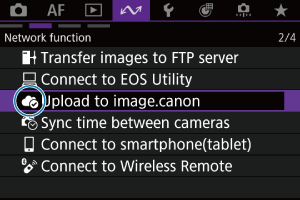
Uploading Images to image.canon
This section describes how to send images to image.canon.
Connecting the Camera to image.canon
Link the camera to image.canon to send images directly from the camera.
- A smartphone with a browser and internet connection is required.
- For instructions on how to use image.canon services and details on countries and regions where it is available, visit the image.canon site (https://image.canon/).
- Separate ISP connection and access point fees may apply.
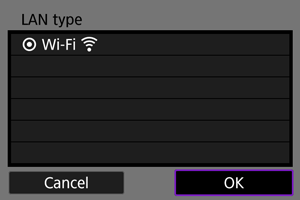
-
Select [OK].
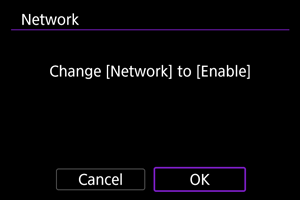
- This screen is not displayed if the network setting is already set to [Enable].
-
Select [Connect].
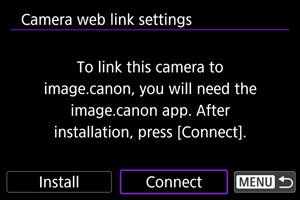
- If the app has not been installed, select [Install].
-
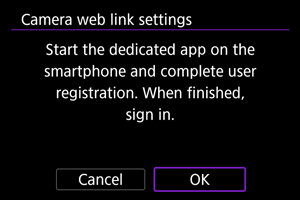
Select [OK].
-
Use the app to scan the QR code.
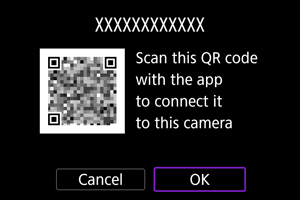
- Select [OK] to go to the next screen.
-
Select [New settings].

- Select [OK] to go to the next screen.
- By selecting [Select from list] when settings are already registered on the camera, you can apply the registered settings.
-
Select [OK].
- For instructions on configuring communication functions, see Basic Communication Settings.
-
Check the number shown in the app.
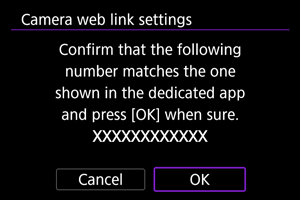
- Select [OK].
-
Complete the settings.
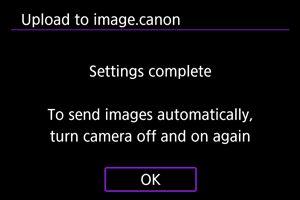
- Press
 .
.
- The setting menu is displayed on the camera screen.
Note
-
The [
 ] icon changes to [
 ].
].
- Press
-
Check the app.
- Confirm that the camera model name is registered in the app.
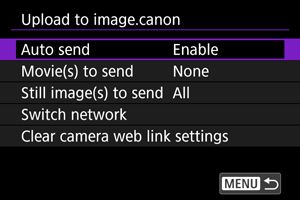
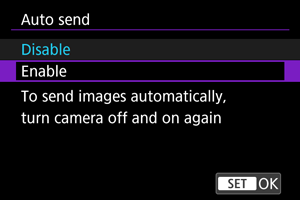
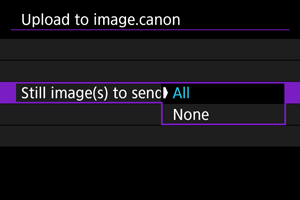
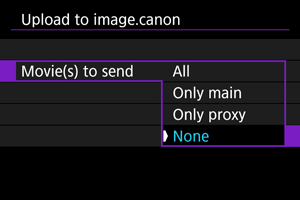
[Upload to image.canon] screen
-
You can choose whether to upload images automatically.
-
Movie(s) to send
You can select the type of movies uploaded.
-
Still image(s) to send
You can select the type of still photos uploaded.
-
Switch network
You can change the settings for network connections.
-
Clear camera web link settings
You can clear the camera web link settings.
Uploading Images to image.canon
Images are automatically uploaded to image.canon after the camera starts up (or recovers from auto power off). Images uploaded to image.canon can be downloaded to a computer or transferred to other web services.
- Uploading is not possible during interval timer shooting.
-
Set [Auto send] to [Enable].
-
Configure [Still image(s) to send].
-
All
All still photos will be uploaded.
-
None
No still photos will be uploaded.
-
-
Configure [Movie(s) to send].
-
Restart the camera.
Note
- Uploaded still photos and movies are stored at image.canon for 30 days at the original size, without storage limitations.