ISO Speed Settings for Still Photos
- ISO Speed Range When Set Manually
- ISO Speed Range Used with ISO Auto
- Minimum Shutter Speed for ISO Auto
Set the ISO speed (image sensor's sensitivity to light) to suit the ambient light level. In [![]() ] mode, ISO speed is set automatically.
] mode, ISO speed is set automatically.
For details on ISO speed in movie recording, see ISO speed (recommended exposure index) in movie recording.
Setting with a dial
-
Set the ISO speed.
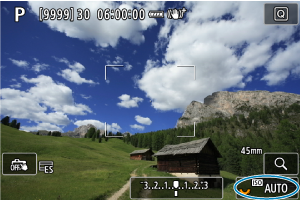
- With an image displayed on the screen, set by turning the
 dial.
dial. - Select [AUTO] to set the ISO speed automatically.
- When [AUTO] is selected, pressing the shutter button halfway will display the ISO speed actually set.
- For details on the ISO Auto range, see ISO speed (recommended exposure index) in still photo shooting.
- With an image displayed on the screen, set by turning the
Setting ISO speed from a screen of options
-
Access the screen of ISO speed options.

- Tap the ISO speed in the lower right of the screen.
-
Select an option.
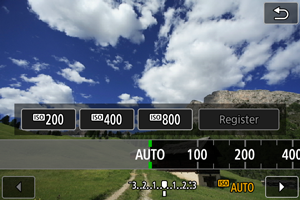
- Turn the
 dial or select a registered setting value.
 - You can register frequently used ISO speed setting values by specifying an option other than [AUTO] and selecting [Register].
- Turn the
Note
-
To specify [AUTO] when setting [ISO speed] in [
 :
:  ISO speed settings], press the
  button.
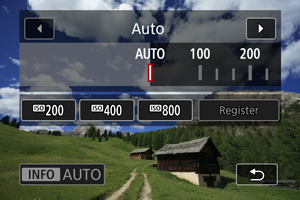
ISO speed guide
- Low ISO speeds reduce image noise but may increase the risk of camera/subject shake or reduce the area in focus (shallower depth of field), in some shooting conditions.
- High ISO speeds enable low-light shooting, a larger area in focus (deeper depth of field), and longer flash range but may increase image noise.
Note
- ISO speed can also be set with the button by pressing the
 button to select the ISO speed item while an image is displayed.
 - Can also be set on the [ISO speed] screen in [: ISO speed settings].
- To expand the available ISO speed range from L (equivalent to ISO 50) to H (equivalent to ISO 102400), adjust [ISO speed range] in [: ISO speed settings] ().
Caution
- Image noise (dots of light or banding) and irregular colors may increase and apparent resolution may decrease at H (equivalent to ISO 102400), because this is an expanded ISO speed.
- Because L (equivalent to ISO 50) is an expanded ISO speed setting, the dynamic range will be somewhat narrower compared to the standard setting.
- When shooting with a high ISO speed, high temperature, long exposure, or multiple exposure, image noise (graininess, dots of light, banding, etc.), irregular colors, or color shift may become noticeable.
- When shooting in conditions that produce an extreme amount of noise, such as a combination of high ISO speed, high temperature, and long exposure, images may not be recorded properly.
- If you use a high ISO speed and flash to shoot a close subject, overexposure may result.
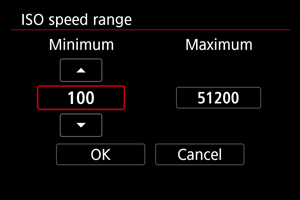
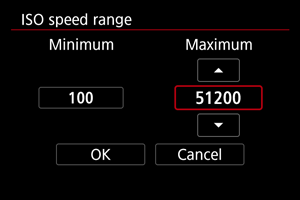
ISO Speed Range When Set Manually
You can set the manual ISO speed setting range (minimum and maximum limits).
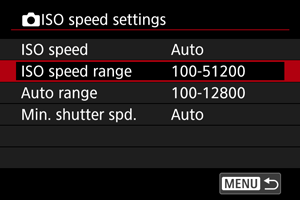
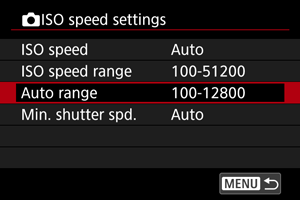
ISO Speed Range Used with ISO Auto
You can set the automatic ISO speed range for ISO Auto.
-
Select [Auto range].
-
Set [Minimum].
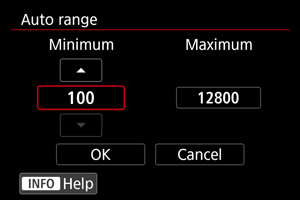
- Select the [Minimum] box, then press
 .
. - Select the ISO speed, then press .
- Select the [Minimum] box, then press
-
Set [Maximum].
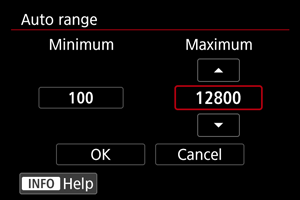
- Select the [Maximum] box, then press .
- Select the ISO speed, then press .
- Select the [Maximum] box, then press
-
Select [OK].
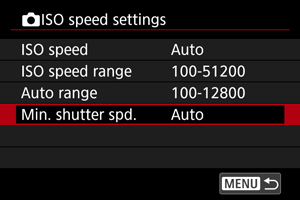
Minimum Shutter Speed for ISO Auto
To prevent shutter speeds from being set too low automatically, you can set the minimum shutter speed for ISO Auto.
This is effective in [P] or [Av] mode when shooting subjects in motion with a wide-angle lens, or when using a telephoto lens. It can also reduce camera shake and blurred subjects.
-
Select [Min. shutter spd.].
-
Set the desired minimum shutter speed.
Auto
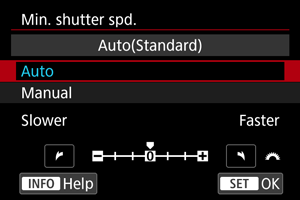
- If you select [Auto], turn the
 dial to set the difference relative to standard speed (toward Slower or Faster), then press .
Manual
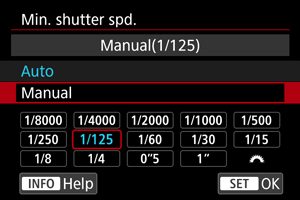
- If you select [Manual], turn the dial to select the shutter speed, then press .
- If you select [Auto], turn the
Caution
- If a correct exposure cannot be obtained with the maximum ISO speed limit set with [Auto range], a shutter speed slower than the [Min. shutter spd.] will be set to obtain the standard exposure.
- This function will not be applied to flash photography.
Note
- When [Auto (Standard)] is set, the minimum shutter speed will be the reciprocal of the lens focal length. A single step from [Slower] to [Faster] is equivalent to a single stop of the shutter speed.