Folder Settings
You can freely create and select the folder where the captured images are to be saved. You can also rename folders.
Creating a Folder
-
Select [
: Record func+card/folder sel.].
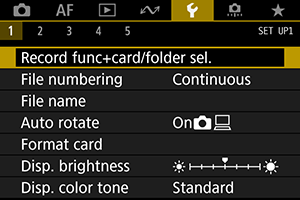
-
Select [Folder].
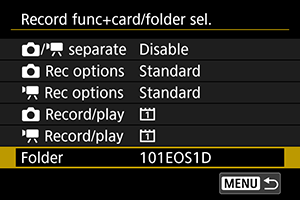
-
Select [Create folder].
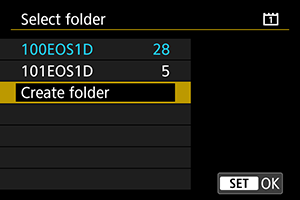
-
Select [OK].
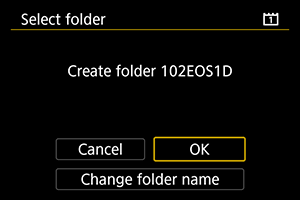
- To rename the folder, select [Change folder name].
Renaming Folders
-
Enter letters and numbers of your choice.
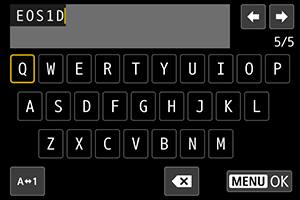
- You can enter five characters.
- By selecting [
], you can change the input mode.
- To delete single characters, select [
] or press the
button.
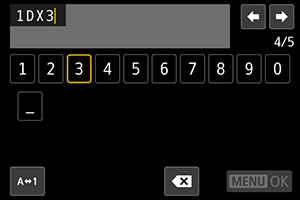
- Use the
or
dial to select a character, then press
to enter it.
-
Exit the setting.
- Press the
button, then press [OK].
- Press the
Selecting a Folder
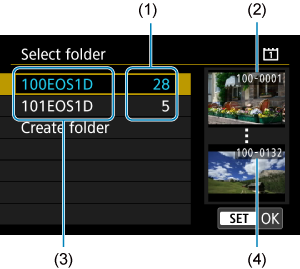
- (1) Number of images in folder
- (2) Lowest file number
- (3) Folder name
- (4) Highest file number
- Select a folder on the folder selection screen.
- Captured images are stored in your selected folder.
Note
Folders
- Folders are named as in “100EOS1D,” with a three-digit folder number followed by five letters or numbers. A folder can contain up to 9999 images (file number 0001–9999). When a folder becomes full, a new folder with the folder number increased by one is created automatically. Also, if manual reset () is executed, a new folder will be created automatically. Folders numbered from 100 to 999 can be created.
Creating folders with a computer
- With the card open on the screen, create a new folder with “DCIM” as the name. Open the DCIM folder and create as many folders as necessary to save and organize your images. “100ABC_D” is the required format for folder names, and the first three digits must be a folder number in the range 100–999. The last five characters can be any combination of upper- and lower-case letters from A to Z, numerals, and the underscore “_”. The space cannot be used. Also note that two folder names cannot share the same three-digit folder number (for example, “100ABC_D” and “100W_XYZ”) even if the remaining five characters in each name are different.