Shooting With Speedlites
- EL/EX Series Speedlites for EOS Cameras
- Canon Speedlites Other Than the EL/EX Series
- Non-Canon Flash Units
EL/EX Series Speedlites for EOS Cameras
Features of EL/EX series Speedlites (sold separately) can be used in flash photography with the camera.
For instructions, refer to the EL/EX series Speedlite's Instruction Manual.
-
Flash exposure compensation
You can adjust flash output (flash exposure compensation). Press the
button, then turn the
dial while looking at the viewfinder or top LCD panel.
-
FE lock
This enables you to obtain appropriate flash exposure for a specific part of the subject. Aim the viewfinder center over the subject, press the camera's
button, then compose the shot and take the picture.
Caution
- Setting [
: Auto Lighting Optimizer] () to an option other than [Disable] may still cause images to look bright even if you set lower flash exposure compensation for darker images.
- When using flash in Live View shooting, set [
: Shutter mode] to an option other than [Electronic] ().
- No AF-assist beam is fired from external flash units in Live View shooting. However, when needed, an AF-assist beam is fired from the LED light of EX series Speedlites equipped with these lights.
- The Auto flash feature of Speedlite EL-100 is not supported. The flash always fires, even when set to
mode. Also note that linkage of flash power status with camera power status is not supported.
Canon Speedlites Other Than the EL/EX Series
-
With an EZ/E/EG/ML/TL series Speedlite set to A-TTL or TTL autoflash mode, the flash can be fired at full output only.
Set the camera's shooting mode to
or
and adjust the aperture value before shooting.
- When using a Speedlite that has manual flash mode, shoot in the manual flash mode.
Non-Canon Flash Units
-
Sync speed
The camera can synchronize with non-Canon compact flash units at up to 1/250 sec. With large studio flash units, the flash duration is longer than that of a compact flash unit and varies depending on the model. Before shooting, confirm that flash sync is performed correctly by taking some test shots at a sync speed of approx. 1/60 sec. to 1/30 sec.
-
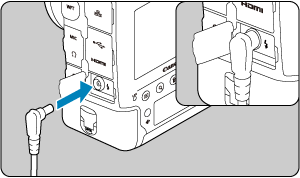
PC terminal

- The PC terminal enables you to use flash units with a sync cord. The terminal has locking threads to prevent accidental cord detachment.
- The PC terminal has no polarity. Sync cords can be connected regardless of polarity.
Caution
- Using the camera with a dedicated flash unit or flash accessory for cameras of other manufacturers poses a risk of malfunction and even damage.
- Do not connect flash units with an output voltage of 250 V or more to the camera's PC terminal.
- Do not attach a high-voltage flash unit to the camera's hot shoe. It may not fire.
Note
- You can use one flash unit attached to the camera's hot shoe and another connected to the PC terminal at the same time.
Note
Metered manual flash exposure
-
This feature enables you to set the flash exposure level manually for close-up shots. Using a Speedlite with manual flash mode and a standard 18% gray card, follow these steps.
-
Configure the camera and Speedlite settings.
- On the camera, set the shooting mode to
or
.
- On the Speedlite, set the firing mode to Manual flash.
- On the camera, set the shooting mode to
-
Focus on the subject.
-
Set up the standard 18% gray card.
- Place the card at the position of the subject.
- Place the card so that it fills the entire spot metering circle in the viewfinder or on the screen.
-
Press the
button (
).
-
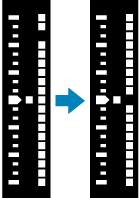
Set the flash exposure level.
-
Adjust the Speedlite's manual flash level and the camera's aperture value to align the flash exposure level with the standard exposure index.

-
-
Take the picture.
- Remove the card and shoot.
-