Reference
Changing the Camera Nickname
You can change the nickname of this camera (displayed on connected devices) as desired.
-
Select [
 : Nickname].
-
Enter text using the virtual keyboard.
- When you finish entering characters, press the
 button.
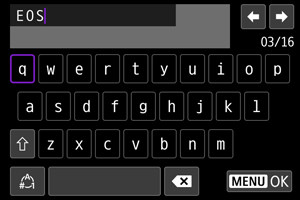
- When you finish entering characters, press the
-
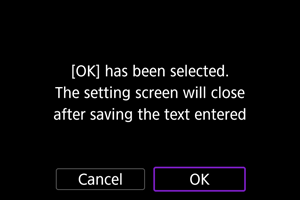
Select [OK].
Virtual Keyboard Operations
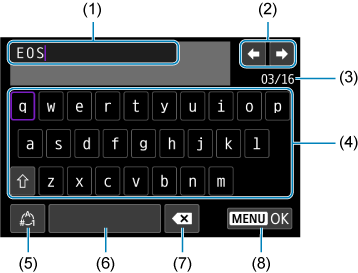
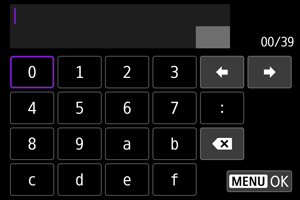
- (1)Input area, for entering text
- (2)Cursor keys, for moving in the input area
- (3)Current no. of characters/no. available
- (4)Keyboard
- (5)Switch input modes
- (6)Space
- (7)Delete a character in the input area
- (8)Exit input
- Use
 or the
  or
or  dial to move within (2) and (4)–(7).
 - Press
 to confirm input or when switching input modes.
Configuring IPv6
To use IPv6, configure the settings manually.
Note
- If you are unsure what to enter, ask the network administrator or other person in charge of the network.
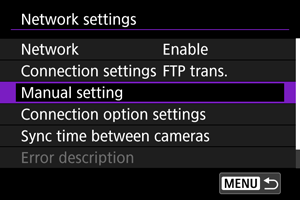
-
Select [
: Network settings].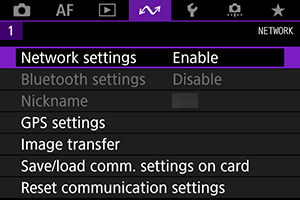
-
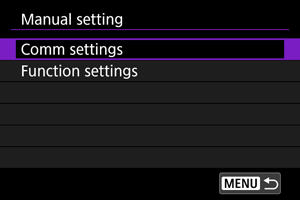
Select [Manual setting].
-
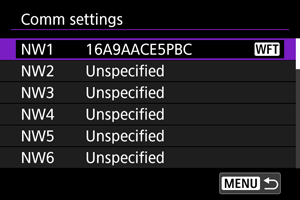
Select [Comm settings].
-
Select the communication settings that will use IPv6.
-
Select [Change].
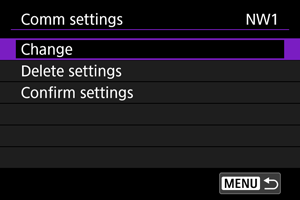
-
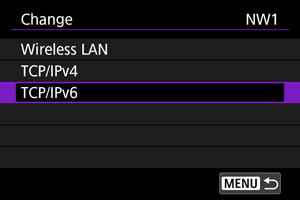
Select [TCP/IPv6].
-
Select an item to configure.
-
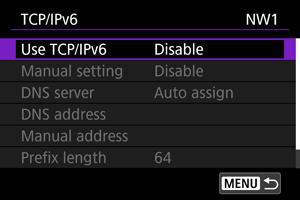
Use TCP/IPv6
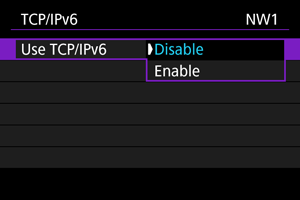
- Select [Enable] or [Disable] for IPv6.
-
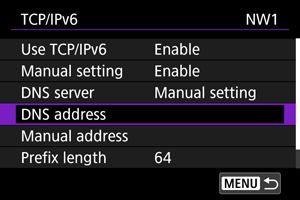
Manual setting
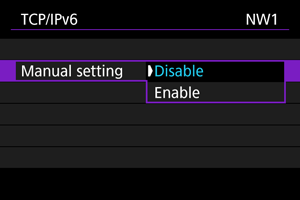
- To set the IP address manually, select [Enable]. [DNS server] is set to [Manual setting], and you can configure [DNS address], [Manual address], [Prefix length], and [Gateway].
-
DNS server
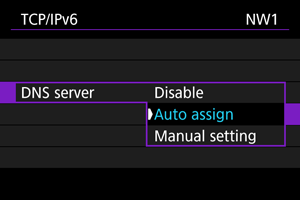
- To set the DNS server IP address manually, select [Manual setting].
- Select [Disable] if you will not use a DNS server.
- If the setting is currently [Auto assign], setting [Manual setting] to [Enable] changes it to [Manual setting].
-
DNS address/Manual address/Gateway
-
Select an item and enter the IP address.
-
-
Prefix length
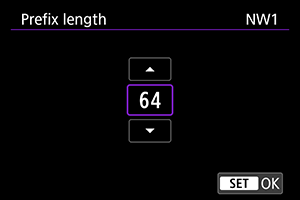
- To set the prefix length, turn the dial to select a value (1–128).
- To set the prefix length, turn the