Live View Shooting
-
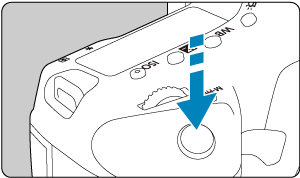
Set the Live View shooting/Movie shooting switch to
 .
.
-
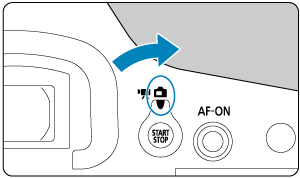
Display the Live View image.
- Press the
 button.
 - Live View images are displayed nearly as bright as your shots.
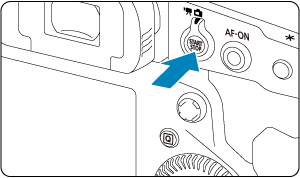
- Press the
-
Select a shooting mode.
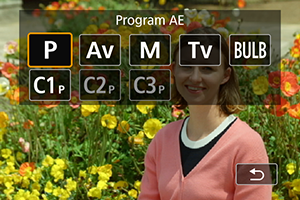
- Press the
 button and turn the
  or
or  dial to select the shooting mode.
- Press the
-
Focus on the subject.
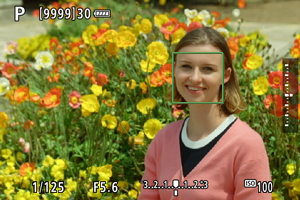
-
Take the picture.
- Press the shutter button completely.
- Press the button to exit Live View shooting.
Caution
- Live View images viewed outdoors on a sunny day may look different from the actual brightness and mood of your shots. For image display unaffected by ambient light, set the brightness in [
 : Disp. brightness] to level 4.
Note
- The field of view is approx. 100% (with image size set to JPEG/
 ).
). - The camera will turn off automatically if left idle for the time set in [: Auto power off] (). When the setting is set to [Disable], the camera exits Live View shooting automatically in approx. 30 min. and remains on.
- With HDMI Cable HTC-100, you can display Live View images on a television (). Note that no sound will be output.
- You can view a histogram when [
 : Expo. simulation] is set to [Enable] () by pressing the
  button repeatedly.
 - White display of the [
 ] icon indicates that brightness of Live View images will closely match the brightness of your shots.
 - If the [] icon is blinking, it indicates that the image is displayed at a brightness that differs from the actual shooting result because of low- or bright-light conditions. However, the actual image recorded will reflect the exposure setting. Note that the noise may be more noticeable than the actual image recorded.
- Exposure simulation may not be performed under some shooting settings. The [] icon and histogram will be displayed in gray. The image will be displayed on the screen at the standard brightness. The histogram may not be properly displayed in low- or bright-light conditions.