Manual Exposure Compensation
Exposure compensation can brighten (increased exposure) or darken (decreased exposure) the standard exposure set by the camera.
For details on exposure compensation when ![]() mode and ISO Auto are both set, see M: Manual Exposure.
mode and ISO Auto are both set, see M: Manual Exposure.
-
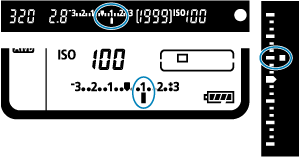
Check the exposure.
- Press the shutter button halfway (
 ) and check the exposure level indicator.
- Press the shutter button halfway (
-
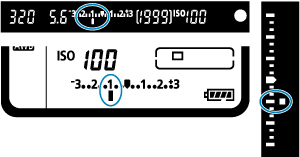
Set the compensation amount.
Increased exposure, to brighten images
Decreased exposure, to darken images
- Turn the
 dial while looking at the viewfinder or top LCD panel.
 - If the setting cannot be set, move the power switch to
 , then turn the dial.
 - The exposure compensation range is ±5 stops in viewfinder shooting and ±3 stops in Live View shooting.
- The exposure compensation range shown in the viewfinder and on the top LCD panel is up to ±3 stops. To specify more than ±3 stops, configure the corresponding Quick Control setting.
- Turn the
-
Take the picture.
- To cancel exposure compensation, set the exposure level
 /
/ to the standard exposure index (
 /
/ ).
).
- To cancel exposure compensation, set the exposure level
Caution
Note
- Can also be set by pressing the
 button and turning the
  or dial.
 - The exposure compensation amount will remain in effect even after you set the power switch to
 .
. - To prevent accidental changes to the exposure compensation amount after setting it, set the power switch to
 .
. - If the exposure compensation amount exceeds ±3 stops, the end of the exposure level indicator will display
 /
/ or
or  /
/ .
.