Movie Recording
 Program AE
 Shutter-Priority AE
 Aperture-Priority AE
- ISO Speed in , , and Modes
 Manual Exposure Recording
- ISO Speed in Mode
- Shutter Speed
- Still Photo Shooting
- Information Display (Movie Recording)
 Program AE
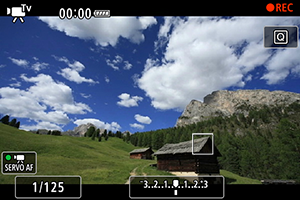
In ![]() recording mode, exposure is controlled automatically to suit the brightness.
recording mode, exposure is controlled automatically to suit the brightness.
-
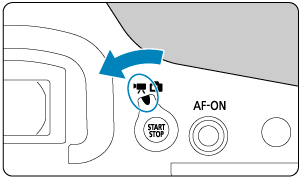
Set the Live View shooting/Movie shooting switch to
.
-
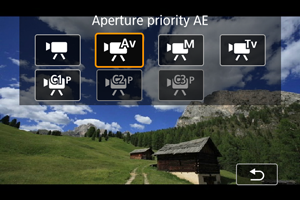
Set the recording mode to
.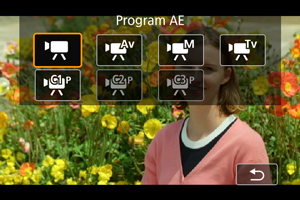
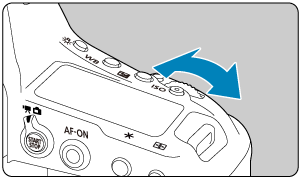
- Press the
 button, then turn the
  or
or  dial for selection.
- Press the
-
Focus on the subject.
-
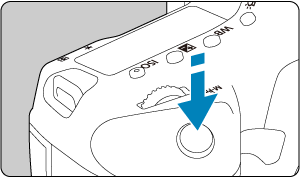
Record the movie.
- Press the
 button to start recording a movie.
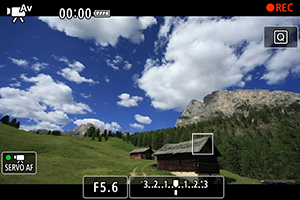
 - While the movie is being recorded, the [
 REC] icon (1) will be displayed in the upper right of the screen.
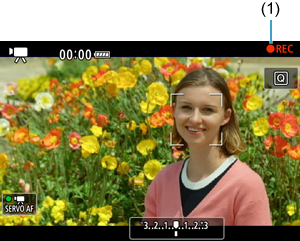
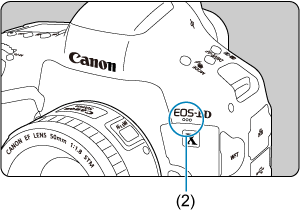
- Sound is recorded with the movie microphone (2).
- To stop recording the movie, press the button again.
- Press the
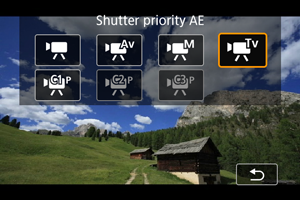
 Shutter-Priority AE
![]() recording mode enables you to set your preferred shutter speed for movies. ISO speed and aperture values are set automatically to suit the brightness and obtain standard exposure.
recording mode enables you to set your preferred shutter speed for movies. ISO speed and aperture values are set automatically to suit the brightness and obtain standard exposure.
-
Set the Live View shooting/Movie shooting switch to
. -
Set the recording mode to
.
- Press the button, then turn the or dial for selection.
- Press the
-
Set the shutter speed (1).

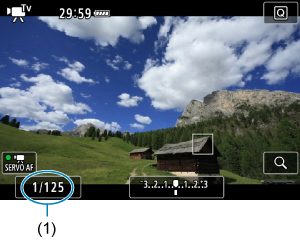
- Turn the dial to set it.
- The available shutter speeds vary depending on the frame rate.
- Turn the
-
Focus and record the movie.
- The procedure is the same as steps 3 and 4 for Program AE.
Caution
- Avoid adjusting shutter speed while recording movies, which will record changes in exposure.
- When recording a movie of a moving subject, a shutter speed of approx. 1/25 sec. to 1/125 sec. is recommended. The faster the shutter speed, the less smooth the subject's movement will look.
- If you change the shutter speed while recording under fluorescent or LED lighting, image flicker may be recorded.
 Aperture-Priority AE
![]() recording mode enables you to set your preferred aperture value for movies. ISO speed and shutter speed are set automatically to suit the brightness and obtain standard exposure.
recording mode enables you to set your preferred aperture value for movies. ISO speed and shutter speed are set automatically to suit the brightness and obtain standard exposure.
-
Set the Live View shooting/Movie shooting switch to
. -
Set the recording mode to
.
- Press the button, then turn the or dial for selection.
- Press the
-
Set the aperture value (1).
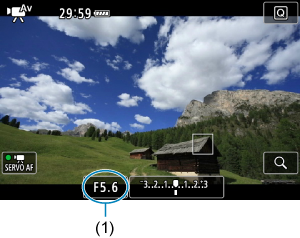
- Turn the dial to set it.
- Turn the
-
Focus and record the movie.
- The procedure is the same as steps 3 and 4 for Program AE.
Caution
- Avoid adjusting the aperture value while recording movies, which will record changes in exposure caused by aperture adjustment.
Note
-
Notes for
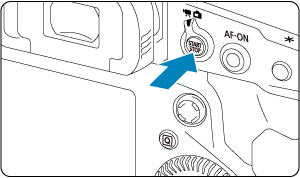
, , and modes - You can lock the exposure (AE lock) by pressing the
 button. After applying AE lock during movie recording, you can cancel it by pressing the
  button. (AE lock setting is retained until you press the button.)
 - Exposure compensation can be set in a range of up to ±3 stops by turning the dial.
- In mode, the ISO speed, shutter speed, and aperture value are not recorded in movie Exif information.
- The camera is compatible with Speedlite functionality to activate the LED light automatically under low light when recording movies in , , and modes. For details, refer to the Instruction Manual of the EX series Speedlite equipped with an LED light.
ISO Speed in , , and Modes
ISO speed is set automatically. See ISO Speed in Movie Recording.
 Manual Exposure Recording
You can manually set the shutter speed, aperture value, and ISO speed for movie recording.
-
Set the Live View shooting/Movie shooting switch to
. -
Set the recording mode to
.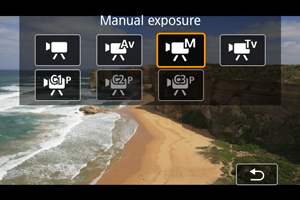
- Press the button, then turn the or dial for selection.
- Press the
-
Set the ISO speed.
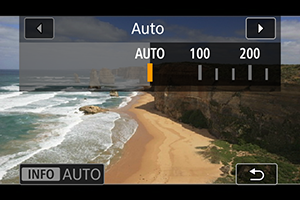
- Press the
 button.
 - Turn the or dial to set it.
- Press the
-
Set the shutter speed (1) and aperture value (2).

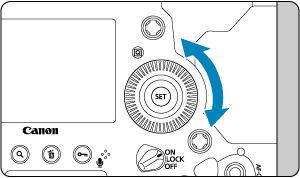
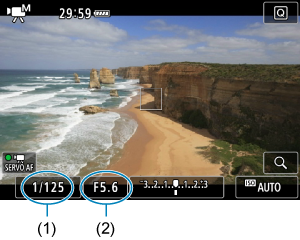
- Press the shutter button halfway and check the exposure level indicator.
- To set the shutter speed, turn the dial. To set the aperture value, turn the dial.
- The available shutter speeds vary depending on the frame rate.
-
Focus and record the movie.
- The procedure is the same as steps 3 and 4 for Program AE.
Caution
- ISO speed cannot be expanded to L, H2, or H3 (equivalent to ISO 50, ISO 409600, and ISO 819200, respectively) in movie recording.
- During movie recording, avoid changing the shutter speed, aperture value, or ISO speed, which may record changes in the exposure or create more noise at high ISO speeds.
- When recording a movie of a moving subject, a shutter speed of approx. 1/25 sec. to 1/125 sec. is recommended. The faster the shutter speed, the less smooth the subject's movement will look.
- If you change the shutter speed while recording under fluorescent or LED lighting, image flicker may be recorded.
Note
- Exposure compensation with ISO Auto can be set in a range of ±3 stops when [
 6: Custom Controls] is set to [
 : Expo comp (hold btn, turn
  )] ().
 - When ISO Auto is set, you can press the button to lock the ISO speed. After locking the ISO speed during movie recording, you can cancel it by pressing the button. (ISO speed lock is maintained until you press the button.)
- If you press the button and recompose the shot, you can see the exposure level difference on the exposure level indicator () compared to when the button was pressed.
ISO Speed in Mode
You can set the ISO speed manually or select [![]() ] to set it automatically. For details on ISO speed, see ISO Speed in Movie Recording.
] to set it automatically. For details on ISO speed, see ISO Speed in Movie Recording.
Shutter Speed
Available shutter speeds in ![]() and
and ![]() mode vary depending on the frame rate of your specified movie recording quality.
mode vary depending on the frame rate of your specified movie recording quality.
| Frame Rate | Shutter Speed (Sec.) | |
|---|---|---|
| Normal Movie Recording | High Frame Rate Movie Recording | |
| – | 1/4000–1/125 | |
| 1/4000–1/100 | ||
| 1/4000–1/8 | – | |
Still Photo Shooting
Still photos cannot be taken during movie recording. To take still photos, stop the movie recording and perform viewfinder shooting or Live View shooting.
Information Display (Movie Recording)
For details on the icons on the movie recording screen, see Information Display.
Caution
-
Precautions for movie recording
- Do not point the camera toward an intense light source, such as the sun or an intense artificial light source. Doing so may damage the image sensor or the camera's internal components.
- If you record something that has fine detail, moire or false colors may result.
- If
 or
or  set and the ISO speed or aperture value changes during movie recording, the white balance may also change.
 - If you record a movie under fluorescent or LED lighting, the movie image may flicker.
- If you perform AF with a USM lens during movie recording in low light, horizontal banding noise may be recorded in the movie. The same type of noise may occur if you focus manually with certain lenses equipped with an electronic focusing ring.
- Recording a few test movies is recommended if you intend to perform zooming during movie recording. Zooming as you record movies may cause exposure changes or lens sounds to be recorded, an uneven audio level, inaccurate lens aberration correction, or loss of focus.
- Large aperture values may delay or prevent accurate focusing.
- Performing AF during movie recording may cause the following kinds of issues: significant temporary loss of focus, recording of changes in movie brightness, temporary stopping of movie recording, or recording of mechanical lens sounds.
- Avoid covering the built-in movie microphone with your fingers or other objects.
- Connecting or disconnecting an HDMI cable during movie recording will end recording.
- Also see General Movie Recording Precautions.
- Also see General Live View Shooting Precautions, as needed.
Note
-
Notes for movie recording
- Each time you record a movie, a new movie file is created on the card.
- Field of view (coverage) is approx. 100%.
- Focusing is also possible by pressing the
 button.
 - To enable starting/stopping movie recording by pressing the shutter button completely, set [Fully-press] for [
 : Shutter btn function for movies] to [Start/stop mov rec] ().
 - Monaural sound is recorded with the built-in microphone for movie recording ().
- Stereo sound can be recorded by connecting an external microphone such as Directional Stereo Microphone DM-E1 (sold separately) to the camera's external microphone IN terminal, which will be used instead of the built-in microphone ().
- Most external microphones equipped with a 3.5 mm mini-jack can be used.
- Focus preset during movie recording is available when using (super) telephoto lenses equipped with this function released in and after the second half of 2011.