Manual Focus
If focus cannot be achieved with autofocus, follow the procedure below to focus manually.
-
Set [
 : Focus mode] to [
 ].
].
- Turn the lens focusing ring to set the approximate focus.
Magnify the image.

- Each tap of [
 ] switches from normal to 5× to 10× display (and after 10×, back to normal display).
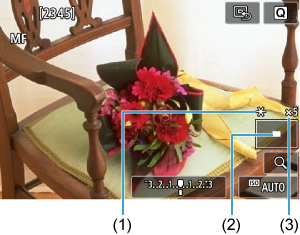
- (1) AE lock
- (2) Magnified area position
- (3) Magnification (approx.)
- Each tap of [
-
Determine an area to magnify.
- You can move the magnified area by scrolling with your finger after you tap.
- To center the magnified area, tap [
 ].
].
-
Focus manually.
- While looking at the magnified image, turn the lens focusing ring to focus.
- After focusing, tap [] to return to the normal view.
-
Take the picture.
Note
- When using non EF-M lenses, set the lens focus mode switch to in step 1.
- Even when focusing manually, you can use Touch Shutter to shoot.
MF Peaking Settings (Outline Emphasis)
As you shoot, edges of subjects in focus can be displayed in color to make focusing easier. You can set the outline color and adjust the sensitivity (level) of edge detection (except in ![]() /
/![]() modes).
modes).
-
Select [
: MF peaking settings].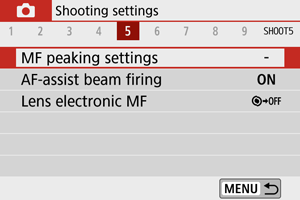
-
Select [Peaking].
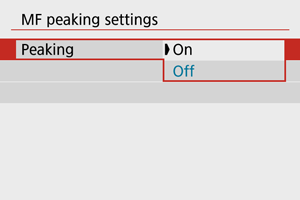
- Select [On].
-
Set the level and color.
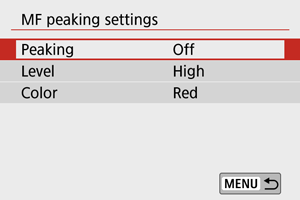
- Set it as necessary.
Caution
- In magnified view, peaking display is not shown.
- During HDMI output, peaking display is not shown on equipment connected via HDMI.
- MF peaking may be hard to discern at high ISO speeds, especially when ISO expansion is set. If necessary, lower the ISO speed or set [Peaking] to [Off].
Note
- Peaking display shown on the screen is not recorded in images.