White Balance Settings
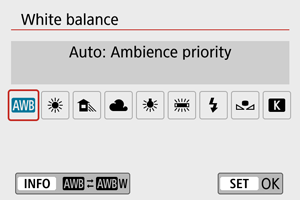
White balance (WB) is for making the white areas look white. Normally, the Auto [![]() ] (Ambience priority) or [
] (Ambience priority) or [![]() ] (White priority) setting will obtain the correct white balance. If natural-looking colors cannot be obtained with Auto, you can select the white balance to match the light source or set it manually by shooting a white object.
] (White priority) setting will obtain the correct white balance. If natural-looking colors cannot be obtained with Auto, you can select the white balance to match the light source or set it manually by shooting a white object.
-
Select [
 : White balance].
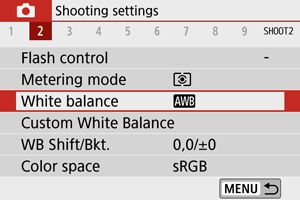
-
Select an option.
| (Approx.) | ||
| Display | Mode | Color Temperature (K: Kelvin) |
|---|---|---|
| Auto: Ambience priority | 3000–7000 | |
| Auto: White priority | ||
| Daylight | 5200 | |
| Shade | 7000 | |
| Cloudy, twilight, sunset | 6000 | |
| Tungsten light | 3200 | |
| White fluorescent light | 4000 | |
| Flash | Automatically set* | |
| Custom | 2000–10000 | |
| Color temp. | 2500–10000 | |
Applicable with Speedlites having a color temperature transmission function. Otherwise, it will be fixed to approx. 6000K.
White Balance
The human eye adapts to changes in lighting so that white objects look white under all kinds of lighting. Digital cameras determine white from the color temperature of lighting and, based on this, apply image processing to make color tones look natural in your shots.
[ ] Auto White Balance
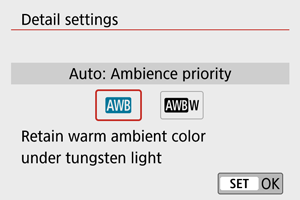
With [![]() ], you can slightly increase the intensity of the image’s warm color cast when shooting a tungsten-light scene.
], you can slightly increase the intensity of the image’s warm color cast when shooting a tungsten-light scene.
If you select [![]() ], you can reduce the intensity of the image’s warm color cast.
], you can reduce the intensity of the image’s warm color cast.
-
Select [
: White balance]. -
Select [
].- With [] selected, press the
 button.
- With [
-
Select an option.
Caution
-
Precautions when set to [
 ]
] - The warm color cast of subjects may appear faded.
- When multiple light sources are included in the scene, the warm color cast of the picture may not be reduced.
- When using flash, the color tone will be the same as with [].
[ ] Custom White Balance
With custom white balance, you can manually set the white balance for the specific light source of the shooting location. Make sure to perform this procedure under the light source at the actual location of the shoot.
-
Shoot a white object.
- Aim the camera at a plain white object, so that white fills the screen.
- Focus manually and shoot with the standard exposure set for the white object.
- You can use any of the white balance settings.
-
Select [
: Custom White Balance].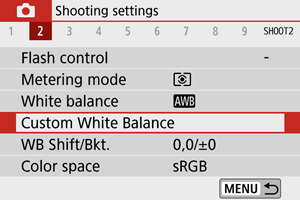
-
Import the white balance data.
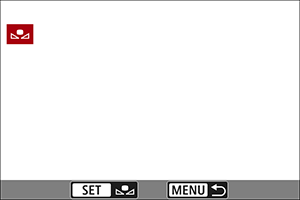
-
Use the

 keys to select the image captured in step 1, then press
  .
.Select [OK] to import the data.
-
-
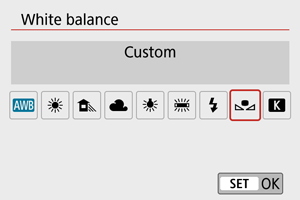
Select [
: White balance]. -
Select [
].
Caution
- If the exposure obtained in step 1 differs greatly from the standard exposure, a correct white balance may not be obtained.
- These images cannot be selected: Images captured with Picture Style set to [Monochrome], images with a Creative filter applied before or after shooting, cropped images, or images shot with another camera.
- Images that cannot be used in the setting may be displayed.
Note
- Instead of shooting a white object, you can also shoot a gray card or standard 18% gray reflector (commercially available).
[ ] Color Temperature
-
Select [
: White balance]. -
Set the color temperature.
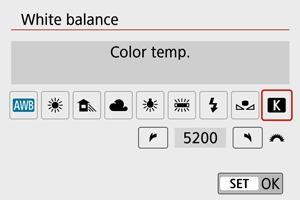
- Select [].
- Turn the
 dial to set the desired color temperature, then press .
 - The color temperature can be set from approx. 2500K to 10000K in 100K increments.
- Select [
Caution
- When setting the color temperature for an artificial light source, set the white balance correction (magenta or green bias) as necessary.
- When setting [] to a value measured with a commercially available color temperature meter, take some test shots in advance and adjust the setting as needed to compensate for any difference between the color temperature meter and the camera.