Movie Recording
- Autoexposure Movie Recording
- Manual Exposure Movie Recording
- ISO Speed in Manual Exposure Recording
- Still Photo Shooting
- Information Display (Movie Recording)
Autoexposure Movie Recording
Exposure is controlled automatically to suit the brightness.
-
Set the Mode dial to
 .
.
- Press
 .
.

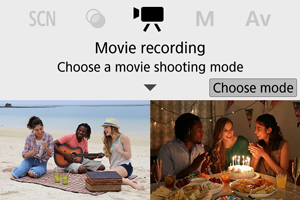
- When the screen above is displayed, tap the recording mode icon.
- Press
-
Select [
].
- You can also select [] (Movie auto exposure) from [
 : Shooting mode].
- You can also select [
-
Focus on the subject.

-
Record the movie.
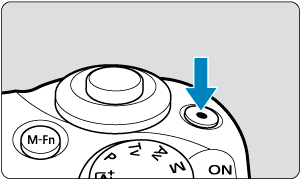
- Press the movie shooting button to start recording a movie.
- You can also start recording a movie by tapping [
 ] on the screen.
Note
- [] is not displayed under the following settings.
- With [Video snapshot] set to [Enable]
- With [Time-lapse movie] set to an option other than [Disable]
- With [Miniature effect movie] set to an option other than [Off]
ISO Speed in [![]() ] Mode
] Mode
- ISO speed is set automatically. For details on ISO speed, see ISO Speed in Movie Recording.
Manual Exposure Movie Recording
You can manually set the shutter speed, aperture value, and ISO speed for movie recording.
-
Set the Mode dial to
.- Press .
- When the screen above is displayed, tap the recording mode icon.
- Press
-
Select [
 ].
].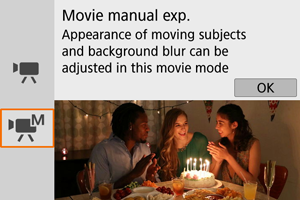
- You can also select [] (Movie manual exp.) from [: Shooting mode].
- You can also select [
-
Set the ISO speed.
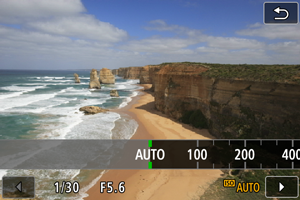
-
Tap the ISO speed icon.
The ISO speed setting screen is displayed.
- Set with the
 dial or
 keys.
keys.
-
-
Set the shutter speed and aperture value.
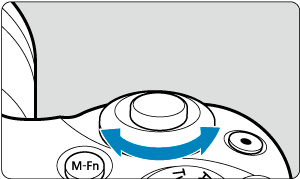
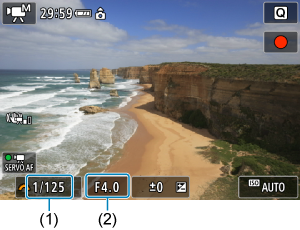
- Press the shutter button halfway and check the exposure level indicator.
- Press the
 key to select the shutter speed or aperture value, then turn the dial to set a value.
 - Shutter speed can be set in a range of 1/4000–1/8 sec.
-
Focus and record the movie.
- Same as step 4 in Autoexposure Movie Recording.
Caution
- During movie recording, avoid changing the shutter speed, aperture value, or ISO speed, which may record changes in the exposure or create more noise at high ISO speeds.
- When recording a movie of a moving subject, a shutter speed of approx. 1/25 sec. to 1/125 sec. is recommended. The faster the shutter speed, the less smooth the subject’s movement will look.
- Flickering shown on the screen when recording under fluorescent or LED lighting may be recorded if you change the shutter speed.
Note
- With ISO Auto, exposure compensation can be set in a range of ±3 stops ().
- To lock the ISO speed when ISO Auto is set, press the
 button. Press the button again to cancel ISO speed locking.
- If you press the button and recompose the shot, you can see the exposure level difference on the exposure level indicator compared to when the button was pressed.
ISO Speed in Manual Exposure Recording
You can set the ISO speed manually or select [![]() ]. For details on ISO speed, see ISO Speed in Movie Recording.
]. For details on ISO speed, see ISO Speed in Movie Recording.
Still Photo Shooting
Still photos cannot be taken during movie recording. To shoot still photos, turn the Mode dial to switch to another shooting mode.
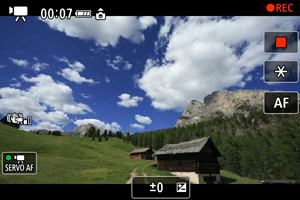
Information Display (Movie Recording)
For details on the icons on the movie recording screen, see Movie Recording Screen.