Settings Configured in [Camera settings]
- Register Picture Style File
- Register Lens Aberration Correction Data
- Personal White Balance Settings
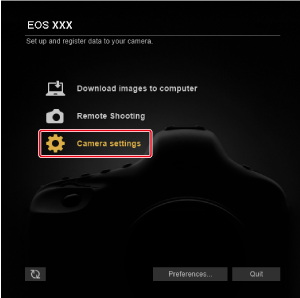
You can configure many camera functions from the camera settings window.
- Configurable functions vary depending on the camera connected.
- For details on available functions, refer to the instruction manual of the connected camera.
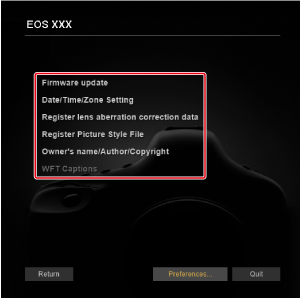
Configurable functions
-
Firmware update
Check and update the camera firmware version. For details on firmware updates, visit the Canon website.
-
Date/Time/Zone Setting
Configure these settings as needed.
- Set the camera date/time and the time zone where images were captured
- Sync the camera date/time to the computer time
- Set or cancel daylight saving time
- Register lens aberration correction data ()
- Register Picture Style File ()
-
Owner's name/Author/Copyright
Owner's name: Enter the name of the camera owner.
Author: Enter the photographer's name.
Copyright (copyright information): Enter information about image copyright holders.
- Personal white balance settings ()
- WFT Captions ()
- Register Background Music ()
- Register IPTC information ()
- Web Service Settings ()
- Network settings ()
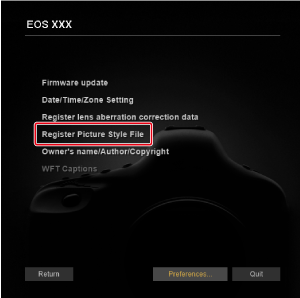
Register Picture Style File
In the user-defined settings on the camera, you can register Picture Style files that you have downloaded from the Canon website or created with Picture Style Editor (PSE, software for creating Picture Style files) and saved to your computer.
Caution
- Picture Style files created with [Base Picture Style] set to [Fine Detail] cannot be registered to cameras without [Fine Detail] as a preset Picture Style.
- Picture Style files with [Fineness] or [Threshold] in [Sharpness] set cannot be registered to cameras without [Fine Detail] as a preset Picture Style.
-
Click [Register Picture Style File].
-
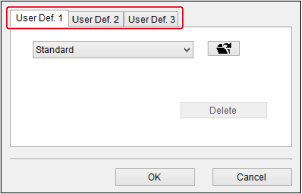
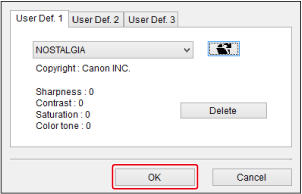
Select a tab from [User Def. 1] to [User Def. 3].
-
Click [
 ].
].
-
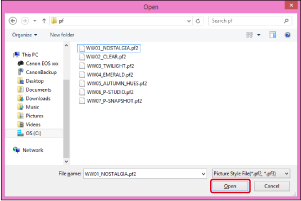
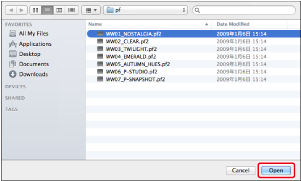
Select a Picture Style file, then click [Open].
Windows
macOS
-
Click [OK].
Note
- Picture Style files (with a .PF2 or .PF3 file extension) expand the functionality of Picture Styles. For details on Picture Style files, visit the Canon website.
- For PSE instructions, refer to the PSE instruction manual.
Register Lens Aberration Correction Data
Lens correction data or lens data for Digital Lens Optimizer (DLO) can be added to cameras using [Register lens aberration correction data] if [Correction data not available], [![]() ], or [Invalid correction data for Digital Lens Optimizer.] appears on the [Lens aberration correction] screen of cameras you will connect.
], or [Invalid correction data for Digital Lens Optimizer.] appears on the [Lens aberration correction] screen of cameras you will connect.
Use of this function requires installation of EOS Lens Registration Tool (version 1.8.20 or later).
-
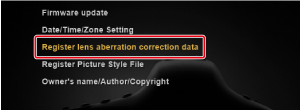
Click [Register lens aberration correction data].
-
Select lenses with correction data to register.
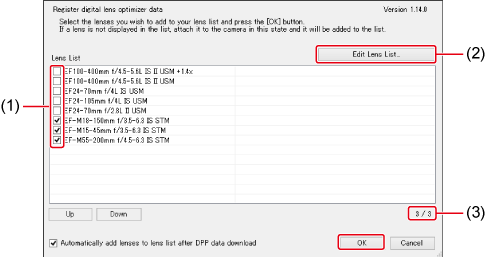
- Select checkboxes (1) of lenses with correction data to register.
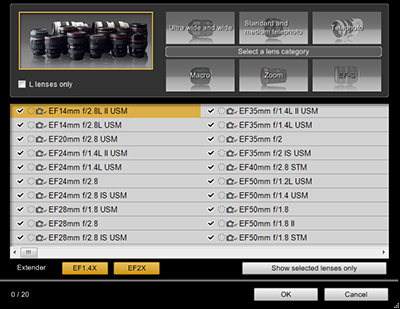
- Click the editing button (2) if your lens is not listed. In the separate screen displayed, select lenses to register, then click [OK] to close the screen.
- Numbers in (3) indicate the number of lenses currently registered to the camera and the total number of lenses you can register. If you cannot select new lenses to register, clear the selection of any unused lenses, then select the lenses to register.
- Click the [OK] button to register the lens correction/DLO lens data and exit EU.
Use of this function requires installation of EOS Lens Registration Tool (version 1.4.20 or later).
-
Click [Register lens aberration correction data].
-
Select lenses.
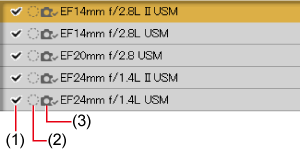
- Select checkboxes (1) of lenses with correction data to register.
- Depending on the camera connected, (2) and (3) may also be displayed. Click the lens name if [
 ] or [
 ] is shown for (2) or (3), respectively. After a dialog box appears with the message [There is no lens data for the digital lens optimizer for *****. Do you want to download the data?], click [OK], and the dialog box will close.
 - Click the [OK] button to register the lens correction data for selected lenses and exit EU.
Note
- For details on functions available in the [Register lens data] window, see Functions for Registering Data for Lenses/Lens Aberration Correction.
- Lens names in the [Register lens data] window may be abbreviated for some types of lenses.
- Not available for EF15mm f/2.8 Fisheye or EF8-15mm f/4L USM Fisheye lenses.
- EF Cinema (CN-E) lens correction data can be registered on the EOS-1D C with firmware version 1.3.0 or later.
Personal White Balance Settings
Personal white balance registered to the camera as described in Setting the White Balance can be saved to the computer as a personal white balance file with a .WBD extension. By loading personal white balance files saved on the computer, you can also register them on a camera.
Saving personal white balance files
-
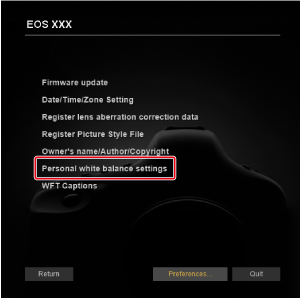
Click [Personal white balance settings].
-
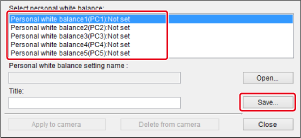
Select a personal white balance to save.
-
Choose a personal white balance to save in the [Select personal white balance] list, then click [Save].
-
-
Save.
- Set the destination on the next screen.
- Enter a file name, then save it to the computer.
Note
- You can also remove personal white balances from a camera – select one, then click [Delete from camera].
Registering personal white balance files
-
Click [Personal white balance settings].
-
Select a personal white balance to register.
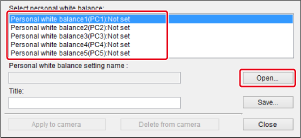
- Choose a personal white balance to register in the [Select personal white balance] list, then click [Open].
-
Select a file.
- Select the personal white balance file (.WBD extension) on the next screen, then click [Open].
- In [Title], enter a name to use for the file.
- Click [Apply to camera]. To register another personal white balance, repeat this procedure from the step 2.
- Click [Close].