Network Settings
These operations are available for camera network settings.
- Create, edit, and delete network settings
- Write and load network settings to and from files
- Write and load network settings to and from the camera
- LAN settings
- FTP settings
Caution
- Use of this function requires installation of EOS Network Setting Tool.
- This function requires sufficient knowledge about configuring your wired LAN and FTP server. Canon cannot provide support for configuring wired LANs or FTP servers.
- Note that Canon cannot be held liable for any loss or damage from erroneous network or FTP server settings. In addition, Canon cannot be held liable for any other loss or damage caused by use of this function.
- When using LAN functions, take any security measures that you consider necessary. Canon cannot be held liable for any loss or damage caused by unauthorized access or other security breaches.
Note
- The EOS Network Setting Tool can also be started up alone.
Network Settings Function
-
In the main window, click [Camera settings].
-
Click [Network settings].

- The network settings main window appears.
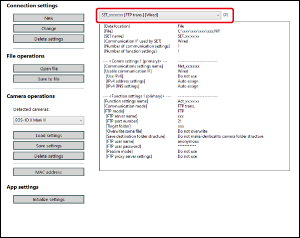
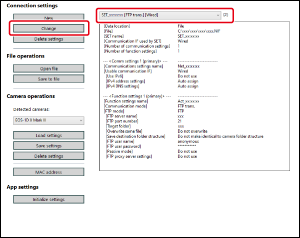
Network settings main window
EOS Network Setting Tool
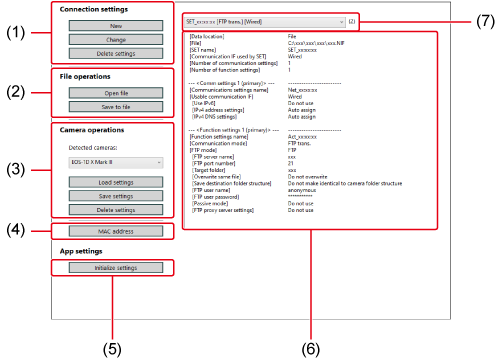
- Connection settings
- File controllers
- Camera controllers
-
MAC address check button
Click to display MAC addresses of connected cameras and other devices in a separate window. By clicking [Copy] in the window, you can also copy MAC addresses.
-
Initialize settings
Erases all [Connection settings], [Comm settings], and [Function settings] information saved in the software. To erase the information, click [Initialize settings], then click [Delete] in the dialog box displayed.
-
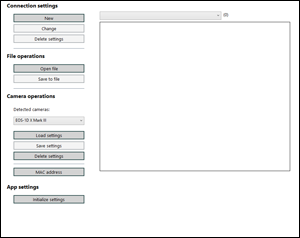
Information display
Shows information for the selected connection setting.
- Select connection setting
Connection Settings
Configuring a new setting
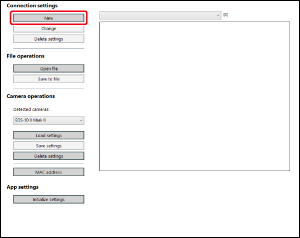
-
Click [New] in [Connection settings].
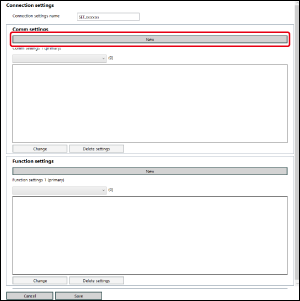
-
Click [New] in [Comm settings].
-
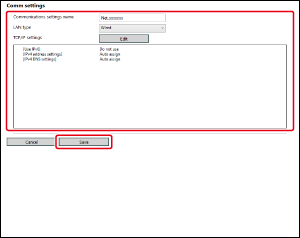
Configure settings as needed.
-
You can perform the following settings in this dialog box.
- Edit the communications settings name
- Select the LAN setting
- TCP/IP setting
- Wireless LAN (Wi-Fi, WFT) setting
- When finished, click [Save] to return to the [Connection settings] dialog box.
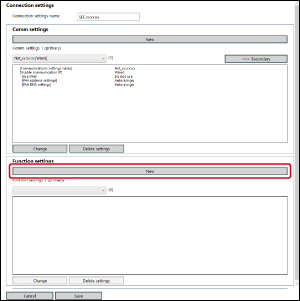
-
-
Click [New] in [Function settings].
-
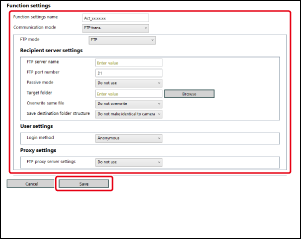
Configure settings as needed.
-
You can perform the following settings in this dialog box.
- Edit the function settings name
- Select the FTP mode
- Edit FTP/SFTP/FTPS settings
- Recipient server settings
- FTP server name (IP address) setting
-
Browse the destination folder
Click [Browse] to browse. After you click [Browse], EU connects to the specified FTP server.
- When finished, click [Save] to return to the [Connection settings] dialog box.
-
-
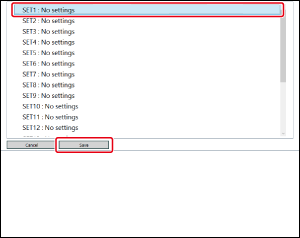
Click [Save] in the [Connection settings] dialog box to return to the network settings main window.
- The settings are saved in the software.
Changing settings
Deleting settings
File Operations
Saving settings as a file
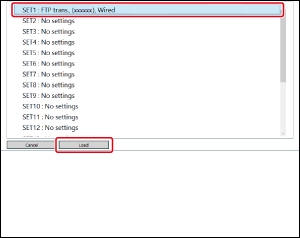
-
Open the settings to save.

-
Click [Save to file], configure settings as needed in the dialog box, then save the file.
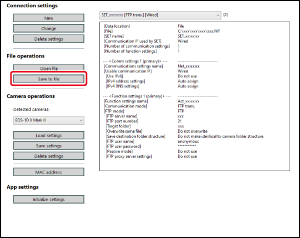
- Settings are saved as a file in NIF format.
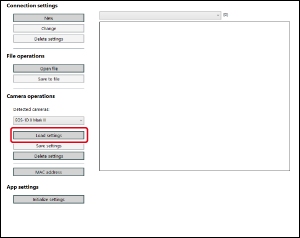
- For details on writing settings to the camera, see Writing settings to the camera.
Caution
- NIF files created with this function are only compatible with the EOS-1D X Mark III, R1, R3, R5, R5 Mark II, and R5 C.
Opening files
-
Click [Open file], select the file in the dialog box, then open the file.
- The selected settings file opens in the network settings main window.
Caution
- Files you can open are limited to NIF files created with this function or with the EOS-1D X Mark III, R1, R3, R5, R5 Mark II, or R5 C.