Shooting Mode
You can change the recording mode to suit the scene.
-
Select a shooting mode.
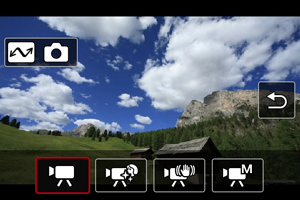
- Press the

 keys to select the recording mode, then press the
  button.
 - To switch to Photo mode, press the
 button.
- Press the
Auto Movie
Select [![]() ].
].
Exposure is controlled automatically to suit the brightness.

Screen brightness can be adjusted by selecting [![]() ].
].
Smooth Skin Movie
Select [![]() ].
].
Image processing makes skin look smoother.
The level of this effect can be set in [Smooth skin effect] on the Quick Control screen.

Screen brightness can be adjusted by selecting [![]() ].
].
![]() Shooting tips
Shooting tips
-
Enable the camera to detect faces.
Frames are displayed around any main subjects detected for skin smoothing. For more effective skin smoothing, you can move closer to or farther from the subject so that the frame is displayed on the subject's face.
-
Focus on the face.
Before shooting, make sure [
 ] appears on the subject's face when you are focusing.
Caution
- Areas other than people's skin may be modified, depending on the shooting conditions.
- If the smooth skin effect is too strong, images may not look as expected. Take some test shots in advance and check the results.
-
4K movie recording precautions
- Image quality on the standby screen may differ from image quality on the screen during movie recording.
- Briefly when you start recording movies, image display may remain on the current frame instead of being updated.
Note
- The [Smooth skin effect] setting is retained even if you change shooting modes or turn the camera off.
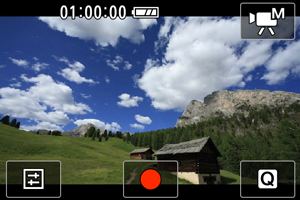
Movie IS Mode
Select [![]() ].
].
Enables movie recording with reduced camera shake.
You can select [![]() Digital IS] or [
Digital IS] or [![]() Auto level] on the Quick Control screen (, ).
Auto level] on the Quick Control screen (, ).

Screen brightness can be adjusted by selecting [![]() ].
].
Caution
- [
 :
:  Digital IS] is set to [Off] when you have specified digital zoom.
Manual Exposure Movie
Select [![]() ].
].
Enables you to set the shutter speed, aperture value, and ISO speed.
With ISO speed set to [![]() ], you can set exposure compensation.
], you can set exposure compensation.
-
Select [
 ].
].
-
Select an item.

- Set by pressing the keys.
- Check the exposure level mark (2) to see how far the current exposure level is from the standard exposure level (1).
- Set by pressing the
Auto Photo
Select [![]() ].
].
The camera analyzes the scene and sets the optimum settings automatically.
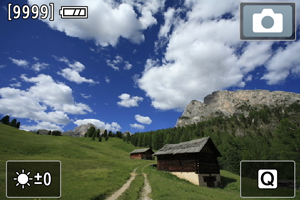
Screen brightness can be adjusted by selecting [![]() ].
].
An icon representing the type of scene detected appears in the upper right of the screen during shooting.
|
Subject Background |
People | Subjects Other Than People | Background Color | ||||
|---|---|---|---|---|---|---|---|
| In Motion | Nature/Outdoor Scene | In Motion | Close | ||||
| Bright | Gray | ||||||
| Backlit | |||||||
| Blue Sky Included | Light blue | ||||||
| Backlit | |||||||
| Sunset | *1 | *1 | Orange | ||||
| Spotlight | Dark blue | ||||||
| Dark | |||||||
| Night Scenes | *1 | ||||||
- 1: Icons of scenes selected from those that can be detected are displayed.
Note
- For certain scenes or shooting conditions, the icon displayed may not match the actual scene.