Movie Recording
 Autoexposure Movie Recording
- ISO Speed in [] Mode
 Manual Exposure Movie Recording
- ISO Speed in [] Mode
- Shutter Speed
 HDR Movie Recording
- Still Photo Shooting
- Information Display (Movie Recording)
 Autoexposure Movie Recording
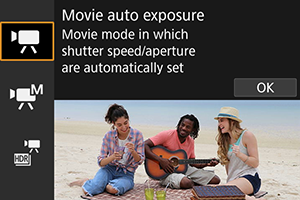
Exposure is controlled automatically to suit the brightness.
-
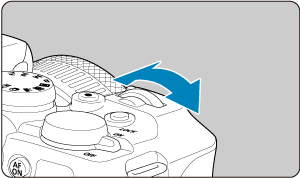
Set the Mode dial to
.
-
Select [
 : Shooting mode].
-
Select [Movie auto exposure].
-
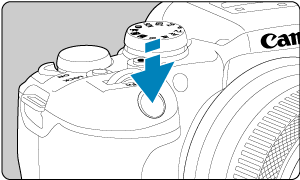
Focus on the subject.
-
Record the movie.
- Press the movie shooting button to start recording a movie. You can also start recording a movie by tapping [
 ] on the screen.
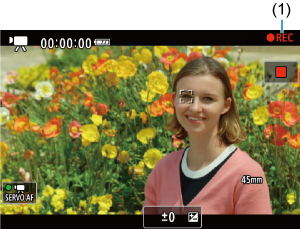
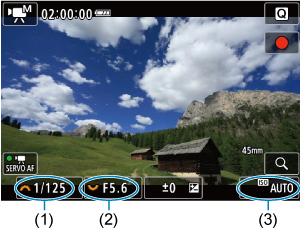
- While the movie is being recorded, the [
 REC] icon (1) will be displayed in the upper right of the screen.
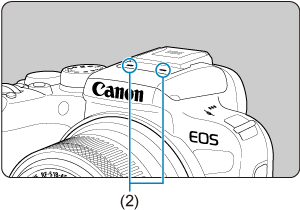
- Sound is recorded with the movie microphone (2).
- To stop recording the movie, press the movie shooting button again. You can also stop recording a movie by tapping [
 ] on the screen.
- Press the movie shooting button to start recording a movie. You can also start recording a movie by tapping [
ISO Speed in [] Mode
ISO speed is set automatically. See ISO Speed in Movie Recording.
 Manual Exposure Movie Recording
You can manually set the shutter speed, aperture value, and ISO speed for movie recording.
-
Set the Mode dial to
. -
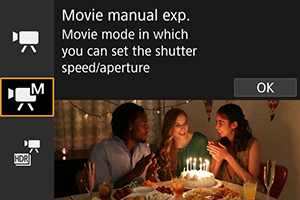
Select [
: Shooting mode].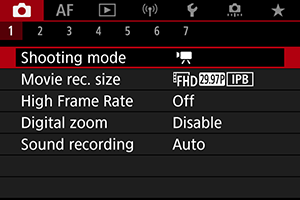
-
Select [Movie manual exp.].
-
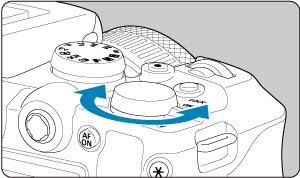
Set the shutter speed, aperture value, and ISO speed.
-
Focus and record the movie.
- Same as steps 4 and 5 for Autoexposure Movie Recording.
Caution
- During movie recording, avoid changing the shutter speed, aperture value, or ISO speed, which may record changes in the exposure or create more noise at high ISO speeds.
- When recording a movie of a moving subject, a shutter speed of approx. 1/25 sec. to 1/125 sec. is recommended. The faster the shutter speed, the less smooth the subject's movement will look.
- If you change the shutter speed while recording under fluorescent or LED lighting, image flicker may be recorded.
Note
-
Exposure compensation with ISO Auto can be set in a range of ±3 stops as follows.
- Tap the exposure level indicator
- [: Exposure comp.]
- Turn the control ring while pressing the shutter button halfway
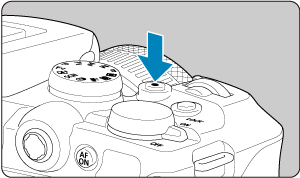
- When ISO Auto is set, you can press the
 button to lock the ISO speed. After locking during movie recording, ISO speed lock can be canceled by pressing the button again.
 - If you press the button and recompose the shot, you can see the exposure level difference on the exposure level indicator () compared to when the button was pressed.
ISO Speed in [] Mode
You can set the ISO speed manually or select [![]() ] to set it automatically. For details on ISO speed, see ISO Speed in Movie Recording.
] to set it automatically. For details on ISO speed, see ISO Speed in Movie Recording.
Shutter Speed
Available shutter speeds in [![]() ] mode vary depending on the frame rate you have set for your specified movie recording size.
] mode vary depending on the frame rate you have set for your specified movie recording size.
| Frame Rate | Shutter Speed (Sec.) | |
|---|---|---|
| Normal Movie Recording | High Frame Rate Movie Recording | |
| – | 1/4000–1/125 | |
| 1/4000–1/100 | ||
| 1/4000–1/8 | – | |
 HDR Movie Recording
You can record high dynamic range movies that retain detail in highlights of high-contrast scenes.
Note
- Movies are recorded at


 (NTSC) or
  (PAL).
-
Set the Mode dial to
. -
Select [
: Shooting mode].
-
Select [
 HDR Movie].
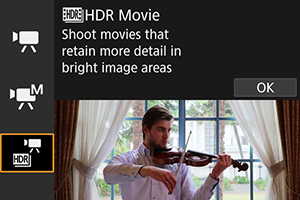
-
Record an HDR movie.
- Record the movie in the same way as normal movie recording.
- For details on file sizes and the recording time available, see Movie recording.
Caution
- Since multiple frames are merged to create an HDR movie, certain parts of the movie may look distorted. This is more noticeable in handheld recording affected by camera shake, so consider using a tripod. Note that even if a tripod is used for recording, afterimages or noise may become more noticeable, compared to normal playback, when the HDR movie is played back frame-by-frame or in slow motion.
- Image color and brightness may change significantly for a moment if you change settings for HDR movie recording. Also, the movie will not be updated for a moment, and the frame stops momentarily. Be aware of this when recording movies to external devices via HDMI.
Still Photo Shooting
Still photo shooting is not supported in movie recording mode. To shoot still photos, turn the Mode dial to switch to another shooting mode.
Information Display (Movie Recording)
For details on the icons on the movie recording screen, see Information Display.