Preferences
In the [Preferences] window, you can modify operation of various DPP functions. Configure these settings after you review these details about each tab.
-
Select [Preferences] in the [Tools] menu, or in the [Digital Photo Professional 4] menu in macOS.
-
Select a tab, complete the settings, then click [OK].
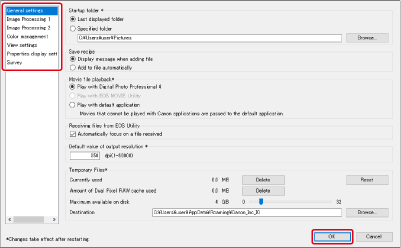
General Settings
You can set the image folder that DPP opens on startup, how recipes are saved, and more.
-
Movie file playback
Select the application used to play movie files. Movies that cannot be played by DPP or EOS MOVIE Utility are played with the movie playback application set in the computer's OS settings. For details on EOS MOVIE Utility, refer to the EOS MOVIE Utility instruction manual.
Caution
- If you have changed the movie playback application to EOS MOVIE Utility and playback does not start after EOS MOVIE Utility starts up, check compatible models in the EOS MOVIE Utility instruction manual.
- When the OS's default movie playback application is EOS MOVIE Utility, MOV and MP4 files cannot be played unless they are from cameras compatible with EOS MOVIE Utility. Check the OS settings and change the movie playback application as needed.
-
Default value of output resolution
You can set the resolution for saving JPEGs or TIFFs converted from RAW images (, ).
-
Temporary files
You can delete temporary files created by DPP to improve responsiveness, change where the files are saved, and limit the amount of space used. Note that any changes you make take effect next time DPP starts up.
- [Delete]: Click [Delete] to delete temporary files.
- [Maximum available on disk]: Drag the slider to set in a range of 0–32 GB. Once the limit is reached, files are erased starting with the oldest.
- [Destination]: Click [Browse] to change where temporary files are stored.
- [Reset]: Click [Reset] to restore default settings for this section.
Image Processing
You can configure settings for image processing in DPP.
Image processing 1
-
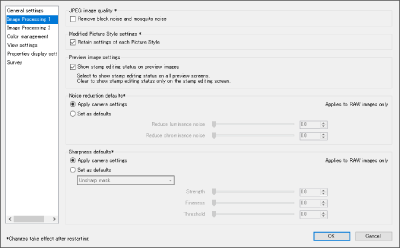
JPEG image quality
[Remove block noise and mosquito noise]
-
You can improve JPEG image quality by reducing noise that tends to occur in these images.
Also effective when saving JPEGs converted from RAW images (, ) and for JPEGs saved as separate files. It is more effective for JPEGs with a high compression rate, and noise reduction may be less noticeable for JPEGs with low compression.
-
-
Modified Picture Style settings
Select to retain setting values for [Color tone], [Color saturation], [Contrast], [Unsharp mask], [Sharpness], and other options for each Picture Style.
-
Noise reduction defaults
You can set a default in advance for noise reduction levels. This setting is only for RAW images.
- Select [Apply camera settings] to set noise reduction levels corresponding to camera settings in advance as defaults.
- Select [Set as defaults] to set your preferred noise reduction levels in advance as defaults.
For images without a recipe, default noise reduction levels set here are applied. Any changes you make take effect as the default noise reduction levels applied to images next time DPP starts up.
For images with a recipe, noise levels in the recipe remains as-is, and the default noise reduction levels set here are not applied.
-
Sharpness defaults
Sharpness defaults can be set in advance. This setting is only for RAW images.
- Select [Apply camera settings] to set sharpness levels corresponding to camera settings in advance as defaults.
- Select [Set as defaults] to set your preferred sharpness and unsharp mask levels in advance as defaults.
For images without a recipe, default sharpness and unsharp mask levels set here are applied. Any changes you make take effect as the default sharpness levels applied to images next time DPP starts up.
For images with a recipe, sharpness in the recipe remains as-is, and the default sharpness and unsharp mask levels set here are not applied.
Image processing 2
-
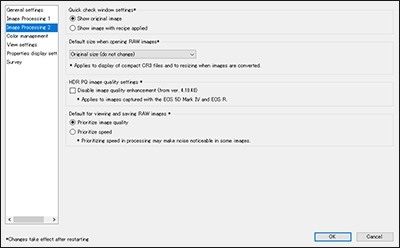
Quick Check window settings
You can configure image display settings for the Quick Check window. Select [Show image with recipe applied] to display images that have a recipe with the recipe applied. Note that any changes you make take effect next time DPP starts up.
-
Default size when opening RAW images
For RAW images with the extension .CR3 that were captured with [
 ] selected on the camera.
You can set the default size for RAW images opened in DPP (except for images captured with the EOS R1, EOS R5 Mark II, EOS R6 Mark III, EOS R6 Mark II, EOS R6 V, EOS R8, EOS R50, EOS R50 V, EOS R100, PowerShot V1, EOS C50).
This default size is also set when RAW images are converted and saved as JPEGs or TIFFs.
Note that any changes you make take effect next time DPP starts up.
-
HDR PQ image quality settings
Image quality enhancement in HDR PQ mode has been introduced as of Digital Photo Professional 4.10.40. To keep using the results of past editing in earlier versions, select the checkbox for [HDR PQ image quality settings *].
-
Default for viewing and saving RAW images
You can set the default condition for viewing and saving RAW images.
Note that any changes you make take effect next time DPP starts up.
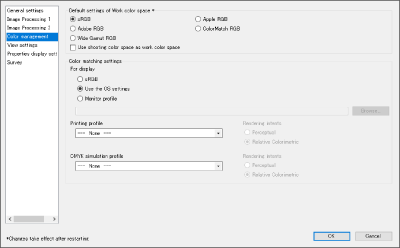
Color Management
You can configure color management settings such as the working color space and color-matching conditions.
-
Default settings of work color space
Choose one of five color spaces () to apply as a default setting of RAW images. This is applied as the color space when RAW images are converted and saved (, ) or printed ( to ).
- Any changes you make take effect as the default color space applied to images next time DPP starts up.
- You can check the color space that is set in an image in all windows except the Quick Check window.
- Select [Use shooting color space as work color space] to set the color space configured on the camera at the time of shooting as the working color space.
-
Color-matching settings (monitor color setting, Windows only)
For monitors with color profiles (), you can display images in more faithful colors by setting the profile.
- Select [Use the OS settings] to apply the color profile set in Windows to DPP. If you are using multiple monitors, the profile set for each monitor is applied to DPP.
- Selecting [Monitor profile] enables you to click [Browse] and then select the monitor profile.
-
Printing profile (printer color setting)
If your printer lacks a profile, setting the profile in DPP enables you to print images in colors closely resembling the colors displayed by your monitor.
Note
- If you set a printing profile in DPP, disable color management by the printer driver. With color management by the driver, images may not be printed in colors close to your monitor colors.
- Using a profile created with a commercially available monitor colorimeter enables even greater accuracy in image color display.
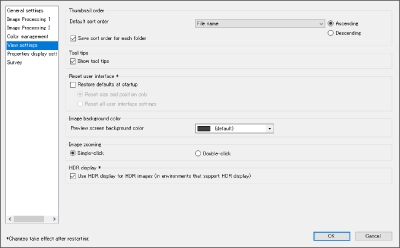
View Settings
You can configure settings for screen display.
-
Thumbnail order
Set the default sort order for thumbnails in the main window, and whether the order of images you rearrange will be retained. When the checkbox is selected, DPP will retain the order of rearranged images, starting the next time you select a folder ().
-
Reset user interface
Restores the default user interface settings.
Choose from two resetting options.
Select [Restore defaults at startup] to restore the original settings next time DPP starts up. Note that the checkmark will be cleared at that time.
-
HDR assist display (movies)
This function enhances display of CRM and MP4 files with [HDR PQ] set to [On], for easier viewing in SDR environments. The setting takes effect next time DPP starts up.
Note that for CRM files, this function only applies to the RAW movie tool.
- Applies to images from the EOS R5 or EOS R6.
- Exposure priority (mid-tones): Maintains brightness in image areas from shadows to midtones. Useful in checking exposure.
- Tones priority (highlights): Maintains color reproduction and gradation as much as possible. Useful in checking gradation in highlights.
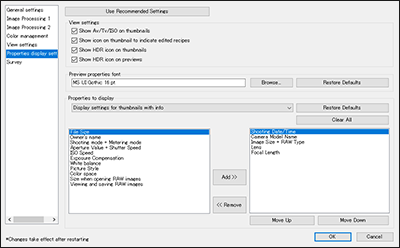
Properties Display Settings
You can configure settings for the shooting and recipe information shown with thumbnails and in the preview window.
-
View settings
You can configure the information shown with thumbnails and previews.
Select [Show Av/Tv/ISO on thumbnails] to show Av, Tv, and ISO information on thumbnails displayed at Size 3 or larger.
-
Preview properties font
Set the font used for information shown in the preview window.
-
Properties to display
Configure in detail the settings for [Display settings for thumbnails with info], [Display settings for thumbnail list], and [Display settings for preview properties]. Available options are listed at left, with current display items at right. Use [Add >>] and [<< Remove] to complete the settings. With [Move Up] and [Move Down], you can also rearrange the display order.
Note
- Not all property items may be displayed, depending on the combination of window, preview window, and thumbnail size.
Survey
You can change how survey information is collected.
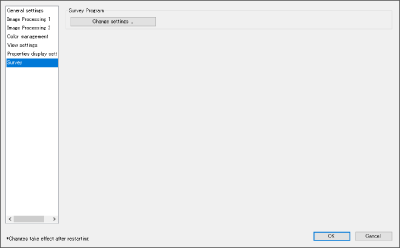
- Click [Change settings] and make any changes in the dialog box.