Saving as JPEG or TIFF Images
You can batch-convert and save edited RAW images in widely used JPEG or TIFF formats. See Converting and Saving for precautions on saving after conversion to JPEG or TIFF.
-
Select images.
-
Select [Batch process] in the [File] menu.
-
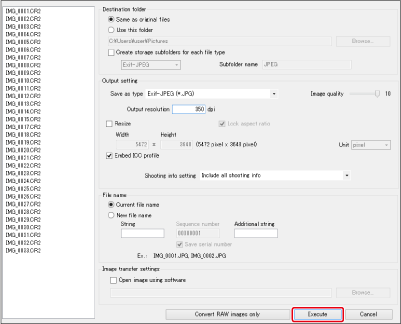
Complete the required settings, then click [Execute].
- A progress indicator appears, and saving begins.
- [Exit] appears on this screen after all images are saved.
-
Click [Exit].
Caution
Note
- When selecting [New file name] in [File name], also enter [Sequence number].
- Saving as described above applies any specified cropping () or dust erasure () to the images saved.
- You can also use this function in the edit image window. Note that this will convert and save all images in the window instead of selected images.
- You can continue working in other windows, such as the main or preview window, while images are being saved.
- Performing step 2 with no images selected in the main window will convert and save all images displayed in the main window.
- With a paid subscription, neural network upscaling is also available, which doubles the horizontal and vertical image size.