Checking and Editing Network Settings
- Checking and Editing Connection Settings
- Manually Editing Connection Settings
- Specifying Connection Options
- Checking the MAC Address
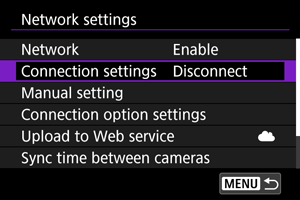
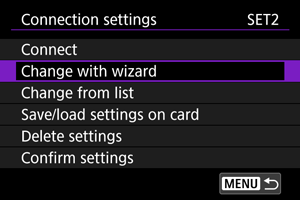
Checking and Editing Connection Settings
You can check, change, or delete connection settings saved on the camera.
-
Select [
 : Network settings].
-
Select [Connection settings].
-
Select [SET*].
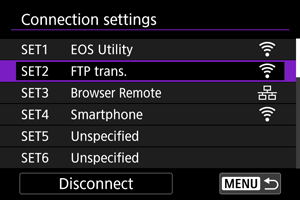
- In the saved settings, select settings to use for the connection.
-
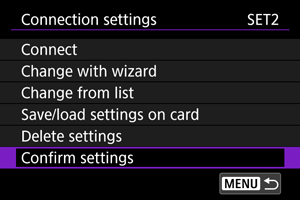
Check or change the settings.
-
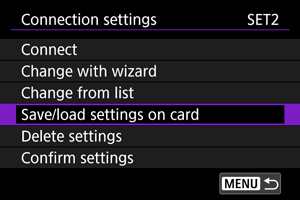
Connect
-
Change with wizard/Change from list
-
Save/load settings on card
-
Delete settings
-
Select to delete connection settings.
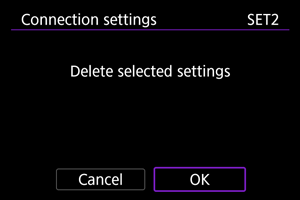
- Selecting [OK] deletes the settings.
-
-
Confirm settings
-
Select to check connection settings.
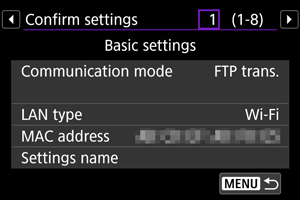
-
-
Changing connection settings
Settings originally completed using the connection wizard can be changed as follows.
Change with wizard
You can use the connection wizard to change connection settings saved on the camera.
-
Access the [Connection settings] screen.
- Follow steps 1–3 in Checking and Editing Connection Settings.
-
Select [Change with wizard].
-
Use the connection wizard to change connection settings.
- See instructions starting with Displaying the Connection Wizard.
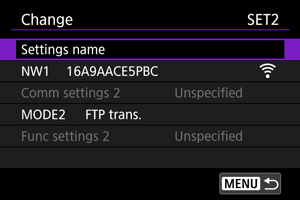
Change from list
You can use communication and function settings saved on the camera to change connection settings saved on the camera. You can also register settings names.
-
Access the [Connection settings] screen.
- Follow steps 1–3 in Checking and Editing Connection Settings.
-
Select [Change from list].
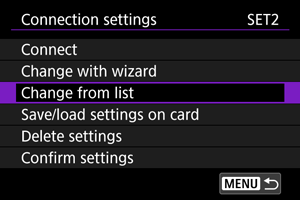
-
Select an option and change setting details as needed.
-
Settings name
-
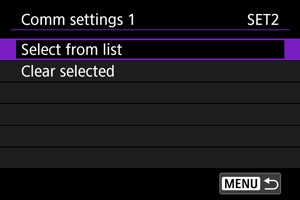
NW*/Comm settings*
-
Select to change, add, or clear communication settings.
-
Selecting [Select from list] lists communication settings saved on the camera. Select the communication settings to use.
To view communication setting details, select settings and press the
 button.
 - Selecting [Clear selected] clears communication settings with registered connection settings. Select [OK] on the confirmation screen.
-
-
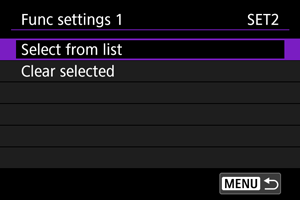
MODE*/Function settings*
-
Select to change, add, or clear function settings.
-
Selecting [Select from list] lists function settings saved on the camera. Select the function settings to use.
To view function setting details, select settings and press the
button. - Selecting [Clear selected] clears function settings with registered connection settings. Select [OK] on the confirmation screen.
-
-
Note
- You can register two sets of communication and function settings to a single set of connection settings. Note that depending on setting details, only one set can be registered in some cases.
- Clearing all function settings also clears communication settings, and the connection settings will be labeled [Unspecified].
Saving and loading settings
Connection settings can be saved on a card and applied to other cameras. Connection settings configured on other cameras can also be applied to the camera you will use.
Note
- [
 : Save/load cam settings on card] enables you to save all communication settings on the camera to a card or load all communication settings for another camera from a card.
Saving settings
-
Access the [Connection settings] screen.
- Follow steps 1–3 in Checking and Editing Connection Settings.
-
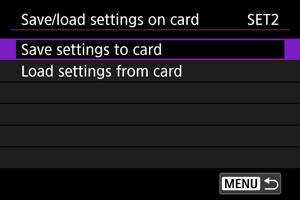
Select [Save/load settings on card].
-
Select [Save settings to card].
-
Select [OK].
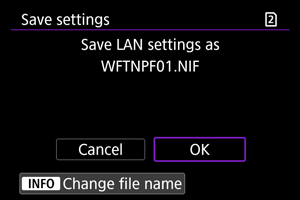
- The file name is determined automatically by the camera: WFTNPF, followed by a number (01 to 40) and the extension NIF. To rename the file as desired, press the button.
- The settings are saved to the card.
- The settings file is saved to an area of the card shown when the card is opened (in the root directory).
- The file name is determined automatically by the camera: WFTNPF, followed by a number (01 to 40) and the extension NIF. To rename the file as desired, press the
Caution
- 40 settings files can be saved on one card from the camera. To save 41 or more, use another card.
Loading settings
-
Access the [Connection settings] screen.
- Follow steps 1–3 in Checking and Editing Connection Settings.
-
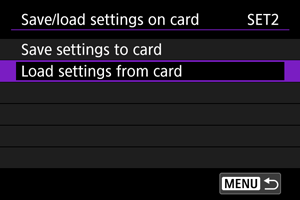
Select [Save/load settings on card].

-
Select [Load settings from card].
-
Select a settings file.
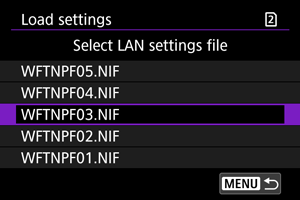
- Select a settings file that matches your network environment.
-
Select [OK].
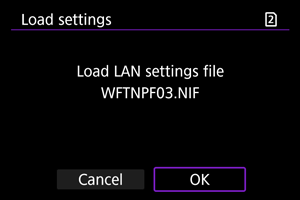
- Information from the settings file is loaded into the selected settings number.
Caution
- Even if a computer or other device is used to save 41 or more settings files on a card, only 40 are displayed on the camera's screen for loading settings. To load 41 or more settings files, load 40 from one card, then load remaining files from another card.
Note
- [: Save/load cam settings on card] enables you to save all communication settings on the camera to a card or load all communication settings for another camera from a card.
Manually Editing Connection Settings
You can add, change, or delete communication and function settings saved on the camera. You can also configure settings that are not set using the connection wizard, such as a setting that determines what happens if files with the same name as existing files are sent to the FTP server.
Editing communication settings
-
Select [
: Network settings].
-
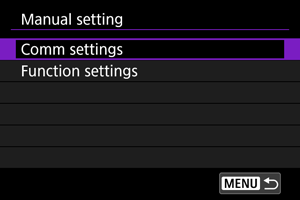
Select [Manual setting].

-
Select [Comm settings].
-
Select [NW*].
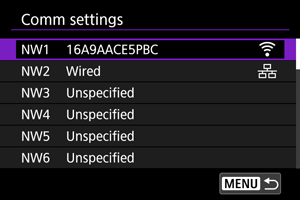
- Select saved settings to edit.
-
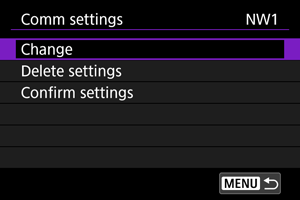
Change, delete, or check the settings as needed.
-
Change
-
Select to change individual settings in sets of communication settings.

- Selecting [Wireless LAN] enables you to change the target SSID, for example.
- Selecting [TCP/IPv4] enables you to configure network-related settings such as the IP address.
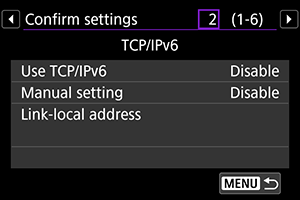
- Selecting [TCP/IPv6] enables you to configure settings used for IPv6 ().
- Depending on the communication setting, not all items may be displayed.
-
-
Delete settings
-
Select to delete communication settings.
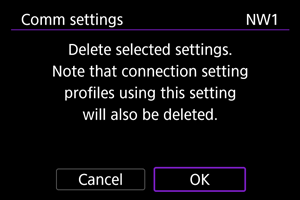
- Selecting [OK] deletes the settings.
-
-
Confirm settings
-
Select to check communication settings.
-
-
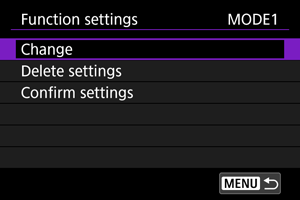
Editing function settings
-
Select [
: Network settings].
-
Select [Manual setting].

-
Select [Function settings].
-
Select [MODE*].
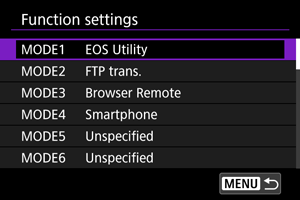
- Select saved settings to edit.
-
Change, delete, or check the settings as needed.
-
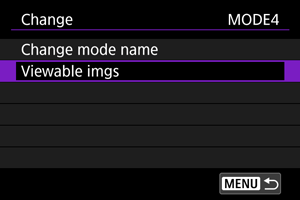
Change
-
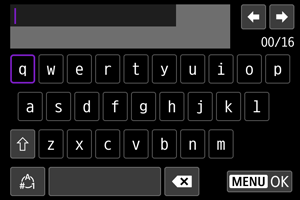
Selecting [Change mode name] enables you to use the virtual keyboard () to rename the mode.
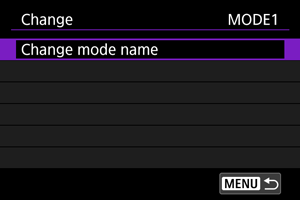
-
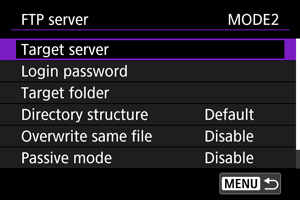
Selecting [FTP server] enables you to configure settings related to the FTP server.
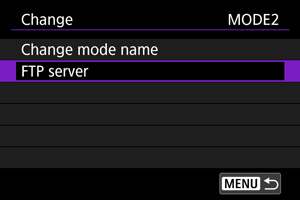
-
Selecting [Viewable imgs] enables you to specify which images can be viewed on smartphones.
-
-
Delete settings
-
Select to delete function settings.
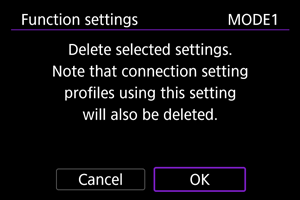
- Selecting [OK] deletes the settings.
-
-
Confirm settings
-
Select to check function settings.
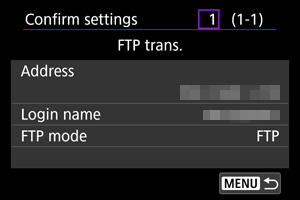
-
-
Directory structure of the target folder
Configured in [FTP server] → [Directory structure].
With [Default], the root folder is used for image storage. If you have created a subfolder in the root folder by changing the [Target folder] setting, images are saved in that folder.
Selecting [Camera] automatically creates a folder structure matching that of the camera's (such as A/DCIM/100EOSR3) in the server's root folder for image storage. If you have created a subfolder in the root folder by changing the [Target folder] setting, a folder structure such as A/DCIM/100EOSR3 is automatically created in that folder for image storage.
Overwriting files of the same name
Configured in [FTP server] → [Overwrite same file].
With [Overwrite same file] set to [Disable]
If there is already a file with the same name in the target folder on the FTP server, the new file is saved with an extension consisting of an underscore and a number, as in IMG_0003_1.JPG.
When you resend images if initial transfer fails
Even if the camera is configured to overwrite files of the same name, if you resend an image file that could not be transferred initially, the existing file may not be overwritten in some cases. If this happens, the new file is saved with an extension consisting of an underscore, a letter, and a numeral, as in IMG_0003_a1.JPG.
Passive mode
Configured in [FTP server] → [Passive mode].
Enable this setting in network environments protected by a firewall. If an Error 41 occurs (Cannot connect to FTP server), setting passive mode to [Enable] may enable access to the FTP server.
Trusting target servers
Configured in [FTP server] → [Trust target server].
Set to [Enable] if you prefer to connect to FTP servers even when trust cannot be established based on the root certificate used. In this case, take suitable security measures.
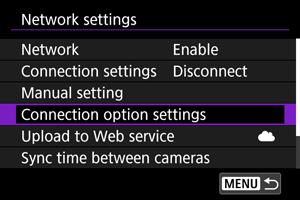
Specifying Connection Options
You can configure settings used for FTP transfer and Browser Remote. Settings are also available for authentication information used in LAN environments with 802.1X authentication.
-
Select [
: Network settings].
-
Select [Connection option settings].
-
Select an option to configure.
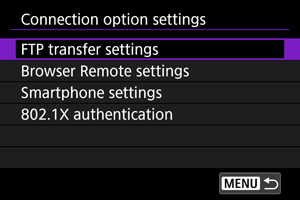
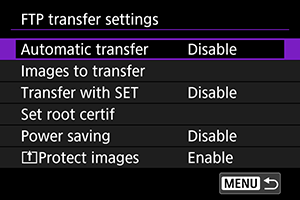
FTP transfer settings
Selecting [FTP transfer settings] enables you to configure settings related to FTP transfer and power saving.
-
Automatic transfer / Images to transfer / Transfer with SET / Set root certif
- For details, see Image Transfer to FTP Servers.
-
Power saving
- When [Enable] is set and no image is transferred for a certain period, the camera will log off from the FTP server and disconnect from the LAN. The connection is re-established automatically when the camera is ready for image transfer again. If you prefer not to disconnect from the LAN, set to [Disable].
-
 Protect images
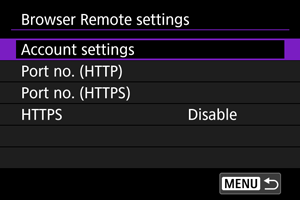
Browser Remote settings
Selecting [Browser Remote settings] enables you to set the account used for Browser Remote access and configure HTTP/HTTPS communication settings.
-
Account settings
- For details, see Configuring Browser Remote Connection Settings.
-
Port no. (HTTP)/Port no. (HTTPS)
- You can change the port number used for HTTP/HTTPS communication. There is normally no need to change the port number (80 for HTTP, 443 for HTTPS).
-
HTTPS
- Selecting [Enable] enables HTTPS communication for Browser Remote access.
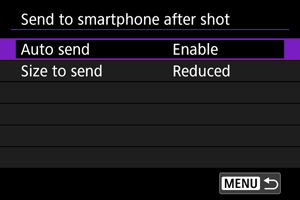
Smartphone settings
Selecting [Send to smartphone after shot] in [Smartphone settings] enables you to set the size of images to send automatically.
-
Auto send / Size to send
- For details, see Automatic Image Transfer as You Shoot.
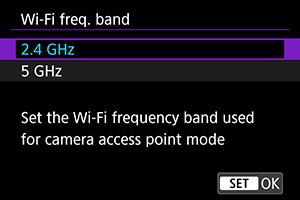
Wi-Fi frequency bands
Select the frequency band for camera access point mode, as needed. This frequency band also applies to Wi-Fi connections established using Bluetooth functions.
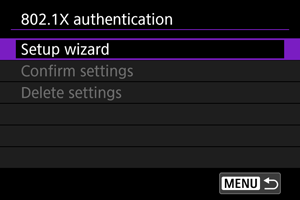
802.1X authentication
Selecting [802.1X authentication] enables you to set, check, or delete 802.1X authentication settings, using a setup wizard.
Configure these settings when connecting to networks that require 802.1X authentication.
First, save the certificate for the type of 802.1X authentication used to a card in the camera.
File types and names that can be loaded using this function are as follows.
| Type | File Name |
|---|---|
| Root certificate | 8021X_R.CER |
| 8021X_R.CRT | |
| 8021X_R.PEM | |
| Client certificate | 8021X_C.CER |
| 8021X_C.CRT | |
| 8021X_C.PEM | |
| 8021X_C.P12 | |
| 8021X_C.PFX | |
| Private key | 8021X_C.KEY |
Note that the camera supports following protocols.
| Protocol | Supported Authentication |
|---|---|
| EAP-TLS | X.509, PKCS#12 |
| EAP-TTLS | MSCHAPv2 |
| PEAP | MSCHAPv2 |
-
Setup wizard
- Follow the wizard to configure the authentication settings.
-
Confirm settings
- Select to check authentication settings.
-
Delete settings
- Select to delete authentication settings. Selecting [OK] on the screen displayed deletes the settings.
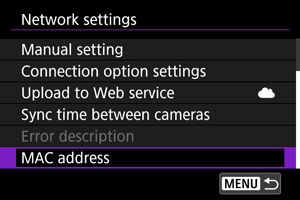
Checking the MAC Address
You can check the camera's MAC address.
-
Select [
: Network settings].
-
Select [MAC address].
-
Check the MAC address.

- The MAC addresses for [Wi-Fi] and [Wired] are displayed.