Preferences
-
In the main window, click [Preferences].
-
Configure settings as needed, then click [OK].
- The settings are applied to EU.
Basic Settings
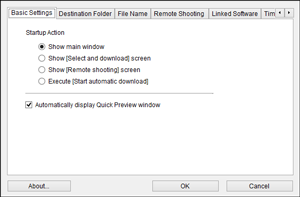
You can configure the initial action on EU startup.
Note
- Select [Show [Select and download] screen] in [Startup Action] to show the viewer window ().
- Select [Show [Remote shooting] screen] in [Startup Action] to show the capture window (). (The main window is displayed for the EOS M6, M5, M3, M10, and M100.)
- Select [Execute [Start automatic download]] in [Startup Action] to start transfer on startup, with the [Save File] dialog box () displayed. After all images have been transferred, DPP starts up automatically, showing the transferred images in the main window.
- If you prefer not to display the [Quick Preview] window in Remote Live View shooting or when images are transferred, clear [Automatically display Quick Preview window].
Destination Folder
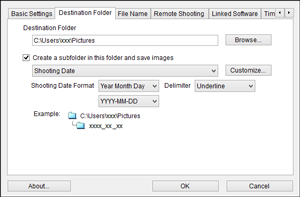
You can specify the destination folder for images transferred from cameras or captured in remote shooting.
Note
- You can also specify a destination folder by entering text directly in the destination folder text box.
- To browse for a destination folder, click [Browse]. After you click [Browse] and choose a destination folder, a subfolder is created automatically in your specified folder.
- A subfolder is created when you select [Create a subfolder in this folder and save images] (Windows) or [Create a subfolder in this folder and save images] (macOS).
- In the list box, you can select the naming rule for subfolders that are created. To customize the subfolder naming rule, click [Customize].
- When using the shooting date as the basis for subfolders that are created, you can specify the format (order and style for year, month, and day) and the delimiter.
File Name
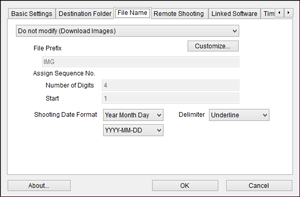
You can specify the file name for images transferred from cameras or captured in remote shooting.
Note
- When specifying the image file name, select a file naming rule from the list box. (Select [Do not modify] to use the file name set on the camera to save files.) To customize the file naming rule, click [Customize].
- Prefix text and the number of digits and starting number for serial numbers can be set separately for file names.
- When using the shooting date as the basis for file names, you can specify the format (order and style for year, month, and day) and the delimiter.
Remote Shooting
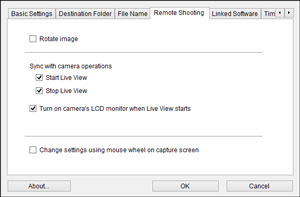
You can configure the operations performed in remote shooting.
Not available for EOS M6, M5, M3, M10, or M100.
Note
- Select [Rotate image] to configure image rotation regardless of shooting orientation. Set the rotation angle in the capture window ().
- Select [Start Live View] to show the [Remote Live View window] automatically when Live View starts up on the camera. (Not available for EOS R1, R3, R5, R5 Mark II, R5 C, R6, R/Ra, RP, M6 Mark II, M200, M50 Mark II, or M50)
- Select [Stop Live View] to close the [Remote Live View window] automatically when Live View ends on the camera. Live View on the camera also ends if Live View display on the camera is active when you stop Remote Live View. (Not available for EOS R1, R3, R5, R5 Mark II, R5 C, R6, R7, R8, R10, R50, R50 V, R100, R/Ra, RP, M6 Mark II, M200, M50 Mark II, or M50)
- Select [Turn on camera's LCD monitor when Live View starts] for simultaneous image display on the camera screen when you start Remote Live View. (Not available for EOS R1, R3, R5, R5 Mark II, R5 C, R6, R7, R8, R10, R50, R50 V, R100, R/Ra, RP, M6 Mark II, M200, M50 Mark II, or M50)
- Select [Change settings using mouse wheel on [Remote Shooting] screen] to enable scroll-wheel input for settings in the capture window, including control buttons, and in the [Flash function settings] window.
Linked Software
You can select linked software from the list box to start after images are transferred from the camera or captured in remote shooting. To add third-party applications as linked software, click [Register].
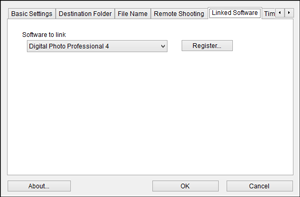
Note
- You can also specify the type of images to notify you about when linked third-party software starts up. Configure this in the window displayed after you click [Register].
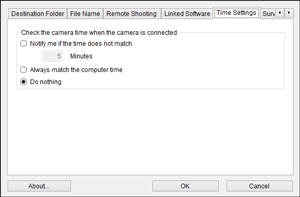
Time Settings
You can configure how the time set on a camera is managed when you connect the camera.
Note
-
In [Notify me if the time does not match], select a notification threshold (1–60 minutes) in case of discrepancies between the camera time and computer time.
A warning is displayed if the threshold is exceeded when EU compares the time after startup.
- Select [Always match the computer time] to set the camera time to the computer time when EU starts up.
Survey
You can change how survey information is collected.
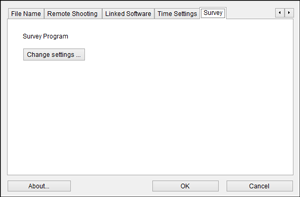
- Click [Change settings] and make any changes in the dialog box.