Automatic Flash Photography with 1 Flash Receiver
- Autoflash Photography Using Multiple Receiver Units
- Multiple Flash Photography with Wireless Functions
- About Sender Unit(s)
This section describes basic fully automatic wireless shooting when using a EL-1 attached to the camera (sender) and a EL-1 set as a receiver unit.
-
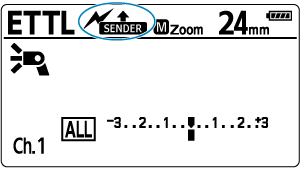
Set the sender unit.
-
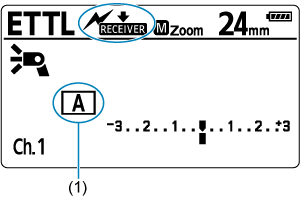
Set the receiver unit.
-
Check the channel.
-
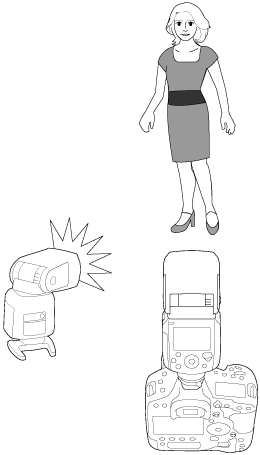
Position the camera and flash.
- Position them within the range shown at "Positioning and Operation Range".
-
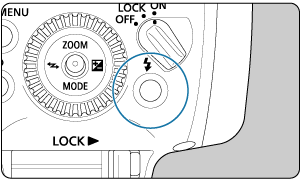
Use the joystick on the sender to select
 .
.
-
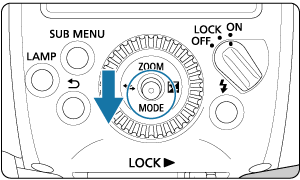
Set the flash mode to
 .
.
- Press the joystick up, down, left, or right, or turn
 and select
  , then press the joystick vertically.
 - The receiver unit is set automatically to during shooting, controlled by the sender unit.
- Check that the firing group control is set to
 .
.
- Press the joystick up, down, left, or right, or turn
-
Check that the flash is ready.
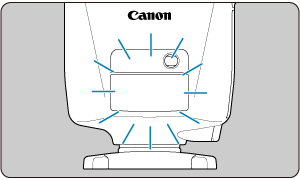
- When the receiver flash is ready, the AF-assist beam emitter blinks at approx. 1-second intervals.
- Check that the sender unit's flash-ready lamp is lit.
-
Check the operation.
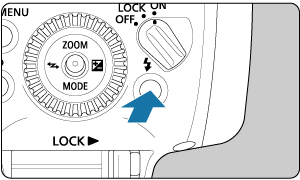
-
Take the picture.
- Set the camera and take the picture in the same way as with normal flash shooting.
Caution
- If there is a fluorescent light or computer monitor near a receiver unit, the presence of the light source may cause the receiver unit to malfunction and fire inadvertently.
- During optical transmission wireless shooting, even if the sender and receiver units (firing group) are not all fully charged,
 will not be displayed on the sender unit's LCD panel as it is with radio transmission wireless shooting (with sender flash firing OFF). Also, there is no function for illuminating or turning off the sender unit's LCD panel according to the charge status of the sender unit and receiver units.
 - When P.Fn-06-0 is set on the sender unit (), the beep will sound when the sender unit is fully charged (This beep does not indicate that charging of all flash units is completed as it does with radio transmission wireless shooting).
Note
- The flash coverage of the sender unit and receiver unit is set to 24 mm. You can also set the flash coverage manually.
- It can also fire a flash on the sender ().
- You can press the depth-of-field preview button on the camera to fire the modeling flash ().
- If the receiver unit's auto power off takes effect, press the sender unit's test flash button to turn on the receiver unit.
- You cannot use the test flash when operating the flash timer, etc. on the camera end.
- You can change the time until the receiver unit's auto power off takes effect (C.Fn-10).
- You can disable the blinking of the AF-assistant beam emitter when the receiver unit is fully charged (C.Fn-23).
Autoflash Photography Using Multiple Receiver Units
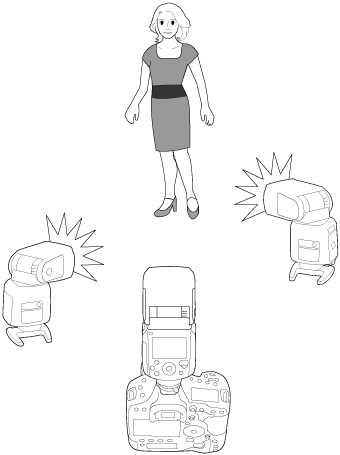
When you need more flash output or you want to perform lighting more easily, you can increase the number of receiver units and fire them as a single flash.
Add a receiver, and follow the same procedure listed in "Automatic flash photography with 1 flash receiver" (). You can use any of A, B, or C as the firing group.
When the number of receiver units is increased or sender flash firing is set to ON, automatic control is performed to fire all flashes at the same flash output and to ensure that the total flash output results in the standard exposure.
Multiple Flash Photography with Wireless Functions
Since the following functions set on the sender unit will be set automatically to the receiver units on this wireless system, you do not need to operate the receiver unit(s). For this reason, you can perform wireless flash photography in the same way as normal flash photography.
Caution
- The flash frequency when performing stroboscopic flash during optical transmission wireless shooting can be set from 1 Hz to 199 Hz (settings from 250 Hz to 500 Hz are not available).
Note
- You can also directly operate the receiver unit to individually set the flash exposure compensation and flash coverage on each receiver unit.
About Sender Unit(s)
You can designate two or more sender units. When using multiple cameras with senders attached, you can switch cameras in wireless strobe shooting using the same lighting (receivers).