Remote Live View Shooting
You can shoot by controlling the camera remotely from EU.
Images captured this way are saved directly to your computer, ready to review in DPP or another linked software application.
-
Connect the camera and computer.
-
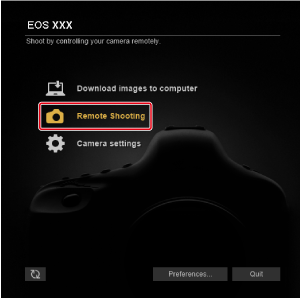
Click [Remote Shooting].
-
Set up the camera.
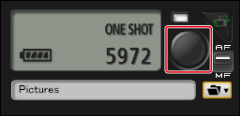
Capture window
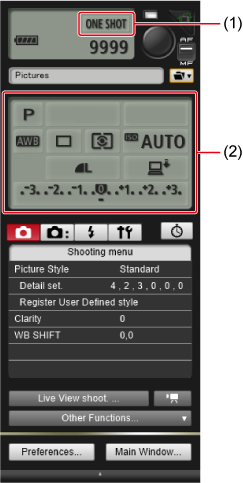
- Click or right-click setting items in sections (1)*1*2 and (2)*1*3, then select the setting.
1: To enable scroll-wheel selection of options in the setting items and the menus displayed, select [Change settings using mouse wheel on [Remote Shooting] screen] () on the [Remote Shooting] tab in [Preferences]. Note that scroll-wheel selection is not supported for the mirror lockup menu or [Image saving location].
2: You can configure AEB by clicking or right-clicking the exposure/AEB level item and then holding down the Shift key while scrolling with the scroll-wheel.
3: Only configurable for some cameras.
Note
- For details on the capture window, see Capture Window Functions.
- Use the camera itself to configure any settings that cannot be configured from the capture window.
- A timer indicator blinks during self-timer countdown, and the countdown time is shown in the area for the number of available shots.
- Mirror lockup settings can be configured in P, Tv, Av, M, or B mode.
- During mirror lockup, the mirror lockup icon blinks.
- For the EOS 5Ds/5Ds R, you can select the shutter release timing after mirror lockup.
- In auto exposure shooting, the indicated shutter speed or aperture value blinks to warn of underexposure or overexposure.
- In manual exposure shooting, the metering value is displayed in real time in the exposure level area.
-
Click [
 ].
].
-
Set the Live View function.
-
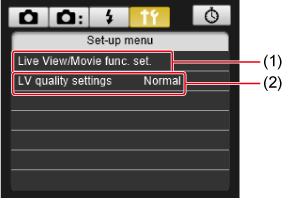
Click [Live View/Movie func. set.] (1).
- The [Live View/Movie func. set.] window appears. Configure settings as follows.
- Display details may vary depending on the camera connected.
EOS-1D X Mark II5Ds/5Ds R5D Mark IV5D Mark III6D Mark II6D7D Mark II80DM6 Mark IISelect [Enable] for [LV func. setting] and an option for [Exposure simulation], then click [OK].
EOS R1R3R5R5 Mark IIR5 CR6R6 Mark IIR7R8R10R50R50 VEOS-1D X Mark III90DConfigure [LV func. setting] and [Exposure simulation] or [Display simulation] as follows.
- Set [LV func. setting] to [Enable], then click [OK].
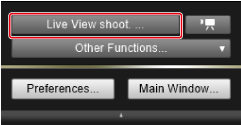
- Click [Live View shoot.] ().
- Follow steps 4–5 in Remote Live View Shooting again.
- Select an option for [Exposure simulation] or [Display simulation], then click [OK].
- Go to step 8 ().
EOS-1D X1D CSelect [Stills] for [LV func. setting] and an option for [Exposure simulation], then click [OK].
EOS 77DREBEL T6s/760DREBEL T8i/850DREBEL T7i/800DREBEL SL3/250D/200D IIREBEL SL2/200DREBEL T6i/750DREBEL T7/2000D/1500DREBEL T6/1300DSelect [Enable] for [LV func. setting], then click [OK].
-
-
Click [Live View shoot.].
Remote Live View window

-
Click [
 ].
].
- The captured image is transferred to the computer and displayed in the [Quick Preview] window.
- DPP starts up automatically.
Caution
- Before shooting when you will focus in the Remote Live View window, change the AF/MF button in the capture window to [MF].
- RAW processing is not supported in EU.
- Connecting a camera that is currently processing RAW images will open EU after processing is finished.
- Options for Basic Zone modes cannot be configured for cameras with Basic Zone modes on the Mode dial.
Note
- You can also shoot by pressing the Space bar.
- For exposure simulation () or histogram display () in the [Remote Live View window], set [Exposure simulation] to [Enable] on the camera.
- To show/hide the [Quick Preview] window, click [Other Functions] and select [Quick Preview].
- Mirror lockup is available in remote shooting for some connected cameras. You can check mirror lockup status when the [Remote Live View window] is displayed.
- Self-timer shooting is available.
- You can change the application that starts up automatically after remote shooting from DPP to a different application on the [Linked Software] tab in preferences ().
- For details on functions of the [Remote Live View window], see Remote Live View Window Functions: Live View Tab.
- For details on functions of the Zoom View window, see Zoom View Window Functions.
- With exposure simulation, image brightness more closely matches the actual brightness (exposure) of your shots. For setting details, refer to the instruction manual of the connected camera.