Connecting the EMR App and the Remote Head
- Registering and Editing the Remote Head
- Linking the Remote Head and the Camera
- Screen Configuration When Connecting the Remote Head
For instructions on how to connect the remote head and camera and how to use the remote head, see the Robotic Camera System CR-S700R Instruction Manual.
Furthermore, when using the remote head with EMR Ver.1.1.0 or later and the CR-G100 IP camera controller, update the CR-G100 firmware to version 1.2.4 or later.
Registering and Editing the Remote Head
Before shooting with the remote head, be sure to register the remote head to be used. Tap [Remote Head] on the Main screen to display the [Add Remote Head] screen.
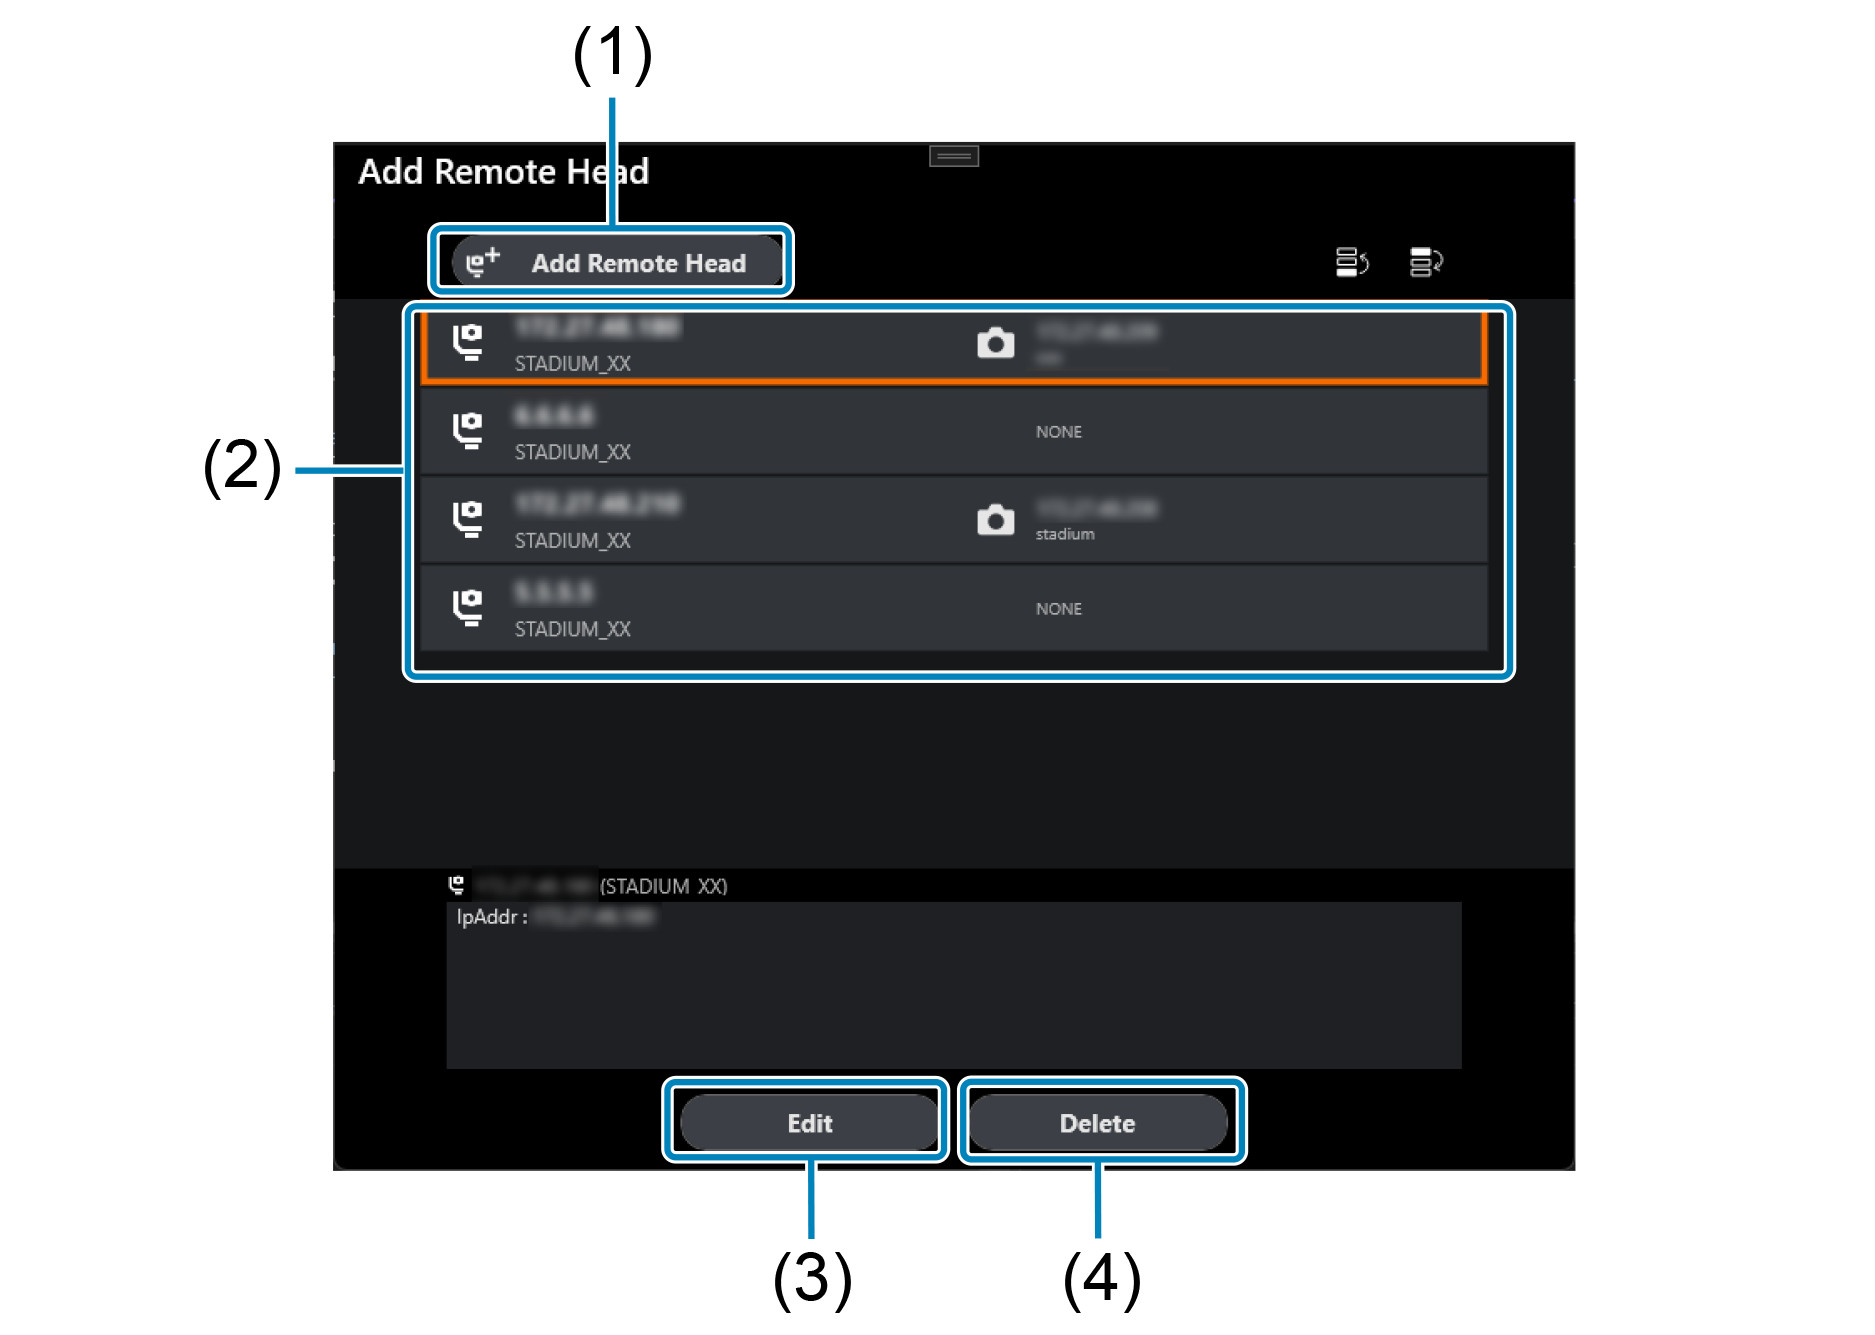
- (1) Display the [Remote head Settings] screen.
- (2) A list of the currently registered remote head settings is displayed.
- (3) When editing the settings of a registered remote head, tap to select the target head and tap this button to display the [Remote head Settings] screen.
- (4) When deleting a registered remote head, tap to select the remote head that you wish to delete and then tap this button.
Linking the Remote Head and the Camera
When operating a remote head and camera with EMR, register the remote head and link the camera to be used in EMR.
-
Display the Main screen and tap [
 ] for the camera that you wish to link to the remote head ().
 -
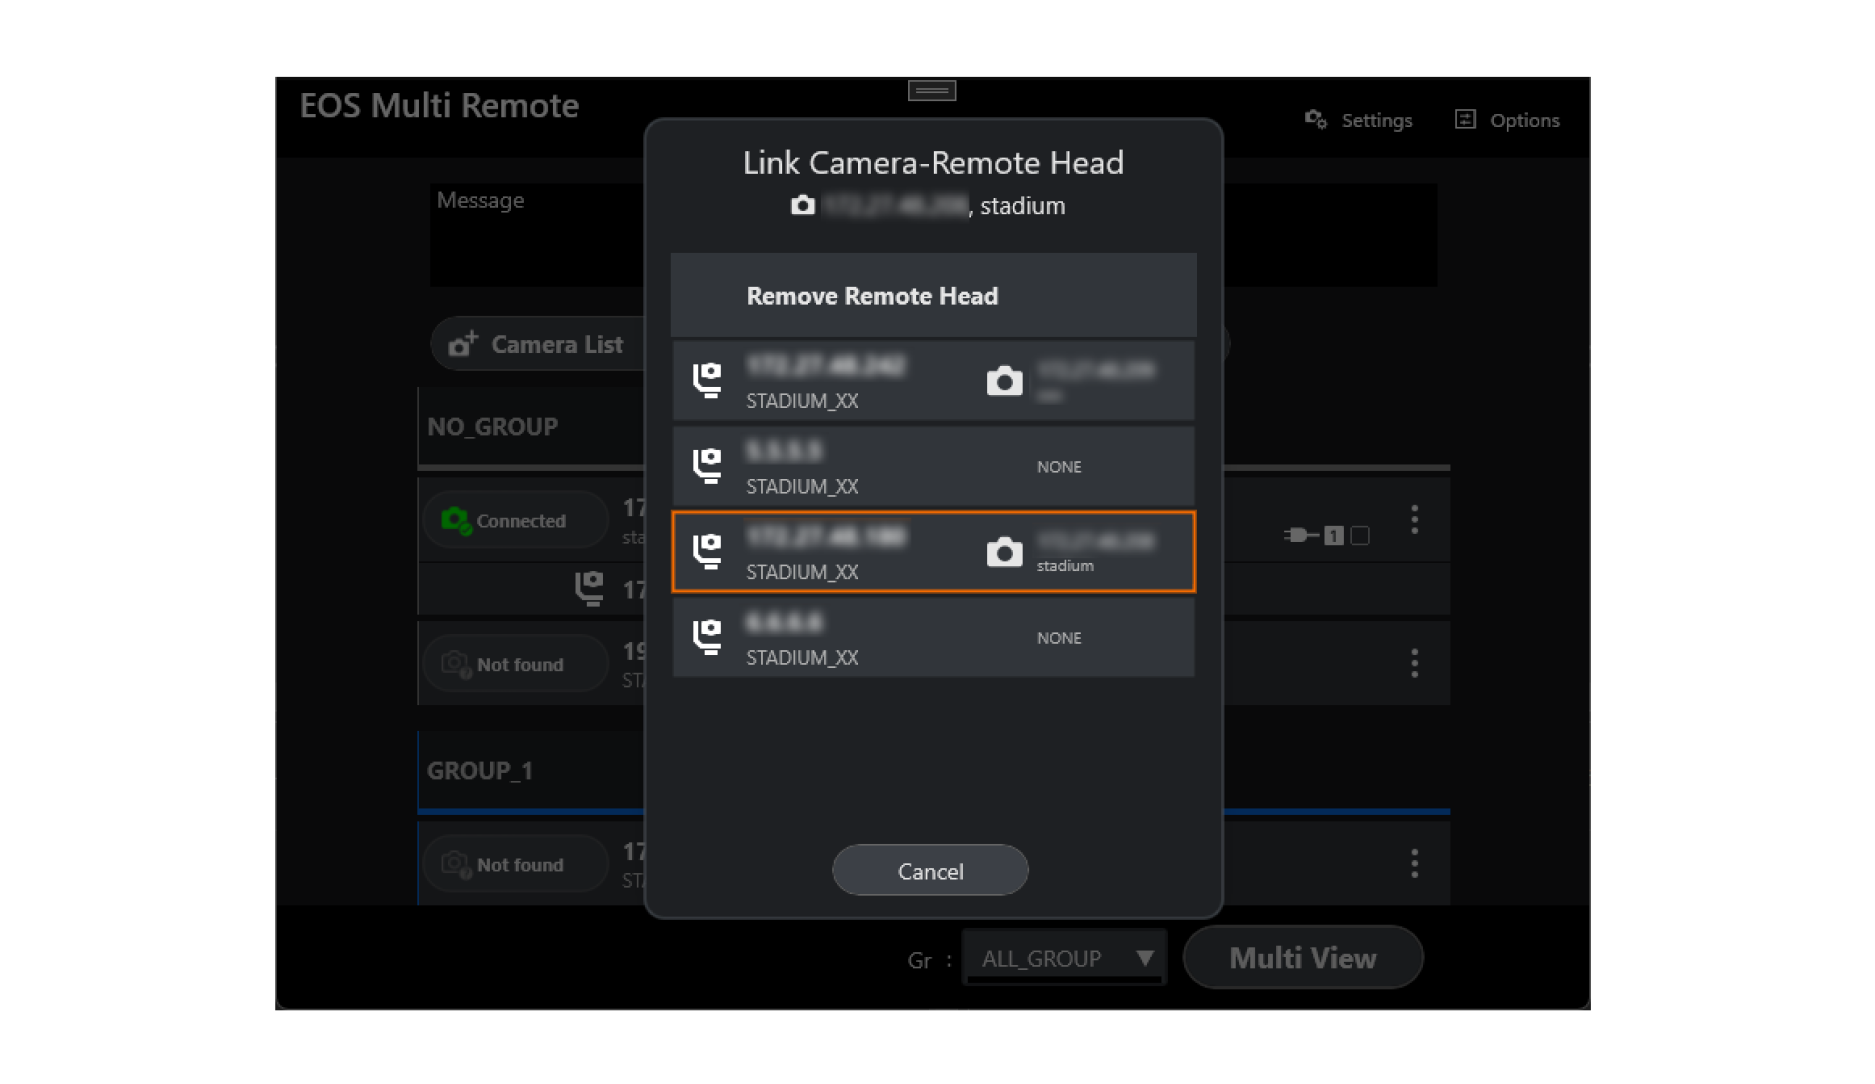
Display the [Select function] screen and tap [Link Camera & Remote Head].
-
On the [Link Camera & Remote Head] screen, tap the remote head that you wish to link to the camera selected in step 2.
Note
- For cameras with a linked remote head, tap [Remote head Power Setting] on the [Select function] screen in step 3 to display the [Remote head Power Setting] screen and turn the power to the connected remote head ON/OFF.
Screen Configuration When Connecting the Remote Head
If a remote head is linked to the camera, it will be displayed on Multi View screen 2 or the Single View screen.
Full screen
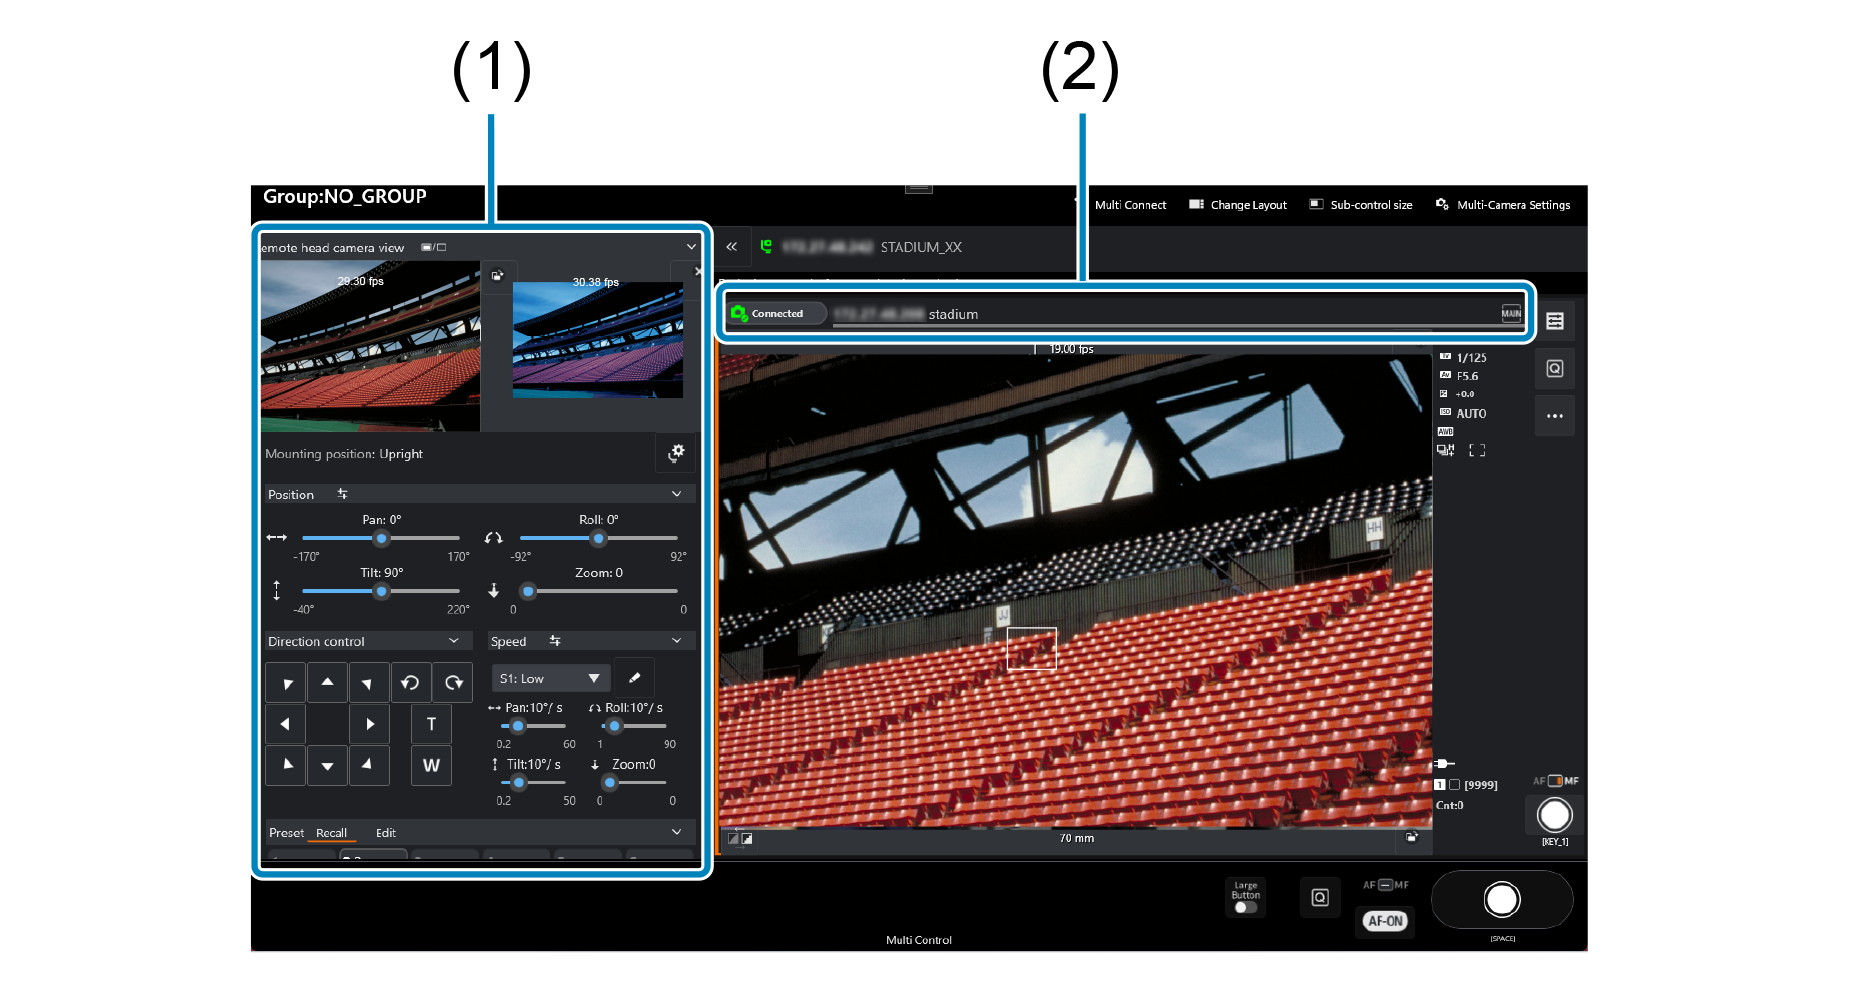
- (1) Display the control UI for the remote head.
- (2) Display the connection status, IP address, and display name for the remote head.
Remote head settings screen

- (1) Display Live View images from the overhead camera and the eyepiece camera.
- (2) Display the attitude setting of the configured remote head.
- (3) Display the settings screen for the operation options.
- (4) Display and specify the position of the remote head.