Autoflash with Three Receiver Groups
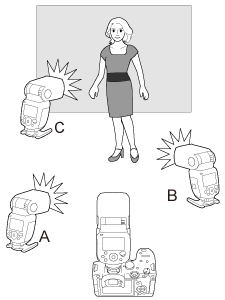
Once firing groups A and B have been set up, you can fire with multiple Speedlites by adding group C. For an overview of flash control, see Group Control.
Group C is useful when you want to eliminate shadows in the background behind subjects.
-
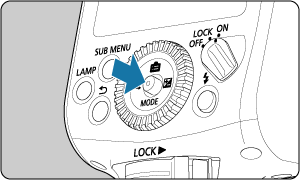
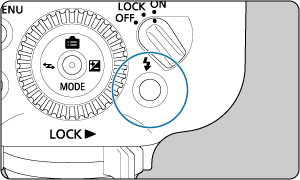
Push the joystick straight in.
-
Select the item shown in (1).
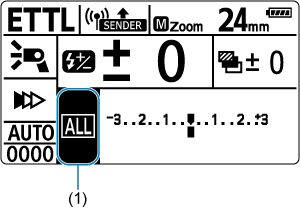
- Press the joystick vertically or horizontally or turn
 to select the item, then push the joystick straight in.
- Press the joystick vertically or horizontally or turn
-
Set to
 .
.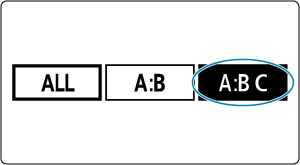
- Press the joystick horizontally or turn to select , then push the joystick straight in.
- Press the joystick horizontally or turn
-
Add Speedlites to firing group A, B, or C and position them.
- Confirm that all receivers and the sender are set to the same transmission channel and wireless radio ID.
- Set up receivers for group A, B, or C and position them.
-
Check the channel and ID.
-
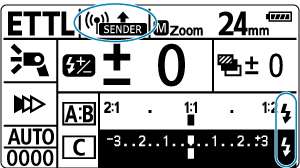
Set the A:B flash ratio.
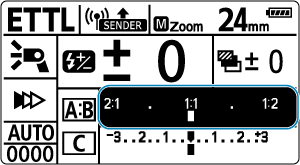
- Push the joystick straight in to select the item shown in the figure.
- Press the joystick horizontally or turn to set the A:B flash ratio, then push the joystick straight in.
-
Set the flash exposure compensation amount for firing group C.
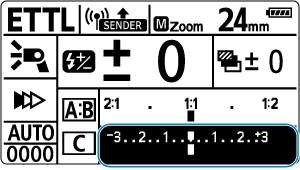
- Push the joystick straight in to select the item shown in the figure.
- Press the joystick horizontally or turn to set the amount of compensation, then push the joystick straight in.
-
Check the connection and make sure the flash units are charged.
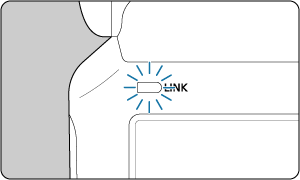
- Confirm that the
 lamp is lit in green.
- Confirm that the sender and receiver flash-ready lamps are lit.
- The sender beeps after all Speedlites have been recharged when P.Fn-05 is set to [0] ().
- Make sure
 is not displayed on the sender LCD panel.
 - Confirm that the
 icon indicating completion of sender/receiver charging appears on the sender LCD panel (
 is not displayed).
 - For details on sender LCD panel illumination, see LCD Panel Illumination.
- Confirm that the
-
Check operation.

-
Take the picture.
- Just as in normal flash photography, shoot after configuring the camera.
Caution
- Radio transmission is not possible when is displayed on the LCD panel. Double-check the transmission channels and wireless radio IDs of senders and receivers. If you cannot connect with the same settings, restart the senders and receivers.
- Aiming the units in firing group C directly at subjects may cause overexposure.
Note
- You can fire the modeling flash by pressing the camera's depth-of-field preview button ().
- Auto power off takes effect in approx. 5 min. when the Speedlite is set as a sender.
- To turn on a receiver that is in auto power off mode, press the sender test flash button.
- Test flash firing is not available while a camera's flash timer or similar functions are active.