Other Menu Functions
[ 2]
2]
-
Exposure comp.
Exposure compensation can be adjusted in a range of ±3 stops, in 1/3-stop increments. For details on exposure compensation, see Manual Exposure Compensation.
-
 ISO speed settings
-
ISO speed
In [
 ] mode, you can set the ISO speed manually. You can also select ISO Auto.
 -
ISO speed range
You can set the manual ISO speed setting range (minimum and maximum). ISO expansion can also be configured.
-
Max for Auto
You can set the maximum limit for ISO Auto in movie recording in [
], [ ], or [
 ] mode or in [] mode with ISO Auto.
 -
 Max for Auto
You can set the maximum limit for ISO Auto in 4K time-lapse/Full HD time-lapse movie recording in [
], [], or [] mode or in [] mode with ISO Auto. By default, the maximum limit is set to ISO 12800. The maximum limit can be set in a range of ISO 400–25600.
-
-
HDR shooting

For details on HDR shooting
, see HDR Shooting. -
Auto Lighting Optimizer
Brightness and contrast can be corrected automatically. For details on Auto Lighting Optimizer, see Auto Lighting Optimizer.
-
Highlight tone priority
You can reduce overexposed, clipped highlights as you record movies. For details on Highlight tone priority, see Highlight Tone Priority.
-
Av 1/8-stop incr.
-
You can set aperture values on a finer scale when recording movies with an RF lens.
This feature is available when the camera is set to [
] or [].Select [Enable] to change the aperture increment from 1/3 stop (or 1/2 stop) to 1/8 stop.
-
Caution
- [Av 1/8-stop incr.] is not available (not displayed) when EF or EF-S lenses are used.
- When set to [Enable], setting options in [
 : Exposure level increments] are disabled and have no effect.
-
Auto slow shutter
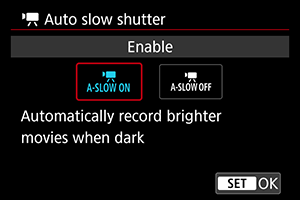
You can choose whether to record movies that are brighter and less affected by image noise than when set to [Disable] by automatically slowing the shutter speed under low light.
Available in [
] or [] recording mode. Applies when the frame rate of the movie recording size is  or
or  .
.-
Disable
Enables you to record movies with smoother, more natural movement, less affected by subject shake than when set to [Enable]. Note that under low light, movies may be darker than when set to [Enable].
-
Enable
Enables you to record brighter movies than when set to [Disable] by automatically reducing the shutter speed to 1/30 sec. (NTSC) or 1/25 sec. (PAL) under low light.
-
Note
- Setting to [Disable] is recommended when recording moving subjects under low light, or when afterimages such as trails may occur.
[3]
-
White balance
For details on white balance, see White Balance.
-
Custom White Balance
For details on custom white balance, see Custom White Balance.
-
WB correction
For details on white balance correction, see White Balance Correction.
-
Picture Style
For details on Picture Styles, see Picture Style Selection.
-
Clarity
For details on clarity, see Clarity.
[4]
-
Lens aberration correction
Peripheral illumination correction, distortion correction, and chromatic aberration correction can be corrected as you record movies. For details on lens aberration correction, see Lens Aberration Correction.
-
High ISO speed NR
For details on High ISO speed noise reduction, see High ISO Speed Noise Reduction.
[5]
-
Remote control
By setting to [Enable], you can start or stop movie recording using Wireless Remote Control BR-E1 (sold separately).
[6]
-
Auto level
For details on
Auto level, see Auto Level. -
Customize Quick Controls
For details on customizing Quick Controls, see Customizing Quick Controls.
-
Metering timer
For details on the metering timer, see Metering Timer.
-
Shooting info. disp.
For details on configuring shooting information display, see Shooting Information Display.
[7]
-
Reverse display
For details on reverse display, see Reverse Display.
-
VF display format
For details on the viewfinder display format, see Viewfinder Display Format.
-
Standby: Low res.
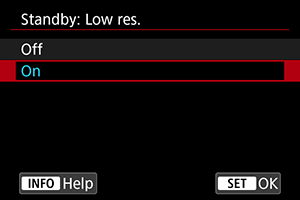
Set to [On] to conserve battery power and control the rise of camera temperature during standby.
As a result, it may enable you to record movies over a longer period.
Caution
- Image quality on the standby screen may differ from image quality on the screen during movie recording.
- Briefly when you start recording movies, image display may remain on the current frame instead of being updated.
- With digital zoom set to an option other than [Disable], overheat control is set to [Off] and cannot be changed ().
-
HDMI display
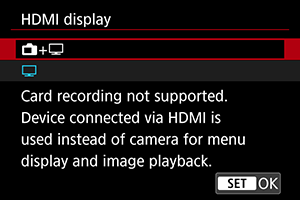
You can specify how movies are displayed as they are recorded via HDMI to an external device. Movie output itself corresponds to the [Movie rec. size] setting.
The default setting is [
 ].
].-
 +
+Enables movie display both on the camera screen and on the other device, via HDMI output.
Camera operations such as image playback or menu display are shown on the other device via HDMI, not on the camera screen.
-
Deactivates the camera screen during output via HDMI, so that the screen is blank.
Shooting information, AF points, and other information is shown on the external device via HDMI, but you can stop output of this information by pressing the
 button.
Before recording movies externally, confirm that no information is being sent by the camera by making sure no shooting information, AF points, and so on is displayed on external monitors or other devices.
-
Caution
- Card recording is not performed with [HDMI display] set to [+]. Camera menus and image playback are only displayed on the screen connected via HDMI.
- The HDMI output resolution and frame rate are automatically adjusted to suit the movie recording size.
![]() For longer HDMI output
For longer HDMI output
To continue HDMI output for longer than 30 min., select [![]() +
+![]() ], then set [Auto power off] in [
], then set [Auto power off] in [![]() : Power saving] to [Disable] (). HDMI output will continue after the camera screen turns off when the time set in [Screen off] elapses.
: Power saving] to [Disable] (). HDMI output will continue after the camera screen turns off when the time set in [Screen off] elapses.
Caution
- HDMI output without information prevents display of warnings about the card space, battery level, or high internal temperature () via HDMI.
- During HDMI output, display of the next image may take some time if you switch between movies of different recording sizes or frame rates.
- Avoid operating the camera when recording movies to external devices, which may cause information to be displayed in the HDMI video output.
- Brightness and color of movies recorded with the camera may look different from that of HDMI video output recorded by external devices, depending on the viewing environment.