Wi-Fi Connection via Access Points
This section describes how to join a Wi-Fi network via an access point compatible with WPS (PBC mode).
First, check the position of the WPS button and how long to press it. It may take approx. 1 min. to establish a Wi-Fi connection.
-
Select [
: Wi-Fi/Bluetooth connection].
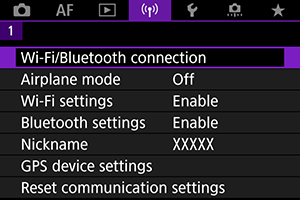
-
Select an option.
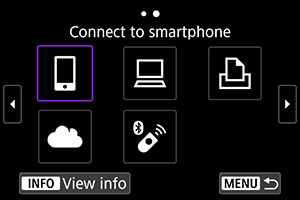
-
Select [Add a device to connect to].
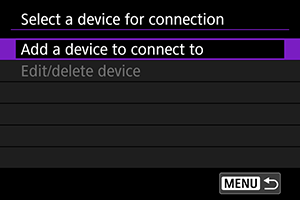
- The following message is displayed if you have selected [
Connect to smartphone]. If Camera Connect is already installed, select [Do not display].
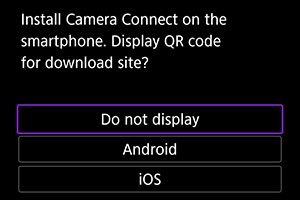
- On the [Connect to smartphone] screen displayed next, select [Connect via Wi-Fi].
- The following message is displayed if you have selected [
-
Select [Switch network].
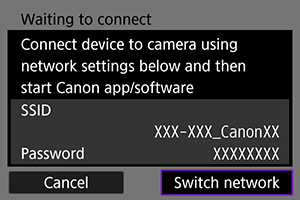
- Displayed when [
], [
], or [
] is selected.
- Displayed when [
-
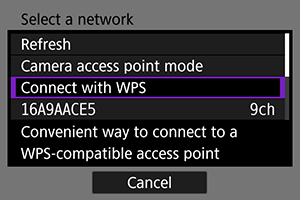
Select [Connect with WPS].
Note
- For [Camera access point mode] displayed in step 5, see Camera Access Point Mode.
-
Select [WPS (PBC mode)].
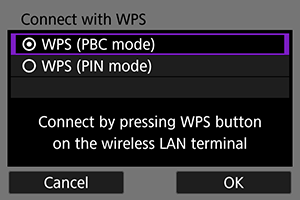
- Select [OK].
-
Connect to the access point via Wi-Fi.
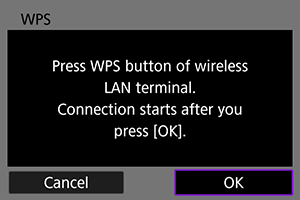
- Press the access point's WPS button.
- Select [OK].
-
Select [Auto setting].
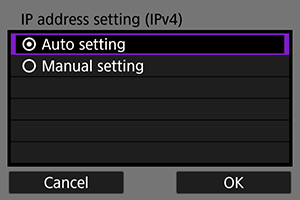
- Select [OK] to access the setting screen for the Wi-Fi function.
- If an error occurs with [Auto setting], see Manual IP Address Setup.
-
Specify the settings for the Wi-Fi function.
[
Connect to smartphone]
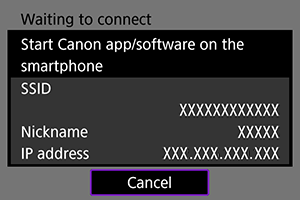
- On the smartphone's Wi-Fi setting screen, tap the SSID (network name) shown on the camera screen, then enter the password of the access point for the connection.
Go to step 7 in Wi-Fi Connection without Using Bluetooth.
[
Remote control (EOS Utility)]
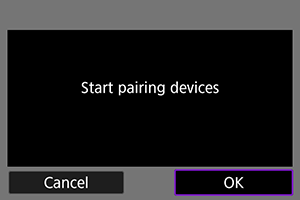
Go to step 7 or 8 in Steps on the computer (2).
[
Print from Wi-Fi printer]

Go to step 6 in Connecting to a Printer via Wi-Fi.
Register image.canon.
Go to step 5 in Connecting to image.canon.
Camera Access Point Mode
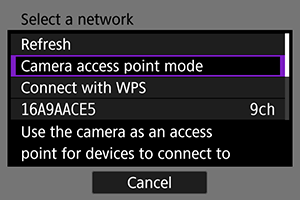
Camera access point mode is a connection mode for connecting the camera directly to each device via Wi-Fi. Displayed when [], [
], or [
] is selected after [
: Wi-Fi/Bluetooth connection].
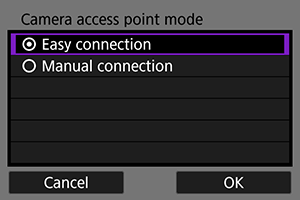
-
Easy connection
Use the other device to establish a Wi-Fi connection with the SSID shown on the camera screen.
-
Manual connection
Enter the SSID of the other device to establish a connection. Follow the instructions on the camera screen to complete the connection settings.
Caution
-
Some printers may not be able to connect when the camera is used as an access point.
If connection in camera access point mode is not possible, you may be able to establish a connection as follows.
- Establish a Wi-Fi connection via an access point
- Start access point mode on the printer
- If a Wi-Fi connection cannot be established, set [Security] on the camera to [WPA2] ().
Manual IP Address Setup
The options displayed vary depending on the Wi-Fi function.
-
Select [Manual setting].
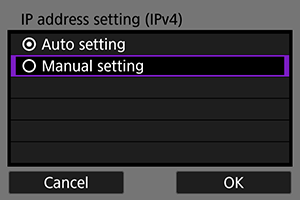
- Select [OK].
-
Select an option.
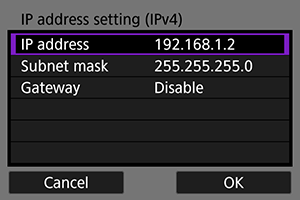
- Select an option to access the screen for numerical input.
- To use a gateway, select [Enable], then select [Address].
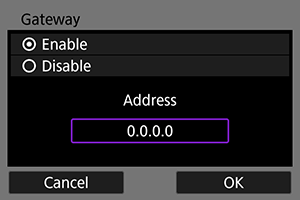
-
Enter the number.
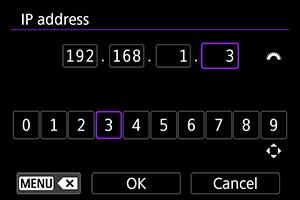
- Turn the
dial to move the input position in the upper area, and use the
dial or
to select numbers to enter. Press the
button to enter the selected number.
- To delete the number just entered, press the
button.
- Select [OK] after the numbers have been entered. Display returns to the screen in step 2.
- Turn the
-
Select [OK].
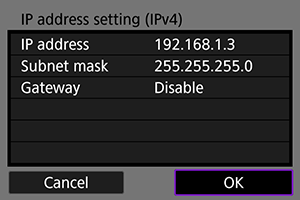
- When you have completed setting the necessary items, select [OK].
- If you are not sure what to enter, see Checking Network Settings, or ask the network administrator or another person knowledgeable about the network.