Troubleshooting
- Power Supply-Related
- Normal Shooting
- Radio Transmission Wireless Flash Shooting
- Linked Shooting
- Optical Transmission Wireless Flash Shooting
If a problem occurs with the flash, first refer to this Troubleshooting Guide. If this Troubleshooting Guide does not resolve the problem, contact your dealer or nearest Canon Service Center.
Power Supply-Related
Batteries cannot be charged with the charger.
- When the remaining battery level is 90% or more, charging will not be performed.
- Do not use any battery other than genuine Canon Battery Pack LP-EL.
The charger's lamp blinks at high speed.
- If (1) the battery charger or battery has a problem or (2) communication with the battery failed (with a non-Canon battery pack), the protection circuit will stop charging, and the charge lamp will blink in orange at a constant high speed. In the case of (1), unplug the charger's power plug from the power outlet. Detach and reattach the battery to the charger. Wait a few minutes, then reconnect the power plug to the power outlet. If the problem persists, contact your nearest Canon Service Center.
The charger's lamp does not blink.
- If the internal temperature of the battery attached to the charger is high, the charger will not charge the battery for safety reasons (lamp off). During charging, if the battery's temperature becomes high for any reason, charging will stop automatically (lamp blinks). When the battery temperature goes down, charging will resume automatically.
[Cannot communicate with battery Use this battery?] appears.
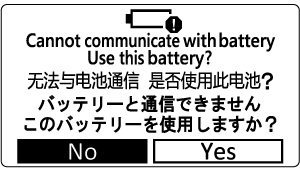
- The battery pack may be faulty. If it is faulty, replace it with a new battery pack.
- For safety, we recommend using LP-EL, genuine battery pack.
- If you continue using a battery pack that is no longer capable of communicating, the flash recharge time will increase for safety reasons.
- Take out and put back the batteries ().
- If the electrical contacts are dirty, use a soft cloth to clean them.
The battery becomes exhausted quickly.
- Use a fully-charged battery ().
- The battery performance may have degraded. Refer to Checking the Battery Information to check the degradation condition of the battery. If the battery performance is poor, replace the battery with a new one.
- The battery is depleted faster when you perform the following operations.
- Fire the modeling flash repeatedly a few times
- Keep the lit status of the modeling lamp for a while
- Using the wireless function
The power turns off by itself.
- Auto power off has been activated. To ensure that the power supply does not turn off automatically, set C.Fn-01-1 in the Custom Function screen ().
Normal Shooting
The power does not turn on.
The Speedlite does not fire.
- Insert the mounting foot into the camera's hot shoe all the way, slide the lock lever to the right, and secure the Speedlite to the camera ().
- If the
 indication remains displayed for approx. 15 sec. or longer, replace the batteries ().
 - If the electrical contacts of the Speedlite or camera are dirty, wipe the contacts () with a dry cloth, etc.
- When you perform continuous firing repeatedly over a short period of time, causing the temperature of the flash head to rise and flash firing to be restricted, the firing interval increases ().
- If the internal temperature of the battery attached to the charger is high, the charger will not charge the battery for safety reasons. During charging, if the battery's temperature becomes high for any reason, charging will stop automatically. When the battery temperature goes down, charging will resume automatically ().
The power turns off by itself.
- The Speedlite's auto power off has been activated (). Press the shutter button halfway or press the test flash button ().
Pictures are underexposed or overexposed.
- If the main subject looks very dark or very bright, set flash exposure compensation ().
- If there is a highly reflective object in the picture, use FE lock ().
- With high-speed sync, the faster the shutter speed, the lower the guide number becomes. Move closer to the subject ().
The bottom of the picture looks dark.
- Move at least 0.5 m / 1.6 ft. away from the subject.
- When shooting within 1 m / 3.3 ft. of the subject, set the bounce angle down by 7° ().
- Remove the lens hood if attached.
The picture periphery looks dark.
- Set the flash coverage to
 (automatic setting) ().
 - When manually setting the flash coverage, set a flash coverage wider than the shooting angle of view ().
- Make sure C.Fn-21-1 is not set ().
The picture is very blurred.
- When the shooting mode is set to the
 aperture-priority AE mode and the scene is dark, slow sync is enabled automatically (the shutter speed becomes slower). Use a tripod, or set the shooting mode to the
  program AE or fully automatic mode (). Note that you can also set the sync speed in [Flash sync. speed in Av mode] ().
The flash coverage is not set automatically
- Set the flash coverage to (automatic setting) ().
- Insert the mounting foot into the camera's hot shoe all the way, slide the lock lever to the right, and secure the Speedlite to the camera ().
The flash coverage cannot be set manually.
Functions cannot be set.
- Set the camera's shooting mode to


 bulb (
 ) (Advanced Shooting Zone).
 - Set the Speedlite's power switch to
 instead of
  ().
().
Modeling lamp does not light up.
- Rest the unit for 30 minutes if the modeling lamp goes off. If the problem persists, contact your nearest Canon Service Center.
Radio Transmission Wireless Flash Shooting
The receiver unit does not fire or unexpectedly fires at full output.
- Set the sender unit to

 and the receiver unit to
  ().
(). - Set the transmission channels and wireless radio IDs of the sender unit and receiver unit to the same number ().
- Make sure the receiver unit is within the transmission range of the sender unit ().
- Run the transmission channel scan and set the channel with the best reception signal ().
- Position the receiver unit at a location with the clearest possible view of the sender unit.
- Turn the front side of the receiver's main body towards the sender unit.
- The camera's built-in flash cannot be used as the sender unit in radio transmission wireless shooting.
Pictures are overexposed.
- When performing autoflash photography with three firing groups A, B, and C, do not fire with firing group C pointing toward the main subject ().
- When shooting with the flash mode set for each firing group, do not fire multiple firing groups set in

 against the main subject ().
![]() is displayed.
is displayed.
Cannot remote release from a receiver unit.
- Remote release is not possible from a receiver unit in cameras released up to 2011 or EOS REBEL T100/4000D/3000D, EOS REBEL T7/1500D/2000D, EOS REBEL T6/1300D or EOS REBEL T5/1200D.
The LCD panel illumination turns on and off.
- The sender unit's LCD panel illuminates or turns off according to the charge status of the receiver units (firing groups). See the section on "About the LCD Panel Illumination".
Linked Shooting
Standard exposure is not obtained. / Uneven exposure occurs.
- If you fire multiple Speedlites simultaneously during linked shooting, the appropriate exposure may not be obtained or uneven exposure may result. It is recommended to set only one Speedlite to fire or to use a self-timer to space out the timing of firing.
The unit cannot be used as a receiver camera unit.
- When used with a camera released up to 2011 or with EOS REBEL T100/4000D/3000D, EOS REBEL T7/1500D/2000D, EOS REBEL T6/1300D or EOS REBEL T5/1200D, the unit can be used only as "sender camera unit". The unit cannot be used as a "receiver camera unit".
Optical Transmission Wireless Flash Shooting
The receiver unit does not fire or unexpectedly fires at full output.
- Set the sender unit to
 and the receiver unit to ().
 - Set the transmission channels of the sender unit and receiver unit to the same numbers ().
- Make sure the receiver unit is within the transmission range of the sender unit ().
- Point the wireless sensor of the receiver unit toward the sender unit ().
- Position the receiver unit at a location with the clearest possible view of the sender unit.
- If the sender unit and receiver unit are too close, the transmission may not take effect properly.
- When you use the built-in flash of the camera as a sender unit, raise the built-in flash of the camera and configure the [Wireless functions] settings in the [Built-in flash settings] of the camera.
The sender unit fires.
- Even when sender flash firing is set to OFF, the sender unit fires a small flash to control the receiver unit with optical transmission ().
Pictures are overexposed.