Manual Flash
Flash output can be set in a range of 1/1024 to full output (1/1), in 1/3-stop increments.
By using a commercially available flash meter, you can determine the flash output required for suitable exposure. Setting the camera shooting mode to ![]() or
or ![]() is recommended.
is recommended.
-
Press the
 button on the
  cross keys.
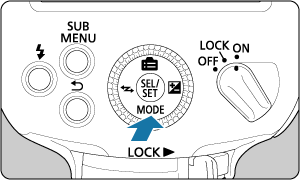
-
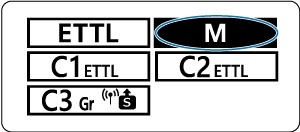
Set the flash mode to
 .
.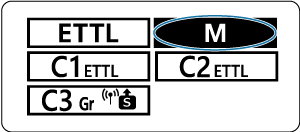
- Turn the
 dial to select
  , then press
  .
.
- Turn the
-
Press the
 button on the cross keys.
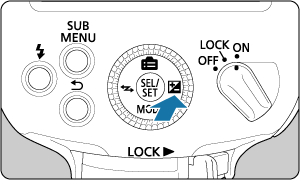
-
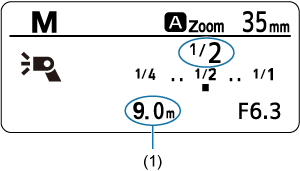
Set the flash output.
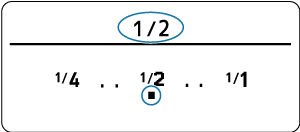
- Turn the dial to select a flash output level, then press .
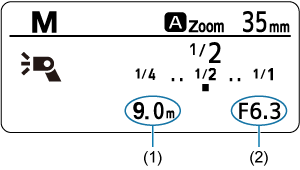
- The approximate shooting distance (1) and the aperture value (2) are displayed when you press the camera shutter button halfway.
- Turn the
Note
- The flash output setting range is 1/128–1/1 when high-speed sync is set.
- If the flash output is set to 1/64, 1/80, 1/100, or 1/128 when high-speed sync is set,
 will be displayed on the LCD panel, and the brightness may change during shooting. It is recommended to check your shots.
 - For details on guide numbers when manual flash is used, see Specifications.
- Flash output can be set directly without pressing the button on the cross keys by turning the dial (C.Fn-13).
Setting Manual Flash Output from FE Memory
The flash output level used when shooting in ![]() flash mode can be applied as the level for
flash mode can be applied as the level for ![]() flash mode.
flash mode.
-
Set up the FE memory function.
-
Shoot in
 flash mode.
- Press the button on the cross keys.
- Turn the dial to select
 , then press .
- Press the shutter button completely to shoot.
- Press the
-
Set the flash mode to
 .
.
- Press the button on the cross keys.
- Turn the dial to select , then press .
- Press the
-
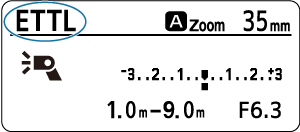
Check the flash output.
- Confirm that the subject is within the effective flash range (1).
Caution
- Before firing with the Speedlite set to , make sure the flash-ready lamp is red (fully charged).
- If you adjust the ISO speed, aperture value, or other settings that involve flash output (such as light intensity or flash zoom) after shooting with the Speedlite set to , we recommend shooting with it set to again.
-
Color temperature of the Speedlite may differ greatly from that of the ambient light when the camera white balance is set to
 , and color tones of shots may differ between and settings when flash compensation is set to the negative side and [E-TTL balance] is set to [Ambience priority].
 - When using FE memory in wireless flash photography, configure settings for and firing groups identically in advance. When is set to
 , set to
  .
. - The effective flash range indicated for may not match the focus distance indicated for , depending on shooting conditions.
- Setting flash output to 1/1024 may result in overexposure.
Note
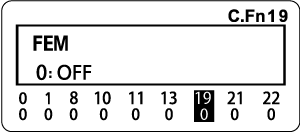
- When C.Fn-19
 is set to [2] (ON /
  ), you can switch between and simply by pressing the button on the cross keys.
Metered Manual Flash Exposure
Using a camera compatible with metered manual flash, you can set the flash exposure level manually before shooting. This is effective in close-range flash photography. Use a standard 18% gray reflector (commercially available) and shoot as follows.
-
Configure the camera and Speedlite settings.
- Set the camera shooting mode to or
 .
. - Set the Speedlite flash mode to .
- Set the camera shooting mode to
-
Focus on the subject.
- Focus on the subject manually.
-
Set up the 18% gray reflector.
- Place it at the position of the subject.
- Aim the camera so that the reflector fills the entire spot metering circle in the viewfinder.
-
Press the
 or
or  /
/  button (
 ).
).- The Speedlite fires a preflash and stores the flash output required for suitable flash exposure.
- On the right side of the viewfinder, the exposure level indicator shows the flash exposure level relative to standard exposure.
-
Set the flash exposure level.
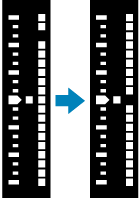
- Adjust the Speedlite's manual flash output to align the flash exposure level with the standard exposure index.
-
Take the picture.
- Remove the gray reflector and take the picture.
Note
- Refer to camera instruction manuals for details on cameras that are compatible with metered manual flash.