Depth Compositing
You can create a single image in focus over a wider range of distances by combining several source images. Images created this way can also be edited, using the depth compositing editing tool. For details and precautions on focus bracketing, which is used to capture the source images, refer to the instruction manual of cameras equipped with this feature.
Note
- Depth compositing is also available for images captured without using focus bracketing.
Compatible Images
| Cameras |
|
|---|---|
| Lenses | RF, EF, and EF-S lens groups (except TS-E and fisheye lenses) |
| Supported Formats | CR2, CR3, JPG, TIFF*1 |
| Shooting Conditions | Source images must be from the same camera and lens, at the same shutter speed, aperture value, and focal length, and in the same image format and size. |
1: TIFF images converted and saved in DPP
-
The following images cannot be used for depth compositing.
- RAW images created from multiple-exposure shooting
- Images without shooting information
- Images saved as HDR PQ mode display images
- Images with a pixel count outside the range of 1600x1600 to 9999x6666
Depth Compositing
-
Select images.
-
Select [Depth Compositing] in the [Tools] menu.
-
Select [Start depth compositing tool].
-
Adjust and set items as needed, then click [Execute].
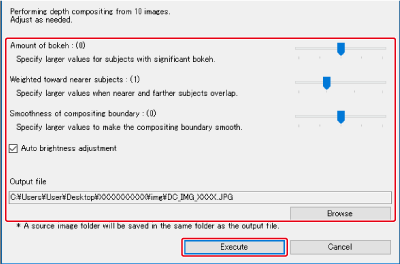
- The images are combined to produce a depth composite image.
-
A source image folder (folder name: DPP_DC_...) is created in the same folder as the depth composite image.
This folder is used in depth composite image editing with the depth compositing editing tool.
- To change the output destination or format of depth composite images, click [Browse].
- [Auto brightness adjustment] automatically compensates for any minor differences in brightness among source images.
Caution
-
Except for the following settings, recipe details for the current image are reflected in the depth composite image shown when the depth compositing tool starts up.
- Copy stamp
- Dust Delete Data
- Color moiré reduction (Partial Adjustment tool palette)
- Angle adjustment (Cropping/Angle Adjustment tool palette)
- Size setting when selected RAW images are opened in DPP ()
- Color adjustments for specific color gamuts (including [Monochrome])
- Dual Pixel RAW Optimizer
- Auto Lighting Optimizer
- Shadows/highlights
- The depth compositing tool does not start up unless the current image is supported.
Editing Depth Composited Images
Images produced by depth compositing can be edited using areas copied from source images.
-
Select a depth composite image.
-
Select [Depth Compositing] in the [Tools] menu.
-
Select [Start depth compositing editing tool].
- If source file thumbnails are not displayed, select the source file folder.
-
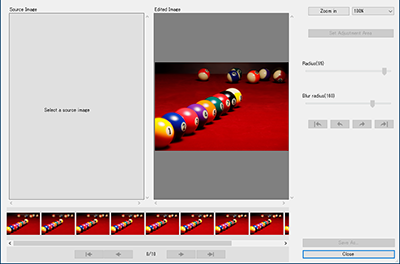
Select a source image.
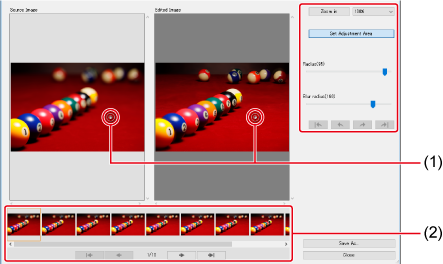
- Circular cursor
- Source image
- Select a source image from the thumbnails at the bottom of the screen.
- The source image may be outlined in black if the source and edited images are shots of different areas.
-
Edit the image as needed.
- Clicking [Set Adjustment Area] displays a circular cursor. As you click or drag on the edited image to correct it with the circular cursor, the same portion of the source image is copied to it.
- Use [Radius] to set the size of the adjustment area and [Blur radius] to set blurring at the adjustment area boundary.
-
To review your adjustments, click [
 ] (Undo All), [
 ] (Undo), [
 ] (Redo), and [
 ] (Redo All). Note that reviewing edits using one source image is not possible if you switch to another.
 -
Recipes for depth composite images are not reflected in the edited images shown with this function.
Moreover, depth composite image recipes are not added to image files saved with this function.
-
Save the file.
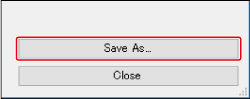
- Click [Save As], then complete the required settings and save the file.
- To exit, click [Close].