Using an External Sensor
- Overview
- When Using VICON or OptiTrack
- When Using VRPN Compatible Sensor
- Setting OptiTrack
- Calibrating the External Sensor
- Registering the Target Using a Sensor
When using an external sensor for the camera tracking method, configure the settings with the following procedure.
Caution
- For details on how to use an external sensor, refer to the instruction manual of the external sensor.
- The camera tracking method using an external sensor requires a separately sold MREAL Optical Sensor Attachment to be mounted to the MREAL Display. For details, refer to the instruction manual of the MREAL Display.
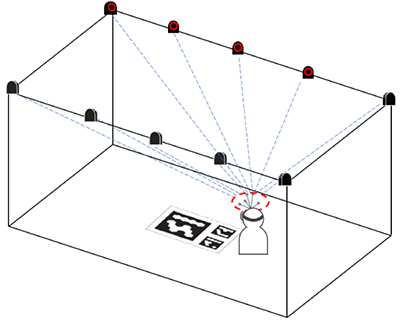
Overview
Track an attachment (sold separately) mounted to the MREAL Display with VICON, OptiTrack, or VRPN compatible optical sensor. This facilitates an MREAL experience with higher accuracy than with spatial features or markers.
When Using VICON or OptiTrack
-
Select [Basic Settings] in the MREAL Configuration Tool window.
-
Select [MREAL Display] in [1. Select Camera Device].
-
Select [Unuse] in [Tracking Using Indicator] of [3. Select Camera Tracking Method].
-
Select [VICON] or [OptiTrack] in [Tracking Using Sensor].
-
Click [Settings].
- The [Sensor Connection Settings] corresponding to the external sensor appears.
-
Enter the setting items.
VICON
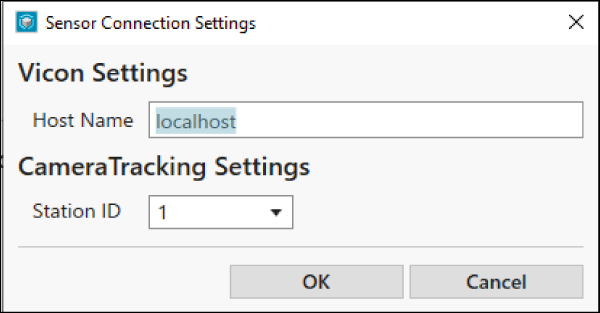
- Enter the host name or IP address of the PC with the system of the external sensor installed in [Host Name].
- Select the station ID set for the tracker name in [Station ID], and click [OK].
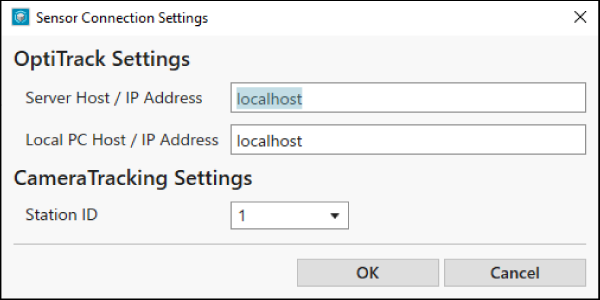
OptiTrack
-
Execute calibration of the external sensor.
When Using VRPN Compatible Sensor
-
Select [VRPN] in [Tracking Using Sensor], and click [Settings].
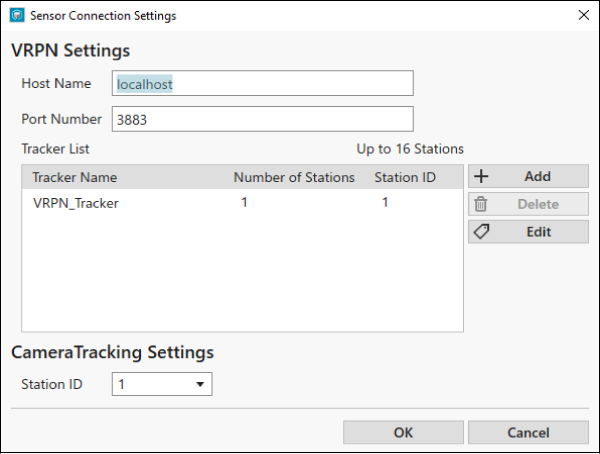
- The [Sensor Connection Settings] window appears.
-
Enter the host name and port number.
- Enter the host name or IP address of the PC with the software for the VRPN compatible sensor installed in [Host Name].
- Enter the specified port number in [Port Number].
-
Select [VRPN_Tracker] in [Tracker List], and click [Edit].
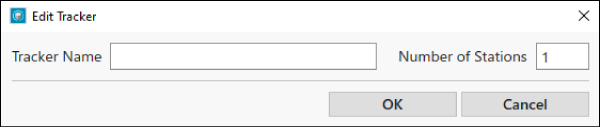
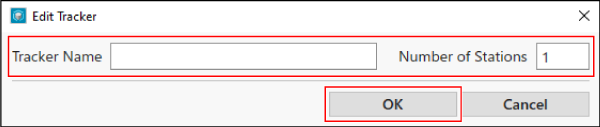
- The [Edit Tracker] window appears.
-
Enter [Tracker Name] and [Number of Stations], and click [OK].
-
Select the station ID set for the tracker name in [CameraTracking Settings] of the [Sensor Connection Settings] window, and click [OK].
-
Click [Detailed Settings] in the MREAL Configuration Tool window.
- Select the items of [Unit for Entering Tracker Position] and [Unit Coordsys] on the [VRPN] tab. For details, refer to the user's manual of the VRPN compatible sensor to be used.
-
Execute calibration of the sensor.
Setting OptiTrack
When you use OptiTrack for the external sensor of the camera tracking method, the information to enter in the Sensor Connection Settings window differs depending on the settings of Motive: Tracker (platform software of OptiTrack system).
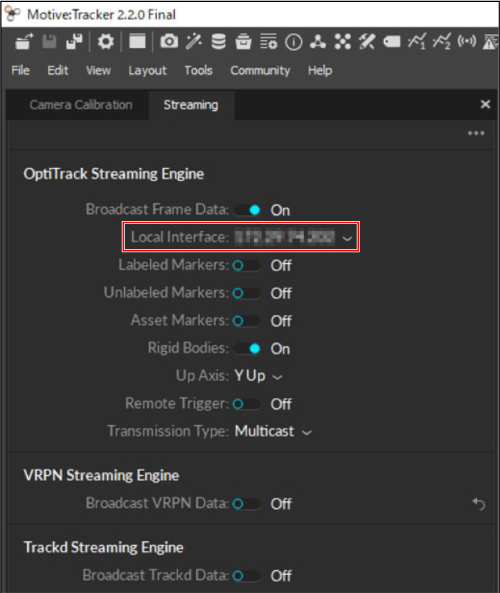
| [Local Interface] Setting | Information to Enter in [Server Host / IP Address] | Information to Enter in [Local PC Host / IP Address] |
|---|---|---|
| Loopback | localhost | localhost |
| IP address of the PC with the OptiTrack system installed | IP address of the PC with the OptiTrack system installed | IP address of the PC with MREAL Platform installed |
Note
- For details on the Motive: Tracker and [Local Interface] settings, contact the distributor.
Calibrating the External Sensor
-
Click [Start Tool] in [Calibration of Sensor] of [3. Camera Tracking Method].
- 6DOF Sensor Tool starts.
-
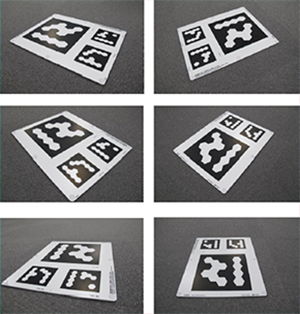
Capture the Default Marker with the external sensor.
- Fit the Default Marker in the 6DOF Sensor Tool window, and click [Grab] to capture an image.
-
If you click the [
 ] icon beside [View], the display area of the image is displayed in full screen mode. Press the [Esc] key of the PC to return to the original size.
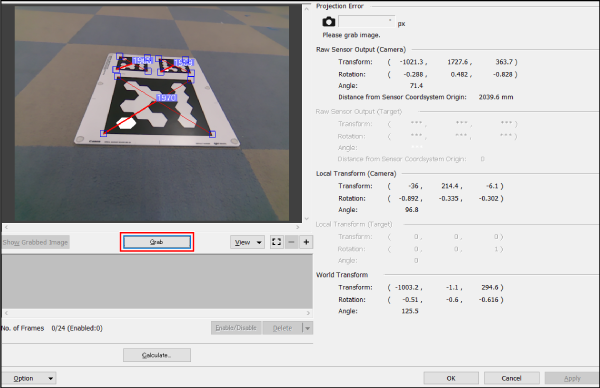
-
Capture 10 or more images from different directions in reference to the following.
-
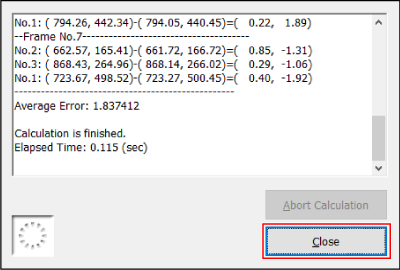
Click [Calculate].
- When the image display area is displayed in full-screen mode, press the [Esc] key of the PC to return the image display area to the original size.
-
When the following window appears, click [Close].
-
Click [Apply] then [OK] in the 6DOF Sensor Tool window.
-
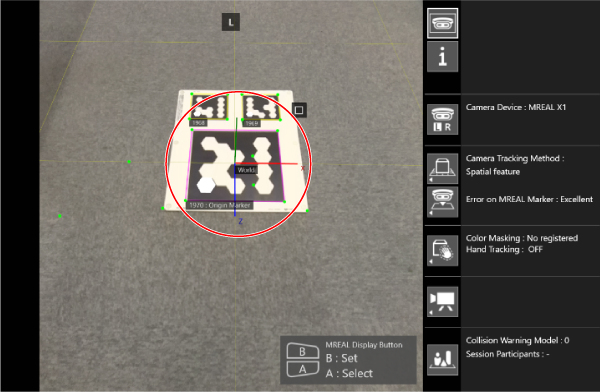
Check the calibration results.
- If calibration finishes normally, a three-axis diagram showing the world coordinate system is displayed on the Default Marker in the Preview Tool window.
Registering the Target Using a Sensor
When tracking using an external sensor, you can use a target using a sensor.
Preparation
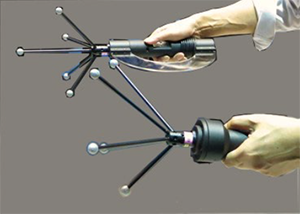
- Attach the reflective markers for an optical sensor to the mock-up or other object to be manipulated.
- When tracking using VICON, preregister a name for the combination of reflective markers to the VICON system as “MRStation001” to “MRStation016”. Note that the number (001 to 016) at the end of the registered name will be the station ID.
- When tracking using OptiTrack, preregister the combination of reflective markers to the OptiTrack system. Note that the ID assigned to the combination of reflective markers will be the station ID.
Registering the Target
-
Select [Target] in [Option Settings] of the MREAL Configuration Tool window.
-
Select [Add] in [List of Targets].
-
Select the ID number and enter the name of the target to be registered in [1. Information Input].
-
Select [On] in [Tracking Using Sensor] of [2. Select Tracking Method].
-
Select the station ID registered to the VICON or OptiTrack system in [Station ID] of [3. Calibration of Coordinate System]/[2. Tracking Using Sensor].
Adjusting the 3D CG Superimposed on the Target
Click [Start Tool] in [Move and Rotate the Target Coordinate System] to launch Model Alignment Tool.
For details on adjusting the 3D CG in Model Alignment Tool, see “Adjusting the 3D CG Orientation” ().