Connecting to a Smartphone or Tablet
- Preparing the Smartphone
- Bluetooth Pairing and Wi-Fi Connection to Smartphones
- Main Functions of Camera Connect
- Maintaining a Wi-Fi Connection When the Camera Is Off
- Connecting via [Advanced connection]
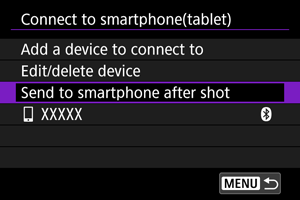
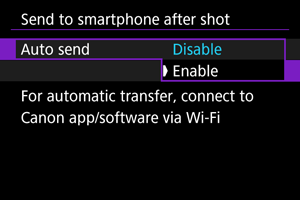
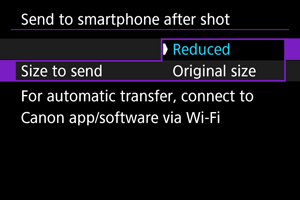
- Automatic Image Transfer to a Smartphone as You Shoot
- Sending Images to a Smartphone from the Camera
You can do the following after the camera and smartphone are paired via Bluetooth.
- Establish a Wi-Fi connection using only the smartphone ().
- Establish a Wi-Fi connection with the camera even when it is off ().
- Geotag images with GPS information acquired by the smartphone ().
- Control the camera remotely from a smartphone ().
You can also do the following after connecting the camera to a smartphone via Wi-Fi.
Preparing the Smartphone
Turning on Bluetooth and Wi-Fi on a Smartphone
Turn on Bluetooth and Wi-Fi from the smartphone settings screen. Note that pairing with the camera is not possible from the smartphone's Bluetooth settings screen.
Installing Camera Connect on a Smartphone
The dedicated app Camera Connect (free of charge) must be installed on the smartphone on which Android or iOS is installed.
- Use the latest version of the smartphone OS.
- Camera Connect can be installed from Google Play or App Store. Google Play or App Store can also be accessed using the QR codes that appear when the camera is paired or connected via Wi-Fi to a smartphone.
Note
- For the operating system versions supported by Camera Connect, refer to the download site of Camera Connect.
- Sample screens and other details in this guide may not match the actual user interface elements after camera firmware updates or updates to Camera Connect, Android, or iOS.
Bluetooth Pairing and Wi-Fi Connection to Smartphones
-
Select [OK].
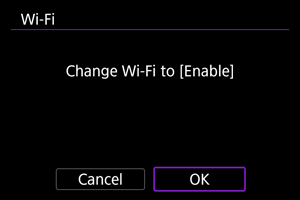
- This screen is not displayed if [
 : Wi-Fi settings] is already set to [Enable].
- This screen is not displayed if [
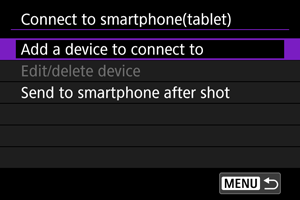
-
Select [Add a device to connect to].
-
Select [OK].
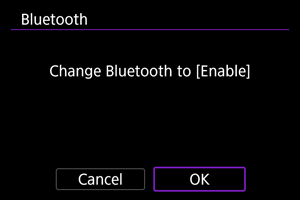
- This screen is not displayed if [: Bluetooth settings] is already set to [Enable].
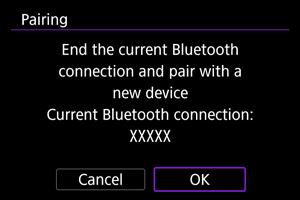
- A message is displayed if the camera is already paired with another device. Select [OK] to end the current Bluetooth connection.
- This screen is not displayed if [
-
Press
 .
.
-
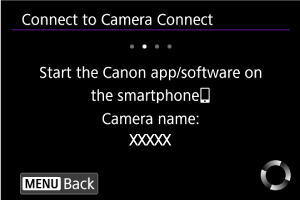
Start pairing.

- Press to start pairing.
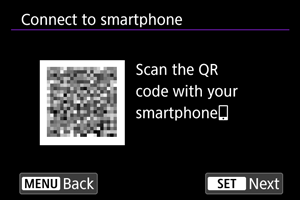
- If Camera Connect is not installed, use the smartphone to scan the QR code on the screen, go to Google Play or App Store to install Camera Connect, then press to start pairing.
- Press
-
Start Camera Connect.
- Following the instructions in the app, select the camera for pairing.
-
Establish a Bluetooth connection.
- When a message appears on the smartphone, use the smartphone as indicated.
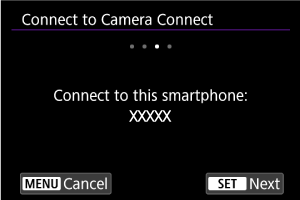
- Press .
-
Complete the connection process.
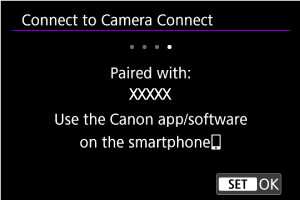
- Press .
- The name of the connected device is displayed.
- Press
Caution
- The camera cannot be connected to two or more devices at the same time via Bluetooth. To switch to a different smartphone for the Bluetooth connection, see Reconnecting via Wi-Fi/Bluetooth.
- Keep in mind that the camera battery level may be low the next time you want to use it, because Bluetooth connections consume battery power even when the camera is off or auto power off is activated.
- Troubleshooting pairing
- Keeping pairing records for previously paired cameras on your smartphone will prevent it from pairing with this camera. Before you try pairing again, remove pairing records for previously paired cameras from your smartphone's Bluetooth settings screen.
-
Tap a Camera Connect function.
- For details on Camera Connect functions, see Main Functions of Camera Connect.
- Tap a Camera Connect function to initiate a Wi-Fi connection.
-
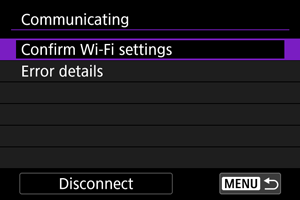
Confirm that the devices are connected via Wi-Fi.
- After a Wi-Fi connection is established, the camera screen switches to shooting standby.
- Selecting [:
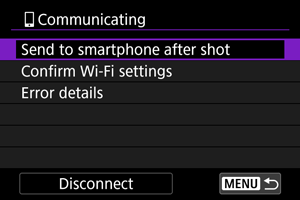
 Connect to smartphone(tablet)] will display the [Communicating] screen on the camera ().
The Wi-Fi connection to a smartphone is now complete.
- To end the Wi-Fi connection, select [Disconnect] on the [Communicating] screen.
- Terminating the Wi-Fi connection will switch the camera to the Bluetooth connection.
- To reconnect, start Camera Connect and tap the function you will use.
[Communicating] screen
Main Functions of Camera Connect
Images on camera
- Images can be browsed, deleted, or rated.
- Images can be saved on a smartphone.
- Effects can be applied to RAW images and saved to a smartphone (Creative Assist).
Remote live view shooting
- Enables remote shooting as you view a live image on the smartphone.
Auto transfer
Bluetooth remote Control
- Enables remote control of the camera from a smartphone paired via Bluetooth. (Not available when connected via Wi-Fi.)
- Auto power off is disabled while you are using the Bluetooth remote controller feature.
Camera settings
- Camera settings can be changed.
Note
- For details on other functions, you can check the main Camera Connect screen.
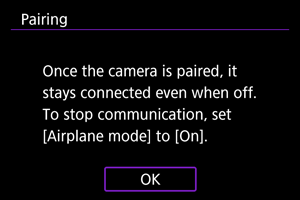
Maintaining a Wi-Fi Connection When the Camera Is Off
You can use a smartphone to browse images on the camera or perform other operations even when the camera is off, as long as it is paired to the smartphone via Bluetooth.
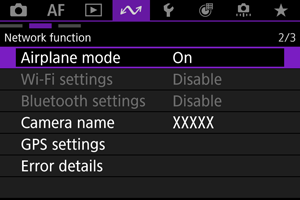
If you prefer not to stay connected to the camera via Wi-Fi or Bluetooth when it is off, either set [![]() : Airplane mode] to [On] or set [
: Airplane mode] to [On] or set [![]() : Bluetooth settings] to [Disable].
: Bluetooth settings] to [Disable].
Caution
- This function can no longer be used if the wireless settings are reset or the smartphone connection information is erased.
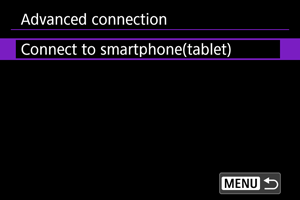
Connecting via [Advanced connection]
You can establish a direct Wi-Fi connection with a smartphone and use Camera Connect to control the camera.
Connecting to a smartphone or tablet
-
Select [OK].
- This screen is not displayed if [: Wi-Fi settings] is already set to [Enable].
- This screen is not displayed if [
-
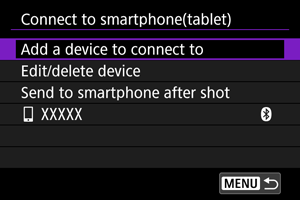
Select [Connect to smartphone(tablet)].
-
Select [Add a device to connect to].

-
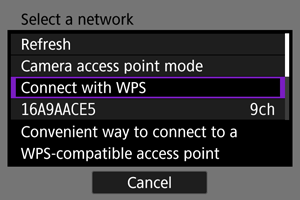
Start searching for access points.
- To start searching if Camera Connect is already installed on the smartphone, press .
- If Camera Connect is not installed, use the smartphone to scan the QR code on the screen, go to Google Play or App Store to install Camera Connect, then press to start searching.
- To start searching if Camera Connect is already installed on the smartphone, press
-
Establish a Wi-Fi connection.
-
For instructions on configuring communication functions, see Basic Communication Settings.
-
-
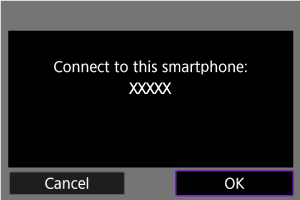
Start Camera Connect and tap the camera name.
-
Select [OK].
[Communicating] screen
Automatic Image Transfer to a Smartphone as You Shoot
Your shots can be automatically sent to a smartphone. Before following these steps, make sure that the camera and smartphone Wi-Fi connection is terminated.
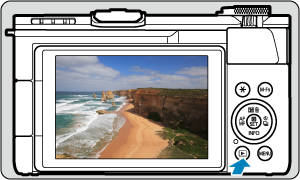
Sending Images to a Smartphone from the Camera
You can use the camera to send images to a smartphone connected via Wi-Fi.
-
Switch to playback.
-
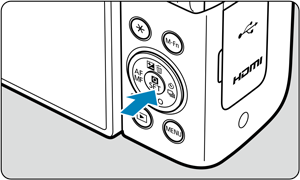
Press
.
-
Select [
Send images to smartphone].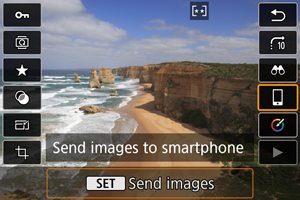
- If you perform this step while connected via Bluetooth, a message is displayed requesting you to establish a Wi-Fi connection. After pressing , tap a Camera Connect function to connect via Wi-Fi, then start again from step 1.
- If you perform this step while connected via Bluetooth, a message is displayed requesting you to establish a Wi-Fi connection. After pressing
-
Browse images.

-
Press
.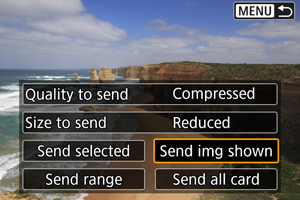
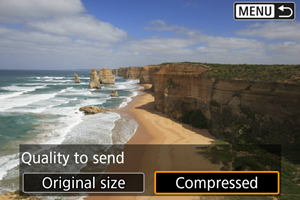
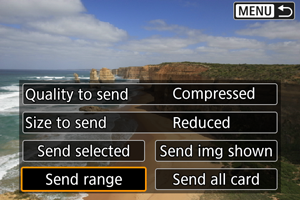
Setting the quality to send
-
Select [Quality to send].
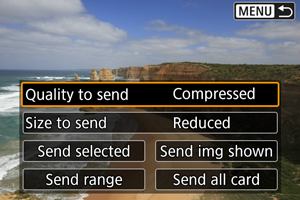
-
You can select the image quality of the movies to send.
-
Note
- When sending multiple movies, you can change the [Quality to send] on the confirmation screen before sending.
- Selecting compression for movies applies to all movies sent at that time. However, the following movie formats are not compressed.
- Movies recorded in


 (NTSC),
  (PAL), or
  (NTSC) sizes
Setting the size of images to send
-
Select [Size to send].
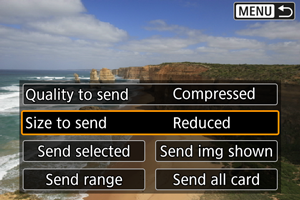
-
Select the image size to send.

-
Note
- When sending multiple images, you can also change [Size to send] as needed on the confirmation screen before sending.
- Selecting the reduced size for still photos applies to all still photos sent at that time. Note that
 size still photos are not reduced.
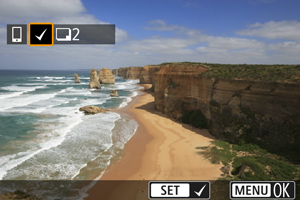
Sending the current image
-
Select [Send img shown].
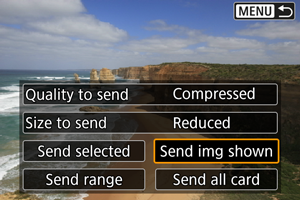
- Press with [Send img shown] selected to immediately send the image.
- Press
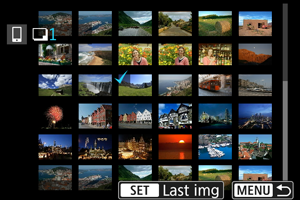
Selecting and sending images
-
Select [Send selected].
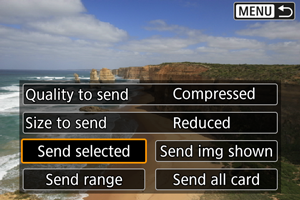
-
Select images to send.
- Turn the
 dial to select images to send, then press .
 - To switch to selecting images from the 3-image display, press the zoom lever on the
 side. To return to the single-image display, press the zoom lever on the
  side.
side.
- Turn the
-
Press the
 button.
-
Select [OK] if a message is displayed.
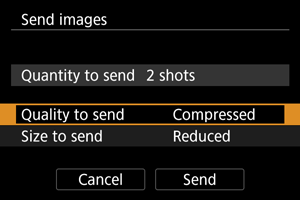
-
-
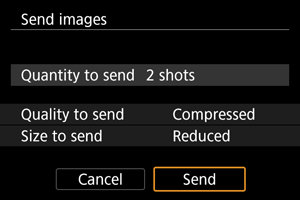
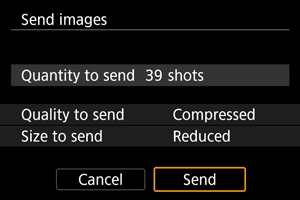
Select an option.

-
Select [Send].

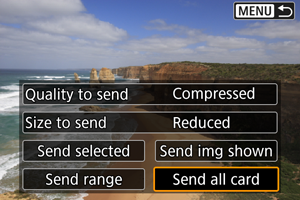
Sending a selected range of images
-
Select [Send range].
-
Specify the range of images.
-
Press the
button.-
Select [OK] if a message is displayed.
-
-
Select an option.
-
Select [Send].
Sending all images on a card


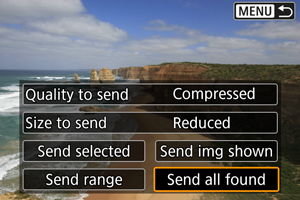
Sending images found by searching
Send all the images that match the search conditions set in [![]() : Set image search conditions] at once. For details on [
: Set image search conditions] at once. For details on [![]() : Set image search conditions], see Setting Image Search Conditions.
: Set image search conditions], see Setting Image Search Conditions.

Ending image transfer

- Press the button on the image transfer screen.
- To end the Wi-Fi connection, select [Disconnect] on the [Communicating] screen.
Caution
- During the image transfer operation, a picture cannot be taken even if the camera's shutter button is pressed.
Note
- You can cancel the image transfer by selecting [Cancel] during the transfer.
- You can select up to 999 files at a time.
- With a Wi-Fi connection established, disabling the smartphone's power saving function is recommended.
- When you use a battery to power the camera, make sure it is fully charged.