RAW Image Processing
You can process ![]() or
or ![]() images with the camera to create JPEG or HEIF images. RAW images are not affected, so different conditions can be applied to create JPEG or HEIF images.
images with the camera to create JPEG or HEIF images. RAW images are not affected, so different conditions can be applied to create JPEG or HEIF images.
You can also use Digital Photo Professional (EOS software) to process RAW images.
Caution
- Processing into HEIF is not available for
 or
or  images captured at an expanded ISO speed (H).
-
Select an option, then select images.
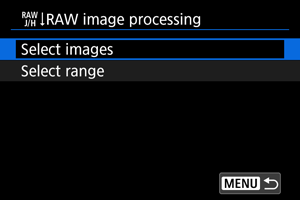
- You can select multiple images to process at once.
Select images
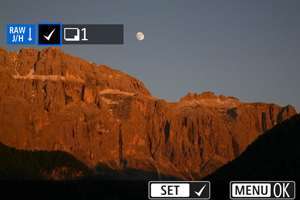
- Turn the
 dial to select images to process, then press
  .
. - Press the
 button.
Select range

- Select the first image (start point).
- Next, select the last image (end point). A checkmark [
 ] will be appended to all the images within the range between first and last images.
 - To process other images, repeat this step.
- Press the button.
-
Set the desired processing conditions.
Use shot settings
- Images are processed using image settings at the time of capture.
- Images captured with [
 : HDR shooting (PQ)] set to [Enable] are processed to create HEIFs, and images captured with this function set to [Disable] are processed to create JPEGs.
Set up processing→JPEG/Set up processing→HEIF
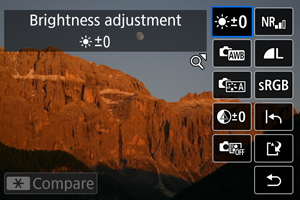
- Use
 to select an item.
 - Turn the
 or dial to switch the setting.
 - Press to access the function setting screen.
- To reset the settings, press the
 button and select [OK] after a confirmation message is displayed.
Comparison screen
- You can switch between the [After change] and [Shot settings] screens by pressing the
 button and turning the dial.
 - Items in orange on the [After change] screen have been modified since the time of capture.
- Press the button to return to the processing conditions screen.
-
Save.
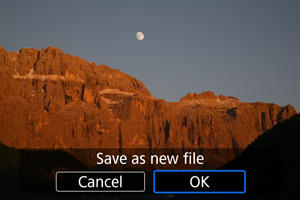
- When using [Set up processing→JPEG] or [Set up processing→HEIF], select [
 ] (Save).
 - Read the message and select [OK].
- If there are other images for processing, select [Yes].
- When using [Set up processing→JPEG] or [Set up processing→HEIF], select [
-
Select the image to display.
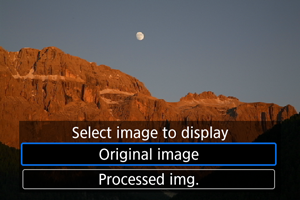
- Select [Original image] or [Processed img.].
- Your selected image is displayed.
Magnified View
You can magnify images displayed for [Set up processing→JPEG] or [Set up processing→HEIF] by pressing the zoom lever on the ![]() side on the displayed screen. With
side on the displayed screen. With ![]() , you can scroll around the magnified image.
, you can scroll around the magnified image.
Press the zoom lever on the ![]() side to exit the magnified view.
side to exit the magnified view.
Processing Images with Specified Aspect Ratios
JPEG or HEIF images at the specified aspect ratio are created when you process RAW images shot with [![]() :
: ![]() Cropping/aspect ratio] () set to [1:1 (aspect ratio)], [4:3 (aspect ratio)], or [16:9 (aspect ratio)].
Cropping/aspect ratio] () set to [1:1 (aspect ratio)], [4:3 (aspect ratio)], or [16:9 (aspect ratio)].
RAW Image Processing Options
-
 Brightness adjustment
You can adjust the image brightness up to ±1 stop in 1/3-stop increments.
-
You can select the white balance. Selecting [
 ] enables you to select [Auto: Ambience priority] or [Auto: White priority]. If you select [
 ], you can set the color temperature.
 -
You can select the Picture Style. You can adjust the sharpness, contrast, and other parameters.
[
 ], [
], [ ], [
], [ ], and [
 ] are not available when [Set up processing→HEIF] is set.
 -
You can adjust clarity in a range of –4 to +4.
Not available when [Set up processing→HEIF] is set.
-
You can specify Auto Lighting Optimizer details.
-
You can set the noise reduction processing for high ISO speeds. If the effect is difficult to discern, magnify the image ().
-
You can set the image quality when creating a JPEG or HEIF image.
-
You can select either sRGB or Adobe RGB. Since the camera screen is not compatible with Adobe RGB, the difference in the image will hardly be perceptible when either color space is set.
[
 ] is displayed when [Set up processing→HEIF] is set but is not an option for selection.
Caution
- Processing RAW images in the camera will not produce exactly the same results as processing RAW images with Digital Photo Professional (EOS software).
- If you perform [Brightness adjustment], noise, banding, etc. may be intensified with the effects of adjustment.