Selecting the AF Area
- AF Area
- Selecting the AF Area
- Tracking (Whole Area)
- Tracking with a Button
- Focus Mode
- Subject to Detect
- Eye Detection
- Manually Setting the AF Frames
- AF Shooting Tips
- Shooting Conditions That Make Focusing Difficult
- AF Range
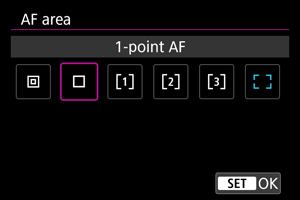
AF Area
Camera operation in the AF area is as follows.
 : Spot AF
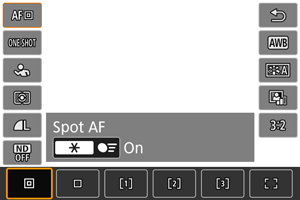
The camera focuses in a narrower area than 1-point AF.
 : 1-point AF
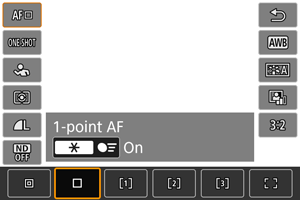
The camera focuses using a single AF point [].
 : Flexible Zone AF 1
By default, a square Zone AF frame is set.
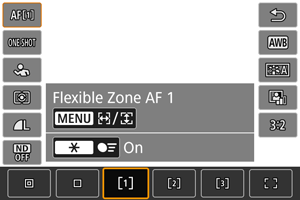
 : Flexible Zone AF 2
By default, a vertical rectangular Zone AF frame is set.
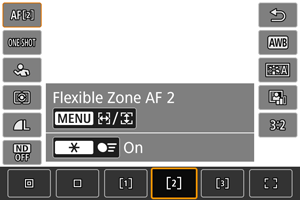
 : Flexible Zone AF 3
By default, a horizontal rectangular Zone AF frame is set.
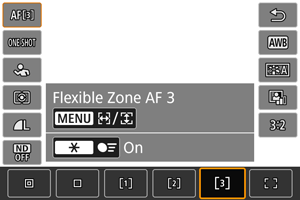
With Flexible Zone AF 1–3, you can freely set the size of the Zone AF frame ().
Uses auto selection AF in Zone AF frames to cover a larger area, which makes focusing easier than with 1-point AF and effective for moving subjects.
Focusing areas are determined not only based on the nearest subject but also based on a variety of other conditions such as faces (of people or animals), subject motion, and subject distance.
Pressing the shutter button halfway displays [] over AF points in focus.
 : Whole area AF
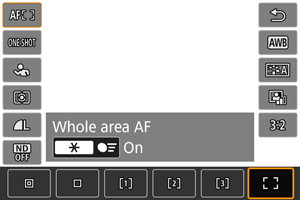
Uses auto selection AF in a whole-area AF frame to cover a larger area than Flexible Zone AF, which makes focusing easier than with 1-point AF/Flexible Zone AF and effective for moving subjects.
Focusing areas are determined not only based on the nearest subject but also based on a variety of other conditions such as faces (of people or animals), subject motion, and subject distance.
Pressing the shutter button halfway displays [] over AF points in focus.
Selecting the AF Area
You can select the AF area to suit the shooting conditions or subject.
Tracking (Whole Area)
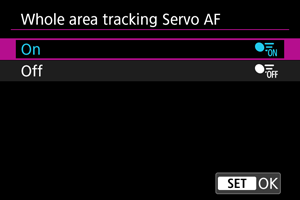
You can set whether to switch to whole-area subject tracking during Servo AF (while the shutter button is pressed halfway with [: AF operation] set to [Servo AF]).
-
Select an option.
-
On
The AF area switches to whole-area AF to track subjects across the entire screen area while the shutter button is pressed halfway.
-
Off
Subjects are tracked only within AF points when the shutter button is pressed halfway or completely.
-
Tracking with a Button
You can press a button assigned to [Start/stop whole area AF tracking] and [AF point selection] in [: Customize buttons] to track subjects with a tracking frame [
]. This example is based on assigning [Start/stop whole area AF tracking] to the
button and [AF point selection] to the
button ().
-
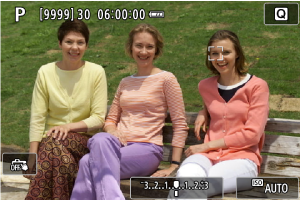
Check the tracking frame.
-
A tracking frame appears after you aim the camera at a subject.
Aim the AF point over the subject if you have selected an option other than [Whole area AF] in [
: AF area].
- With Flexible Zone AF, the specified Zone AF frame is displayed.
-
-
Press the
button.
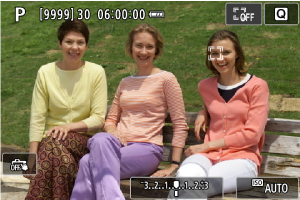
- The tracking frame changes to [
], which locks on to that subject for tracking and follows the subject within the screen if it moves. To cancel tracking, press the
button again.
- To choose a subject to focus on when multiple subjects can be detected, press the
button to change the tracking frame to [
], then use the
keys.
- Once tracking begins, the subject is tracked across the entire screen, regardless of the specified AF area.
- The tracking frame changes to [
-
Take the picture.
Note
- The position of AF areas and points when tracking stops during shooting standby corresponds to the position before tracking.
- When tracking stops while the shutter button is pressed halfway or completely, the AF area reverts to the state before tracking, but the AF point is centered in the tracking frame when tracking stops (during [Servo AF]).
Focus Mode
You can set how the camera focuses.
-
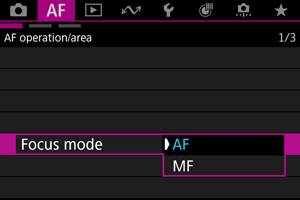
Select an option.
-
AF
The camera operates in autofocus mode.
-
MF
The camera operates in manual focus mode.
-
Note
- You can also switch between [AF] and [MF] when the shooting screen is displayed by pressing the AF MF key.
Fine-tuning the focus
You can adjust the focus after focusing with the One-Shot AF.
-
Focus on the subject.
-
Press the shutter halfway to focus on the subject and keep holding down the shutter button halfway.
-
-
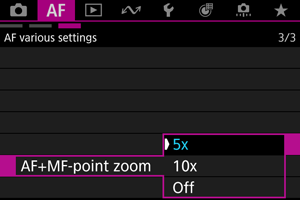
Adjust the focus.
-
Operate the
.
-
Selecting [5x] or [10x] in [
: AF+MF-point zoom] magnifies the screen by 5x or 10x when fine-tuning the focus.
-
Note
- To focus more accurately, try attaching the camera to a tripod to stabilize it.
- Press the shutter button halfway to fine-tune the focus to the optimal position.
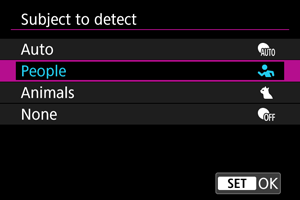
Subject to Detect
You can specify conditions for automatic selection of the main subject to track.
-
Auto
Automatically selects the main subject to track in the scene.
-
People
Prioritizes the faces or heads of people as the main subjects to track.
When a person's face or head cannot be detected, the camera attempts to detect and track their torso. If their torso cannot be detected, the camera may track other parts of their body.
-
Animals
Detects animals (dogs and cats) and people and prioritizes detection results for animals as the main subjects to track.
For animals, the camera attempts to detect faces or bodies, and a tracking frame is shown over any face detected.
When an animal's face or entire body cannot be detected, the camera may track part of their body.
-
None
The camera determines the main subject automatically from how you compose shots, without detecting subjects.
Tracking frames are not displayed.
Caution
-
The following kinds of subjects may not be detected. Also, the subject's left or right eye may not be prioritized correctly.
- Extremely small or large
- Too bright or dark
- Partially hidden
- Difficult to distinguish from the background
- Obscured by rain, snow, or dust clouds
- People's posture or the color or shape of what they are wearing may prevent detection. Frames may also appear for subjects other than people.
- The camera may not detect dogs or cats depending on the breed, color, shape, or posture. Frames may also appear for similar-looking animals or non-animal subjects.
- To avoid having a tracking frame displayed next to unintended subjects when you are shooting people or animals with the camera set to [Auto], change the setting to track your intended subjects.
Note
-
When pressing the shutter button halfway for subject selection, you can choose the following subjects. In scenes without relevant subjects, the camera tracks other objects regardless of the [
: Subject to detect] setting.
-
Auto, People
People, animals
(When the subject for detection is set to [People], animals can only be selected during Servo AF.)
-
Animals
Animals, people
-
- To restrict AF to your specified AF area, set [
: Whole area tracking Servo AF] to [Off] and [
: Subject to detect] to [None].
Manually selecting a subject for focus
-
Check the tracking frame.
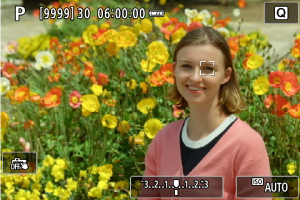
- Aim the camera at the subject. An AF point (or Zone AF frame) appears on the screen if you have set [
: AF area] to an option other than [Whole area AF]. In this case, aim the AF point over the subject.
- A tracking frame [
] appears over any subjects detected.
- Tracking frames [
] away from AF points are displayed in gray, except in some cases.
- Once the tracked subject is near an AF point, even if it is outside the AF point, the tracking frame turns white (distinguishing it as an active frame), which enables selection as the main subject.
- Aim the camera at the subject. An AF point (or Zone AF frame) appears on the screen if you have set [
-
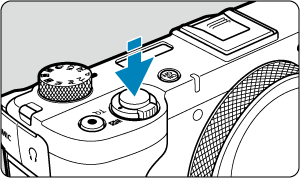
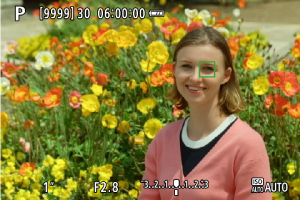
Focus and take the picture.
-
A tracking frame is displayed (in green for One-Shot AF or blue for Servo AF) when you press the shutter button halfway, and the camera beeps.
A yellow tracking frame indicates that the camera could not focus on the subjects.
-
Note
- Selecting a subject by touch with [
: AF area] set to [Whole area AF] changes the tracking frame to [
] and locks on to that subject for tracking across the entire screen.
- To release locked tracking, tap [
].
- Pressing the shutter button halfway when the AF point does not overlap the tracking frame [
] will focus using the active, white AF frame.
- For human subjects, the active [
] may cover only a part of the face, not the whole face.
- The size of tracking frames varies depending on the subject.
Caution
- If the subject's face is significantly out of focus, face detection will not be possible. Adjust the focus manually () so that the face can be detected, then perform AF.
- AF may not detect subjects or people's faces at the edges of the screen. Recompose the shot to center the subject or bring the subject closer to the center.
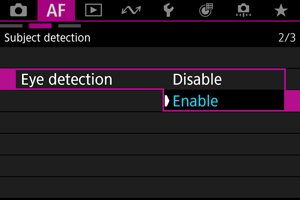
Eye Detection
You can shoot with the eyes of people or animals in focus.
-
Select an option.
-
Aim the camera at the subject.
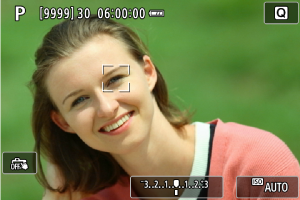
- An AF point is displayed around their eye.
- To choose an eye when [
: AF area] is set to [Whole area AF], tap the screen.
- If your selected eye is not detected, an eye to focus on is selected automatically.
- To choose an eye to focus on when [
] is displayed and [
: AF area] is set to [Whole area AF], you can use the
keys depending on the [
: Eye detection] setting.
-
Take the picture.
Caution
- Subject eyes may not be detected correctly, depending on the subject and shooting conditions.
- Eyes are not detected when [
: Subject to detect] is set to [None].
Manually Setting the AF Frames
You can manually set the AF point or Zone AF frame. Screens such as these are shown when set to Flexible Zone AF 1.
-
Check the AF point.
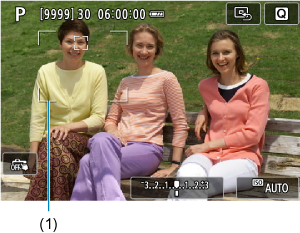
- The AF point (1) will appear.
-
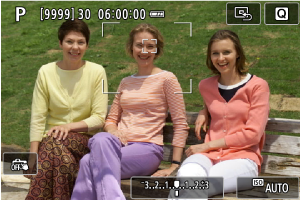
Move the AF point.
-
Focus by tapping a position on the screen to move the AF point there.
- To center the AF point, tap [
].
-
-
Focus and take the picture.
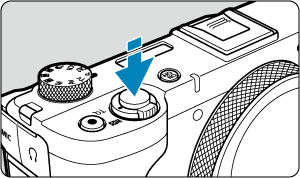
- Aim the AF point over the subject and press the shutter button halfway.
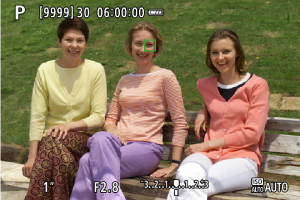
- Once the subject is in focus, the AF point changes color (to green for One-Shot AF or blue for Servo AF) and the camera beeps.
- If focus is not achieved, the AF point will turn yellow.
Caution
- The camera will keep moving the AF point [
] to track subjects when set to Flexible Zone AF and Servo AF, but under some shooting conditions (such as when subjects are small), it may not be possible to track the subject.
- Focusing may be difficult when using a peripheral AF point. In this case, select an AF point in the center.
AF Shooting Tips
- Even when focus is achieved, pressing the shutter button halfway will focus again.
- Image brightness may change before and after autofocusing.
- Depending on the subject and shooting conditions, it may take longer to focus, or the continuous shooting speed may decrease.
- If the light source changes as you shoot, the screen may flicker, and focusing may be difficult. In this case, restart the camera and resume shooting with AF under the light source you will use.
- If focusing is not possible with AF, focus manually ().
- For subjects at the edge of the screen that are slightly out of focus, try centering the subject (or AF point, or Zone AF frame) to bring them into focus, then recompose the shot before shooting.
Shooting Conditions That Make Focusing Difficult
- Subjects with low contrast, such as a blue sky or flat surfaces in solid colors, or other cases when highlight or shadow details are clipped.
- Subjects in low light.
- Stripes and other patterns where there is contrast only in the horizontal direction.
- Subjects with repetitive patterns (Example: Skyscraper windows, computer keyboards, etc.).
- Fine lines and subject outlines.
- Under light sources with constantly changing brightness, colors, or patterns.
- Night scenes or points of light.
- The image flickers under fluorescent or LED lighting.
- Extremely small subjects.
- Subjects at the edge of the screen.
- Strongly backlit or reflective subjects (Example: Car with a highly reflective surfaces, etc.).
- Near and distant subjects covered by an AF point (Example: Animal in a cage, etc.).
- Subjects that keep moving within the AF point and will not stay still due to camera shake or subject blur.
- Performing AF when the subject is very far out of focus.
- A special effect filter is used.
- Noise (dots of light, banding, etc.) appears on the screen during AF.
AF Range
The available autofocus range varies depending on the settings such as aspect ratio, movie recording size, and Movie digital IS.
