Movie Recording
- Select a Recording Mode
 /
/ Autoexposure Recording
 Shutter-Priority AE
 Aperture-Priority AE
- Scene Icons
- ISO Speed in []/[]/[]/[] Mode
 Manual Exposure Recording
- ISO Speed in [] Mode
- Shutter Speed
- Creative Filters
- HDR Movie Recording
- Still Photo Shooting
- Information Display (Movie Recording)
Select a Recording Mode
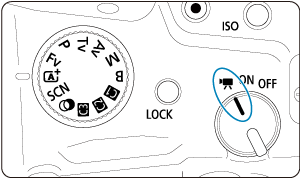
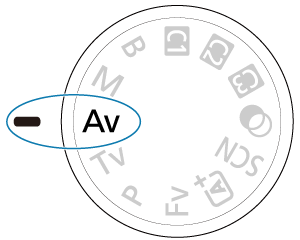
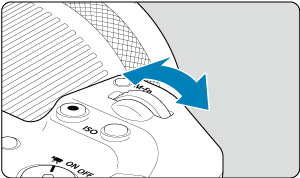
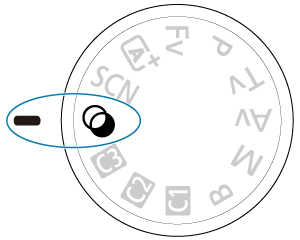
Set the power switch to ![]() , then use the Mode dial to select a recording mode.
, then use the Mode dial to select a recording mode.
| Mode Dial | Mode | Operation |
|---|---|---|
| The camera detects the type of scene and sets all settings accordingly. | ||
| Exposure is controlled automatically to suit the brightness. | ||
| You can manually set the shutter speed for movie recording. | ||
| You can manually set the aperture value for movie recording. | ||
| You can manually set the shutter speed, aperture value, and ISO speed for movie recording. | ||
| Exposure is controlled automatically to suit the brightness. | ||
| Customized | Operation follows your customized settings in [ |
|
| Movie recording with filter effects applied. | ||
| You can record high dynamic range movies that retain detail in highlights of high-contrast scenes. |
Note
-
You can also record movies with the power switch set to
 .
.In this case, operation corresponds to
 when the Mode dial is set to . When the Mode dial is set to an option other than , operation corresponds to
  .
.
 /
/ Autoexposure Recording
Exposure is controlled automatically to suit the brightness.
-
Set the recording mode to [
] or [].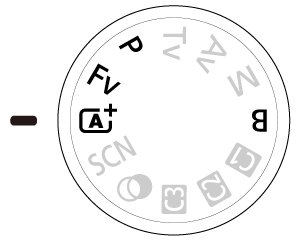
- Turn the Mode dial to , ,
 , or
, or  .
.
- Turn the Mode dial to
-
Focus on the subject.
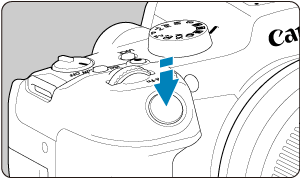
-
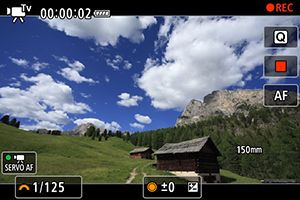
Record the movie.
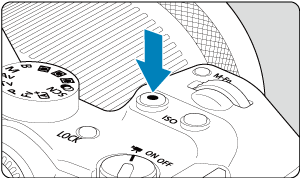
- Press the movie shooting button to start recording a movie. You can also start recording a movie by tapping [
 ] on the screen.
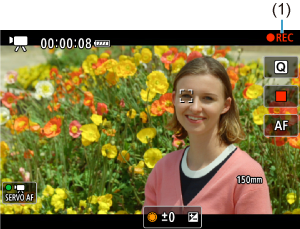
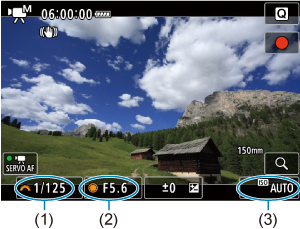
- While the movie is being recorded, the [
 REC] icon (1) will be displayed in the upper right of the screen.
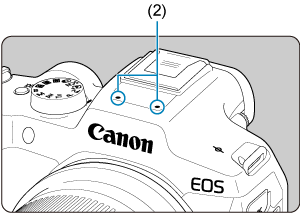
- Sound is recorded with the movie microphone (2).
- To stop recording the movie, press the movie shooting button again. You can also stop recording a movie by tapping [
 ] on the screen.
- Press the movie shooting button to start recording a movie. You can also start recording a movie by tapping [
 Shutter-Priority AE
[![]() ] recording mode enables you to set your preferred shutter speed for movies. ISO speed and aperture values are set automatically to suit the brightness and obtain standard exposure.
] recording mode enables you to set your preferred shutter speed for movies. ISO speed and aperture values are set automatically to suit the brightness and obtain standard exposure.
-
Set the recording mode to [
].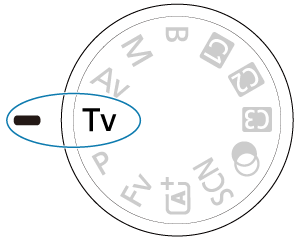
- Turn the Mode dial to
 .
.
- Turn the Mode dial to
-
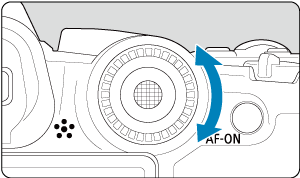
Set the shutter speed (1).
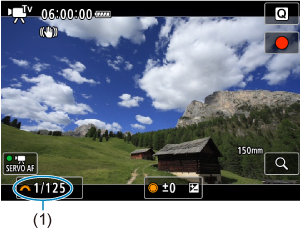
- Set it by looking at the screen as you turn the
 dial.
dial. - The available shutter speeds vary depending on the frame rate.
- Set it by looking at the screen as you turn the
-
Focus and record the movie.
- Same as steps 2 and 3 for Autoexposure Recording.
Caution
- Avoid adjusting shutter speed while recording movies, which will record changes in exposure.
- When recording a movie of a moving subject, a shutter speed of approx. 1/25 sec. to 1/125 sec. is recommended. The faster the shutter speed, the less smooth the subject's movement will look.
- If you change the shutter speed while recording under fluorescent or LED lighting, image flicker may be recorded.
 Aperture-Priority AE
[![]() ] recording mode enables you to set your preferred aperture value for movies. ISO speed and shutter speed are set automatically to suit the brightness and obtain standard exposure.
] recording mode enables you to set your preferred aperture value for movies. ISO speed and shutter speed are set automatically to suit the brightness and obtain standard exposure.
-
Set the recording mode to [
].
- Turn the Mode dial to
 .
.
- Turn the Mode dial to
-
Set the aperture value (1).
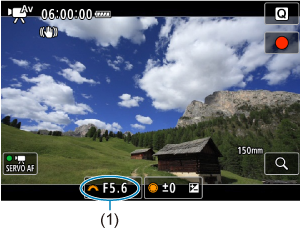
- Set it by looking at the screen as you turn the dial.
- Set it by looking at the screen as you turn the
-
Focus and record the movie.

- Same as steps 2 and 3 for Autoexposure Recording.
Caution
- Avoid adjusting the aperture value while recording movies, which will record changes in exposure caused by aperture adjustment.
Note
-
Notes for [
], [], [], and [] modes - You can lock the exposure (AE lock) by pressing the
 button (except in [] mode). After locking, AE lock can be canceled by pressing the button again.
 - Exposure compensation can be set in a range of up to ±3 stops by turning the
 dial (except in [] mode).
 - In [] and [] mode, the ISO speed, shutter speed, and aperture value are not recorded in movie Exif information.
- The camera is compatible with Speedlite functionality to activate the LED light automatically under low light when recording movies in [], [], [], and [] modes. For details, refer to the Instruction Manual of the EX series Speedlite equipped with an LED light.
Scene Icons
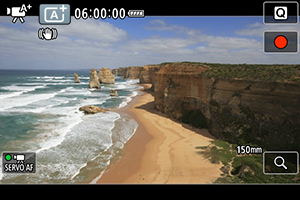
In [![]() ] recording mode, the camera detects the type of scene and sets all settings accordingly. The detected scene type is indicated in the upper left of the screen. For icon details, see Scene Icons.
] recording mode, the camera detects the type of scene and sets all settings accordingly. The detected scene type is indicated in the upper left of the screen. For icon details, see Scene Icons.
ISO Speed in []/[]/[]/[] Mode
ISO speed is set automatically. See ISO Speed in Movie Recording.
 Manual Exposure Recording
You can manually set the shutter speed, aperture value, and ISO speed for movie recording.
-
Set the recording mode to [
].
- Turn the Mode dial to
 .
.
- Turn the Mode dial to
-
Set the shutter speed, aperture value, and ISO speed.
-
Focus and record the movie.
- Same as steps 2 and 3 for Autoexposure Recording.
Caution
- During movie recording, avoid changing the shutter speed, aperture value, or ISO speed, which may record changes in the exposure or create more noise at high ISO speeds.
- When recording a movie of a moving subject, a shutter speed of approx. 1/25 sec. to 1/125 sec. is recommended. The faster the shutter speed, the less smooth the subject's movement will look.
- If you change the shutter speed while recording under fluorescent or LED lighting, image flicker may be recorded.
Note
-
Exposure compensation with ISO Auto can be set in a range of ±3 stops as follows.
- Tap the exposure level indicator
- Set [
 : Exposure comp.]
 - Turn the control ring while pressing the shutter button halfway
- When ISO Auto is set, you can press the button to lock the ISO speed. After locking during movie recording, ISO speed lock can be canceled by pressing the button again.
- If you press the button and recompose the shot, you can see the exposure level difference on the exposure level indicator () compared to when the button was pressed.
ISO Speed in [] Mode
You can set the ISO speed manually or select [![]() ] to set it automatically. For details on ISO speed, see ISO Speed in Movie Recording.
] to set it automatically. For details on ISO speed, see ISO Speed in Movie Recording.
Shutter Speed
Available shutter speeds in [![]() ] and [
] and [![]() ] mode vary depending on the frame rate you have set for your specified movie recording size.
] mode vary depending on the frame rate you have set for your specified movie recording size.
| Frame Rate | Shutter Speed (Sec.) | |
|---|---|---|
| Normal Movie Recording | High Frame Rate Movie Recording | |
| – | 1/4000–1/125 | |
| 1/4000–1/100 | ||
| 1/4000–1/8 | – | |
Creative Filters
In ![]() (creative filters) mode, you can record movies with one of five filter effects applied: Dream, Old movies, Memory, Dramatic B&W, or Miniature effect movies.
(creative filters) mode, you can record movies with one of five filter effects applied: Dream, Old movies, Memory, Dramatic B&W, or Miniature effect movies.
Recording size can be set to ![]()
![]() /
/![]()
![]() (NTSC) or
(NTSC) or ![]()
![]() (PAL).
(PAL).
-
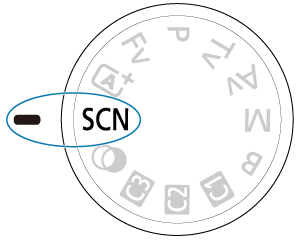
Set the Mode dial to
 .
.
-
Press the
 button.
 -
Select [
 ].
].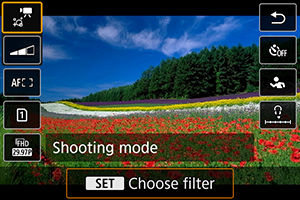
- Press the

 keys to select the setting item, then press the button.
- Press the
-
Select a filter effect.

-
Adjust the filter effect level.
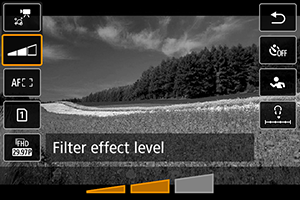
- Press the button and select
 .
. - Turn the dial to select a filter effect level, then press the button.
- When setting up miniature effect movies, select the playback speed.
- Press the
-
Record the movie.
Caution
- A magnified view is not available.
- No histogram is displayed.
- Subjects such as the sky or white walls may not be rendered with smooth gradation and may have noise or irregular exposure or colors.
Creative Filter Characteristics
-
Dream
Applies a soft, dreamy, otherworldly appearance. Gives the movie a soft look overall, blurring the periphery of the screen. You can adjust the blurry areas along the screen edges.
-
 Old movies
Creates an atmosphere like an old film by adding wavering, scratches, and flickering effects to the image. The top and bottom of the screen are masked in black. You can modify the wavering and scratch effects by adjusting the filter effect.
-
 Memory
Creates the atmosphere of a distant memory. Gives the movie a soft look overall, reducing brightness of the periphery of the screen. You can modify the overall saturation and the dark areas along the screen edges by adjusting the filter effect.
-
 Dramatic B&W
Creates an atmosphere of dramatic realism with high-contrast black and white. You can adjust the graininess and black-and-white effect.
-
 Miniature effect movies
You can record movies with a miniature (diorama) effect. Select the playback speed and record.
Recording under the default setting will keep the center in sharp focus.
To move the area that looks sharp (the scene frame), see “Adjusting the Miniature Effect” (). 1-point AF is used as the AF area. Recording with the AF point and scene frame aligned is recommended. The AF point and scene frame are hidden during recording.
In step 5, set the playback speed to [5x], [10x], or [20x] before recording.
Speed and playback time (for a 1-minute movie)
| Speed | Playback Time |
|---|---|
| 5x | Approx. 12 sec. |
| 10x | Approx. 6 sec. |
| 20x | Approx. 3 sec. |
HDR Movie Recording
You can record high dynamic range movies that retain detail in highlights of high-contrast scenes.
Note
- Movies are recorded at


 (NTSC) or
  (PAL).
-
Set the Mode dial to
 .
.
-
Record an HDR movie.
- Record the movie in the same way as normal movie recording.
- For details on file sizes and the recording time available, see Movie recording.
Caution
- Since multiple frames are merged to create an HDR movie, certain parts of the movie may look distorted. This is more noticeable in handheld recording affected by camera shake, so consider using a tripod. Note that even if a tripod is used for recording, afterimages or noise may become more noticeable, compared to normal playback, when the HDR movie is played back frame-by-frame or in slow motion.
- Image color and brightness may change significantly for a moment if you change settings for HDR movie recording. Also, the movie will not be updated for a moment, and the frame stops momentarily. Be aware of this when recording movies to external devices via HDMI.
Still Photo Shooting
Still photo shooting is not supported in movie recording mode. To shoot still photos, stop recording and change the [Shooting mode] setting to still photos first.
Information Display (Movie Recording)
For details on the icons on the movie recording screen, see Information Display.