Основни операции
- Как да държите фотоапарата
- Лост на вариото
- Бутон за запис на видео (отгоре/отпред)
- Спусък
 Главен селектор
 /
/ Селектор за бърз контрол 1/четирипосочен бутон
 Селектор за бърз контрол 2
 Мултифункционален контролер
 Бутон за заключване на функции
 Контролен пръстен
 Бутон INFO
 /
/ Бутон 1/стартиране на AF
 /
/ Бутон 2/увеличаване/намаляване
 /
/ Бутон 3/AE фиксиране
 /
/ /
/ Бутон 4/многофункционален бутон/изпращане на изображения към смартфон
 /
/ /
/ Бутон 5/баланс на бялото/превключване на видео-снимки при възпроизвеждане
 /
/ /
/ Бутон 6/поточно предаване в реално време/търсене на изображение
 /
/ /
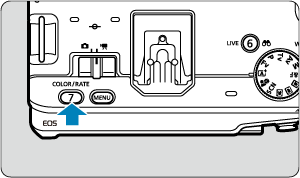
/ Бутон 7/цветови режим/задаване на категория
Как да държите фотоапарата
-
Снимане чрез екрана
Когато снимате, можете да наклоните екрана, за да го настроите. За подробности вижте Използване на екрана.
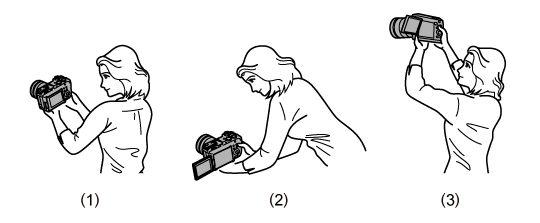
(1) Нормален ъгъл
(2) От ниска позиция
(3) От висока позиция
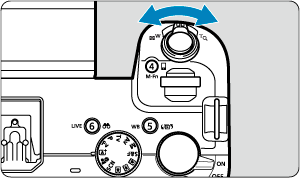
Лост на вариото
Можете да управлявате вариото чрез лоста на вариото, когато използвате обектив с моторизирано варио. Можете да управлявате също и операциите, посочени по-долу.
- Цифрово увеличаване ()
- Превключване между панелите на менюто
- Увеличаване/намаляване на изображения по време на възпроизвеждане
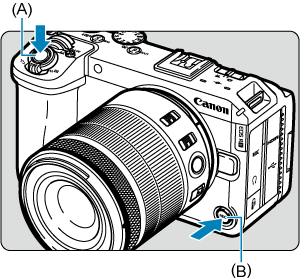
Бутон за запис на видео (отгоре/отпред)
Натиснете бутона за запис на видео отгоре (A) или отпред (B), за да стартирате записа на видео. Натиснете бутона отново, за да прекратите записа.
Забележка
- Бутонът за запис на видео отгоре функционира като спусък при заснемане на снимки.
Спусък
Спусъкът работи с две степени. Можете да натиснете спусъка наполовина. След това можете да натиснете спусъка докрай.
Натискане наполовина
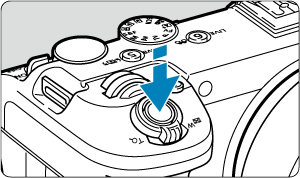
Натискането на спусъка наполовина активира функцията за автоматично фокусиране и функцията за автоматично измерване на експонацията, която определя скоростта на затвора и отвора на диафрагмата.
Настройката на експонацията (скорост на затвора и отвор на диафрагмата) се извежда на дисплея за около 8 s (таймер за показания/ ).
).
Натискане докрай
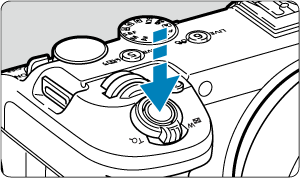
Така освобождавате затвора и заснемате изображението.
-
Предотвратяване на заклащането на фотоапарата
Движението на фотоапарата в момента на експонирането се нарича "заклащане" на фотоапарата. То може да причини размазване на изображението. За да предотвратите заклащането на фотоапарата, обърнете внимание на следното:
- Дръжте фотоапарата неподвижно, както е показано в Как да държите фотоапарата.
- Натиснете спусъка наполовина, за да фокусирате автоматично, и след това бавно натиснете спусъка докрай.
Забележка
- Фотоапаратът ще заснеме снимката с известно закъснение, ако натиснете спусъка докрай, без да го натискате наполовина, или ако натиснете спусъка наполовина и веднага след това го натиснете докрай.
- Дори когато е изведено менюто или сте в режим на възпроизвеждане, можете да върнете фотоапарата към готовност за снимане, като натиснете спусъка наполовина.
 Главен селектор
-
(1) Завъртане на селектора
след натискане на бутон.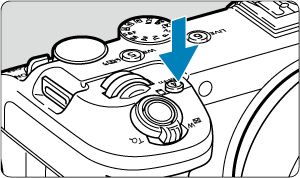
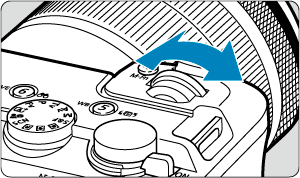
Натиснете бутон, като например
 , и след това завъртете селектора .
Ако натиснете спусъка наполовина, фотоапаратът се връща към готовност за снимане.
- Използва се за задаване на баланс на бялото, метод на снимане, стил на снимката и др.
-
(2) Само завъртане на селектора
.Наблюдавайте екрана, докато въртите селектора
.- Използвайте този селектор, за да зададете скорост на затвора, отвор на диафрагмата и др.
 /
/ Селектор за бърз контрол 1/четирипосочен бутон
-
(1) Завъртане на селектора
след натискане на бутон.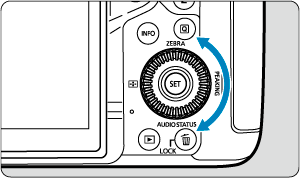
Натиснете бутон, като например
, и след това завъртете селектора .Ако натиснете спусъка наполовина, фотоапаратът се връща към готовност за снимане.
- Използва се за задаване на режим за измерване на осветеността, AF функция, ISO чувствителност, AF зона и др.
-
(2) Само завъртане на селектора
.Наблюдавайте екрана, докато въртите селектора
.- Използва се за операции, като например задаване на компенсация на експонацията и отвор на диафрагмата при ръчна експонация.
-
(3) Натискане на стрелките


 след натискане на бутон.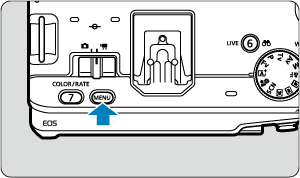
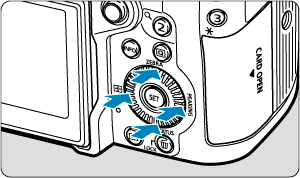
Натиснете бутона
 или
или  , след това натиснете или , за да зададете настройка от менюто или екрана за бърз контрол.
 Селектор за бърз контрол 2
-
(1) Завъртане на селектора
след натискане на бутон.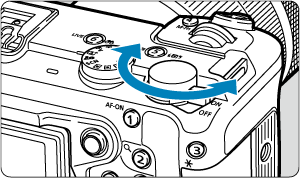
Натиснете бутон, като например
, и след това завъртете селектора .Ако натиснете спусъка наполовина, фотоапаратът се връща към готовност за снимане.
- Използва се за операции, като например превключване между основните панели в екрана на менюто.
-
(2) Само завъртане на селектора
.Наблюдавайте екрана, докато въртите селектора
.- Използва се за операции, като например задаване на ISO светлочувствителност.
 Мултифункционален контролер
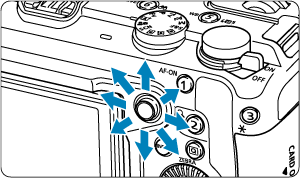
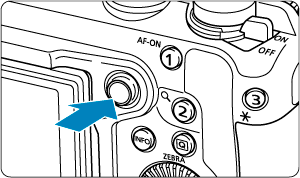
е контролер с осем бутона за посока и един централен бутон.
За да го използвате, поставете палеца си върху него и го натиснете в която и да е от посоките. Имайте предвид, че контролерът може да не работи правилно, ако се натиска странично.
-
Примери за използване на мултифункционалния контролер.
- Преместване на AF точката/рамката за увеличаване при заснемане на снимки или запис на видео
- Корекция на баланса на бялото
- Преместване на позицията на увеличената зона по време на възпроизвеждане
- Бърз контрол
- Избор или настройване на елементи от менюто
 Бутон за заключване на функции
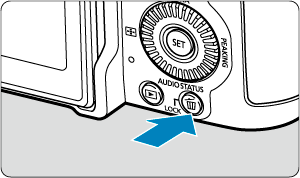
При конфигурирана настройка [ : Multi function lock/: Заключване на функции] () можете да натиснете бутона , за да предотвратите неволна промяна на настройките чрез докосване на главния селектор, селектора за бърз контрол, мултифункционалния контролер, контролния пръстен или сензорния дисплей.
 Контролен пръстен
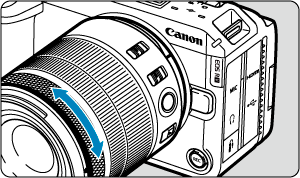
По подразбиране компенсация на експонацията може да бъде зададена в режимите от „Творческа зона“ чрез завъртане на контролния пръстен на използвания RF обектив или монтажен адаптер за обектив, докато натискате спусъка наполовина. Можете също да присъедините различна функция към контролния пръстен, като конфигурирате [] в [: Customize dials/control ring/: Персонализиране на селектори/контролен пръстен] ().
 Бутон INFO
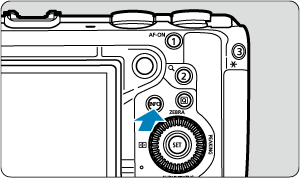
Всяко натискане на бутона променя показваната информация.
 /
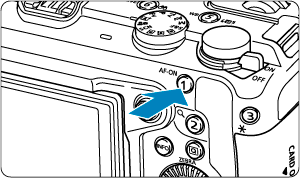
/ Бутон 1/стартиране на AF
Натиснете по време на запис на видео, за да активирате автофокуса в режимите от „Творческа зона“ за видео.
В режимите от „Творческа зона“ за снимки натискането на този бутон е еквивалентно на натискане на спусъка наполовина.
 /
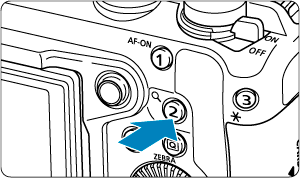
/ Бутон 2/увеличаване/намаляване
По време на снимане можете да проверите фокуса, като увеличите изображението на екрана приблиз. 5 или 10 пъти. По време на възпроизвеждане можете да увеличите заснетите изображения.
 /
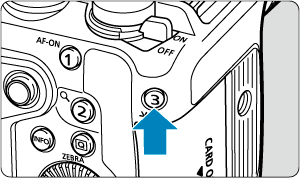
/ Бутон 3/AE фиксиране
Можете да фиксирате експонацията (AE фиксиране) по време на снимане.
 //
// Бутон 4/многофункционален бутон/изпращане на изображения към смартфон
Натиснете по време на снимане, за да изведете на екрана настройките, които могат да се конфигурират чрез селекторите. Натиснете по време на възпроизвеждане, за да отворите екрана с настройки за изпращане на изображения към смартфон ().
Настройки, които можете да конфигурирате заедно със селекторите
- Баланс на бялото ()
- Метод на снимане* ()
- Цветови режим ()
- Режим за измерване на осветеността* ()
- AF функция* ()
- ISO светлочувствителност* ()
- AF зона ()
Налично само при заснемане на снимки. ISO чувствителност обаче може да се задава в режим Запис на видео с ръчна експонация.
Как се използва със селекторите
- Натиснете бутона , за да покажете настройките, които можете да конфигурирате чрез селекторите (
 ). Натиснете бутона отново неколкократно (или завъртете селектора ), за да изберете настройка за конфигуриране.
 - За да настроите горния ред от елементи за настройване, завъртете селектора .
- За да настроите долния ред от елементи за настройване, завъртете селектора .
Внимание
- Разширените настройки за баланс на бялото, като напр. цветова температура, не могат да бъдат конфигурирани по този начин.
Забележка
- Само текущият цветови режим може да се регулира по този начин.
- За да зададете AF зоната, можете също да натиснете бутона
 и след това бутона .
 /
/ /
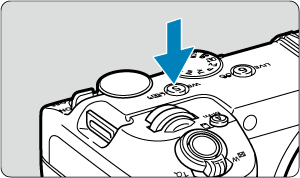
/ Бутон 5/баланс на бялото/превключване на видео-снимки при възпроизвеждане
Натиснете по време на снимане, за да изведете екрана за избор на баланс на бялото (). Натиснете по време на възпроизвеждане, за да превключвате между възпроизвеждане на видео и снимки.
 /
/ /
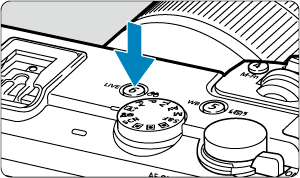
/ Бутон 6/поточно предаване в реално време/търсене на изображение
Натиснете по време на запис на видео, за да отворите екрана с настройки за поточно предаване (). Натиснете по време на възпроизвеждане, за да покажете изображения, намерени според текущите условия за търсене.
 /
/ /
/ Бутон 7/цветови режим/задаване на категория
Натиснете по време на снимане, за да изведете екрана за избор на цветови режим (). Натиснете по време на възпроизвеждане, за да категоризирате изображението.