Basic Communication Settings
- Checking the Type of Access Point
- Connecting via WPS (PBC Mode)
- Connecting via WPS (PIN Mode)
- Connecting Manually to Detected Networks
- Connecting Manually by Specifying Networks
- Connecting in Camera Access Point Mode
- Setting the IP Address
Checking the Type of Access Point
When connecting via an access point, check whether the access point supports WPS*, which simplifies connections between Wi-Fi devices.
If you are unsure about WPS compatibility, refer to the access point user manual or other documentation.
Stands for Wi-Fi Protected Setup.
-
When WPS is supported
Two connection methods are available, as follows. You can connect more easily via WPS in PBC mode.
-
When WPS is not supported
Access point encryption
See Authentication and data encryption methods for details on types of authentication and encryption.
Caution
- Connections may not be possible when access point stealth functions are enabled. Deactivate stealth functions.
- Ask any network administrator in charge of networks you will join for setting details.
Connecting via WPS (PBC Mode)
Instructions in this section are continued from Checking the Type of Access Point.
This is a connection method used with access points compatible with WPS. In pushbutton connection mode (PBC mode), the camera and access point can be connected simply by pressing the WPS button on the access point.
- Connecting may be more difficult if multiple access points are active nearby. If so, try to connect with [WPS (PIN mode)].
- Check the position of the WPS button on the access point in advance.
- It may take approx. 1 min. to establish a connection.
-
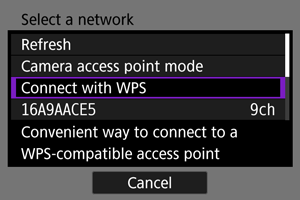
Select [Connect with WPS] on the [Select a network] screen.

-
Select [WPS (PBC mode)].
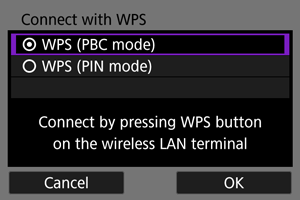
- Select [OK].
-
Connect to the access point.
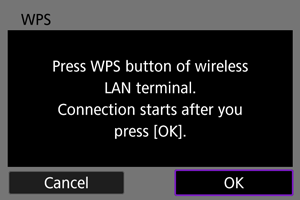
- Press the access point's WPS button. For details on where the button is and how long to press it, refer to the access point user manual.
- Select [OK] to initiate connection with the access point.
- The following screen is displayed once the camera is connected to the access point.
-
Set the IP address.

- Go to Setting the IP Address.
Connecting via WPS (PIN Mode)
Instructions in this section are continued from Checking the Type of Access Point.
This is a connection method used with access points compatible with WPS. In PIN code connection mode (PIN mode), an 8-digit identification number indicated on the camera is entered on the access point to establish a connection.
- Even if multiple access points are active nearby, connecting by using this shared identification number is relatively reliable.
- It may take approx. 1 min. to establish a connection.
-
Select [Connect with WPS] on the [Select a network] screen.
-
Select [WPS (PIN mode)].
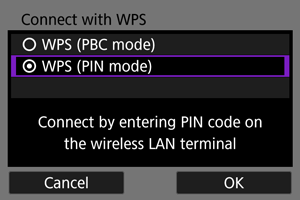
- Select [OK].
-
Enter the PIN code.
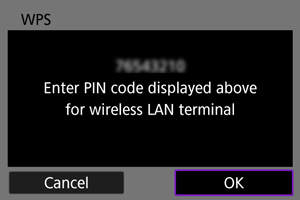
- On the access point, enter the 8-digit PIN code displayed on the camera screen.
- For instructions on entering PIN codes on the access point, refer to the access point user manual.
- After entering the PIN code, select [OK] on the camera.
-
Connect to the access point.
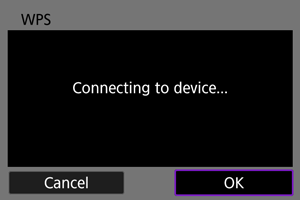
- Select [OK] to initiate connection with the access point.
- The following screen is displayed once the camera is connected to the access point.
-
Set the IP address.

- Go to Setting the IP Address.
Connecting Manually to Detected Networks
Instructions in this section are continued from Checking the Type of Access Point.
Connect to an access point by selecting its SSID (or ESS-ID) in a list of active access points nearby.
Selecting the access point
-
Select an access point on the [Select a network] screen.
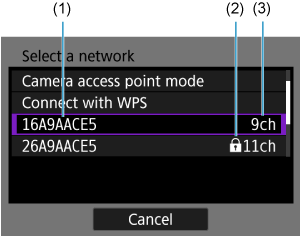
- (1) SSID
- (2) Security icon (only for encrypted access points)
- (3) Channel used
- Use the

 keys to select the access point to connect to in the list of access points.
Note
-
[Refresh]
- To display [Refresh], scroll down the screen in step 1.
- Select [Refresh] to search for access points again.
Entering the access point encryption key
- Enter the encryption key (password) set on the access point. For details on the encryption key that has been set, refer to the access point's user manual.
- If the [IP address set.] screen is displayed, go to Setting the IP Address.
-
Enter the encryption key.

-
Set the IP address.

- Go to Setting the IP Address.
Connecting Manually by Specifying Networks
Instructions in this section are continued from Checking the Type of Access Point.
Connect to an access point by entering its SSID (or ESS-ID).
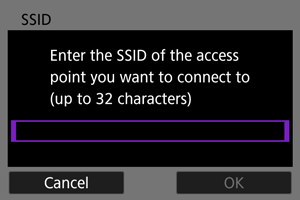
Entering the SSID
-
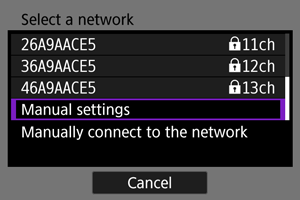
Select [Manual settings] on the [Select a network] screen.
-
Enter the SSID (network name).
Setting the access point authentication method
-
Select the type of security.
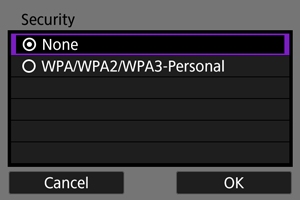
- Select an option and then [OK] to go to the next screen.
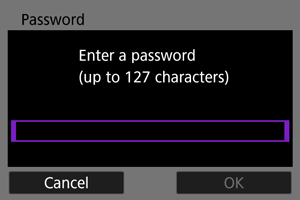
Entering the access point encryption key
- Enter the encryption key (password) set on the access point. For details on the encryption key that has been set, refer to the access point's user manual.
- If the [IP address set.] screen is displayed, go to Setting the IP Address.
-
Enter the encryption key.
-
Set the IP address.

- Go to Setting the IP Address.
Connecting in Camera Access Point Mode
Camera access point mode is a connection method for directly connecting the camera and other devices via Wi-Fi without using an access point. Two connection methods are available, as follows.
Connecting with Easy connection
Network settings for camera access point mode are configured automatically.
- For instructions on using the devices you will connect to, refer to the device instruction manual.
-
Select [Camera access point mode] on the [Select a network] screen.
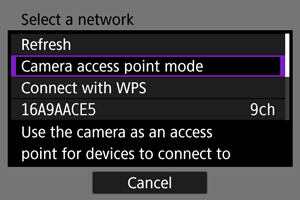
-
Select [Easy connection].
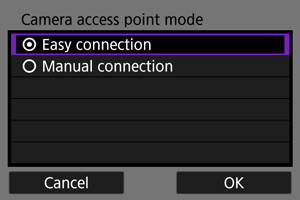
- Select [OK].
-
Use the other device to connect to the camera.

- (1) SSID (network name)
- (2) Encryption key (password)
- In other device's Wi-Fi settings, select the SSID (network name) shown on the camera screen, then enter the password.
-
Complete the connection settings based on the device to connect to.
Connecting with Manual connection
Network settings for camera access point mode are configured manually. Set [SSID], [Channel setting], and [Encryption settings] on each screen displayed.
-
Select [Manual connection].
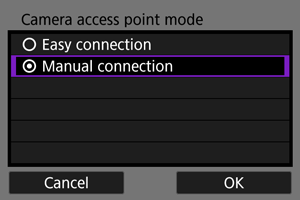
- Select [OK].
-
Enter the SSID (network name).

-
Select a channel setting option.
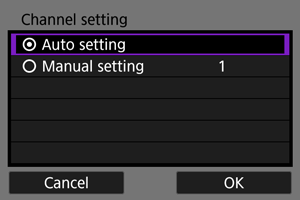
- To specify the settings manually, select [Manual setting], then turn the
 dial.
dial. - Select [OK] to go to the next screen.
- To specify the settings manually, select [Manual setting], then turn the
-
Select the type of security.
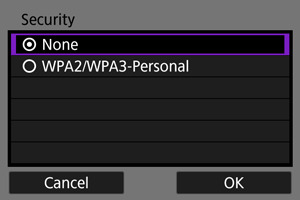
- Select [OK] to go to the next screen.
- If you have selected [None], the [IP address setting (IPv4)] screen is displayed ().
- The same type of security must be set on both the other device and the camera. See Authentication and data encryption methods for details on types of authentication and encryption.
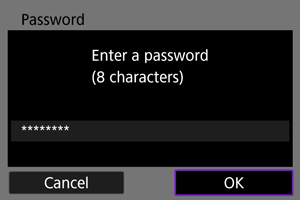
-
Enter the password.
-
Select [Auto setting].

-
Use the other device to connect to the camera.

- (1) SSID (network name)
- (2) Encryption key (password)
-
Complete connection settings for the communication function.
Setting the IP Address
Select a method of setting the IP address, and then set the IP address on the camera. When IPv6 is used, the camera only connects via IPv6. IPv4 connections are disabled.
Setting the IP address automatically
Set up the IP address settings automatically.
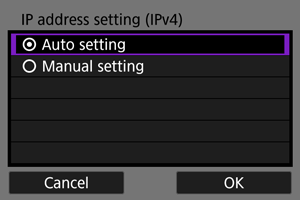
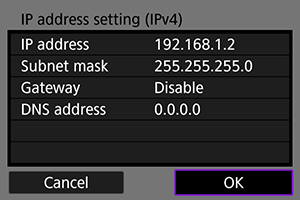
Setting the IP address manually
Set up the IP address settings manually. Note that the items displayed vary depending on the communication function.
-
Select [Manual setting].

- Select [OK] to go to the next screen.
-
Select an option to configure.

- The items displayed vary depending on the communication function.
- Select an option to access the screen for numerical input.
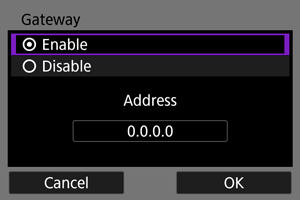
-
To use a gateway, select [Enable], then select [Address].
-
Enter the number.
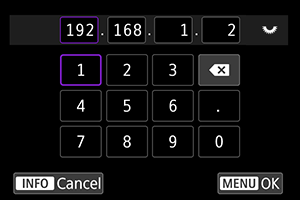
- Turn the dial to switch to other input fields at the top of the screen, and press the

 keys to select numbers to enter. Press
  to enter the selected number.
 - To delete the last number entered, select the [
 ] button.
 - To set the entered numbers and return to the screen for step 2, press the
 button.
- Turn the
-
Select [OK].
- When you have completed setting the necessary items, select [OK]. The next screen is displayed.
- If you are unsure what to enter, see Checking Network Settings or ask the network administrator or other person in charge of the network.
-
Select an IPv6 option.
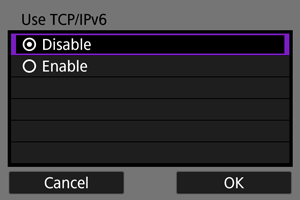
- Select an option and then [OK] to go to the next screen.
- Select [Enable] to use IPv6.
-
Complete the connection settings based on the device to connect to.