Using a Battery Grip
- Attaching Batteries
- Using a Household Power Outlet
- Button and Dial Operations
- Using a USB Power Adapter to Charge/Power the Camera
Equipped with buttons and dials for vertical shooting, Battery Grip BG-R10 is an optional camera accessory that can power the camera with two batteries.
-
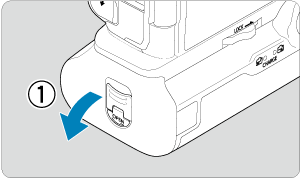
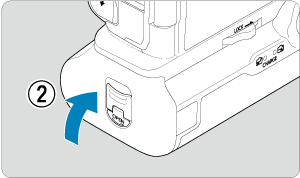
Remove the contact covers.
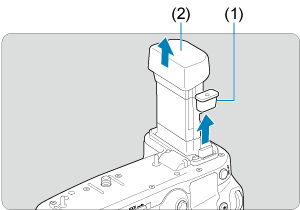
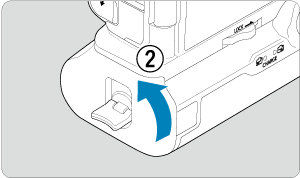
- Remove contact covers (1) and (2) on the battery grip.
- Attach the battery grip contact cover (1) to (2) to store them.
-
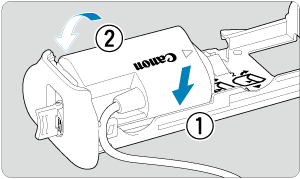
Remove the battery compartment cover.
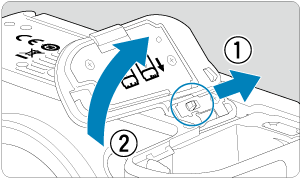
- Turn off the camera before removing the battery.
- Remove the battery compartment cover from the camera.
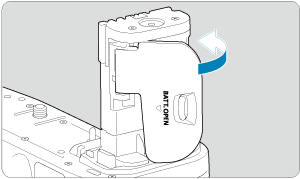
- Attach the cover to the battery grip.
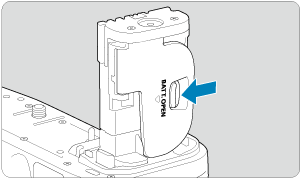
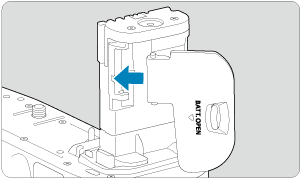
- To remove the cover, slide the lever to release it, following the attachment procedure in reverse.
-
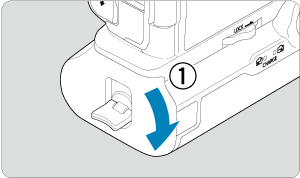
Attach and lock the battery grip.
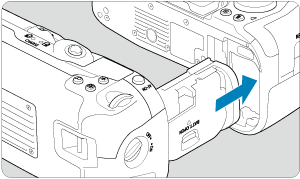
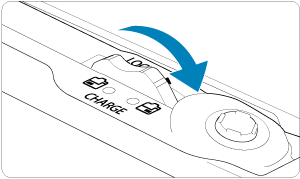
- Insert the battery grip in the camera and turn the release dial to lock it in place.
-
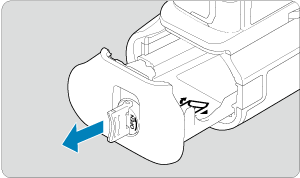
Remove the battery magazine.
Caution
- When reattaching the battery compartment cover to the camera, attach it opened to at least 90°.
- Do not touch the camera or battery grip contacts.
Attaching Batteries
-
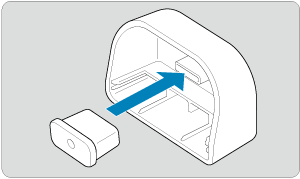
Attach the batteries.
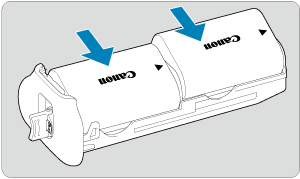
- Insert the batteries as shown.
- When only one battery is used, it can be inserted in either position.
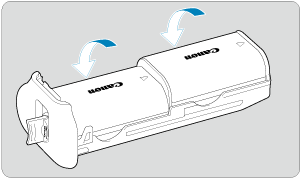
- To secure the batteries, push in the direction of the arrows until they click into place.
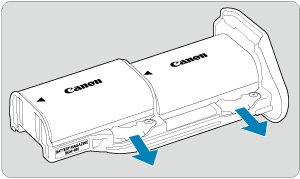
- To remove the batteries, press the battery magazine lever in the direction of the arrow.
-
Attach the battery magazine.
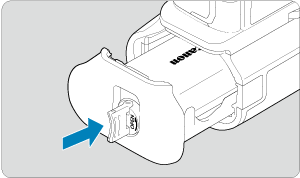
- Insert the battery magazine all the way in to secure it.
Caution
- When attaching batteries, make sure the electrical contacts are clean. Wipe off any dirt on the contacts with a soft cloth.
- Attach batteries after attaching the battery grip to the camera. If the battery grip is attached to the camera with batteries already attached, it may prevent correct display of battery check results.
- Before removing the battery grip, turn the camera off and remove the batteries.
- Reattach the protective covers for the camera and battery grip contacts after removing the battery grip. If the battery grip will not be used for some time, remove the batteries.
- If a battery communication error message is displayed when a battery grip is attached, follow the instructions in the message. If the camera loses power, reinstall the battery magazine and restart the camera.
Using a Household Power Outlet
-
Attach the DC coupler.
- Attach DC Coupler DR-E6 (sold separately) the same way as the batteries.
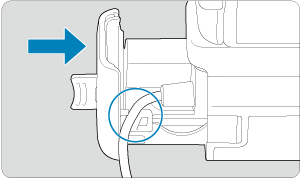
- Pass the DC coupler cord through the battery magazine cord groove.
- Insert the battery magazine all the way in to secure it.
-
Attach the battery magazine.
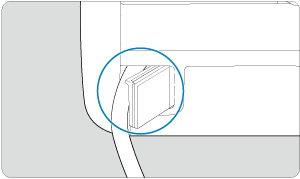
- Guide the end of the cord out of the cord hole.
-
Connect the DC coupler to the AC adapter.

- Fully insert the DC coupler plug into the socket of AC Adapter AC-E6N (sold separately).
-
Connect the power cord.

- Connect the power cord to the AC adapter and insert the power plug into a power outlet.
Caution
- While the camera is on, do not connect or disconnect the power cord or socket, and do not remove the battery magazine.
- Avoid getting the DC coupler cord caught between the battery grip and battery magazine.
Button and Dial Operations
- To use the buttons and dials, turn the vertical-grip on/off switch (4) to ON.
- The buttons and dials are used the same way as corresponding buttons and dials on the camera.

- (1) Shutter button
- (2)
 Multi-function button
 - (3)
 Main dial
 - (4) Vertical-grip On/Off switch
- (5)
 Multi-controller
- (6)
 Magnify/Reduce button
 - (7)
 AF point selection button
 - (8)
 AE lock/FE lock button
 - (9)
 AF start button
 - (10)
 Quick control dial 2
Using a USB Power Adapter to Charge/Power the Camera
Using USB Power Adapter PD-E1, you can charge Battery Pack LP-E6P, LP-E6NH or LP-E6N without removing it from the battery grip. The camera can also be powered.
Caution
- LP-E6P, LP-E6NH and LP-E6N can be charged together.
- Otherwise, you can charge a single LP-E6P, LP-E6NH or LP-E6N battery at a time.
- LP-E6 cannot be charged this way. If LP-E6 and a rechargeable battery are both attached, neither will be charged.
- The battery is not charged if LP-E6P, LP-E6NH or LP-E6N is loaded when DC Coupler DR-E6 is connected.
- Charging stops if you operate the camera.
- When batteries are depleted, the adapter charges them. In this case, power is not supplied to the camera.
Charging
-
Connect the USB power adapter.
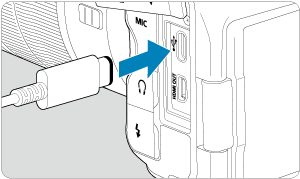
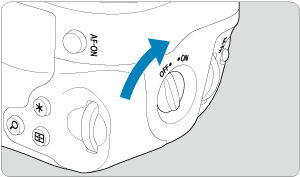
- With the camera power switch set to
 , insert the USB power adapter plug fully into the camera's digital terminal.
- With the camera power switch set to
-
Charge the battery.
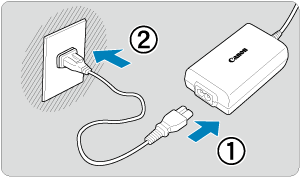

- Connect the power cord to the USB power adapter and plug the other end into a power outlet.
- Charging begins, and the charge lamp lights up.
- [
 ] is displayed on the LCD panel.
 - When charging is finished, the charge lamp turns off.
Supplying power
To power the camera without charging batteries, set the camera power switch to ![]() .
.
[![]() ] is displayed on the LCD panel and screen while the camera is powered.
] is displayed on the LCD panel and screen while the camera is powered.
To change from powering the camera to charging, set the camera power switch to ![]() .
.
Caution
- To protect the battery pack and keep it in optimal condition, do not charge it continuously for more than 24 hours.
- If the charging lamp fails to light up or a problem occurs during charging (shown by the charge lamp blinking), unplug the power cord, reinsert the battery, and wait a few minutes before plugging it in again. If the problem persists, take the camera to the nearest Canon Service Center.
- The charging time required and the amount charged vary depending on ambient temperature and remaining capacity.
- For safety, charging in low temperatures takes longer.
- The remaining battery level may decline when power is supplied to the camera. To avoid running out of battery power, use a fully charged battery when shooting at regular intervals.