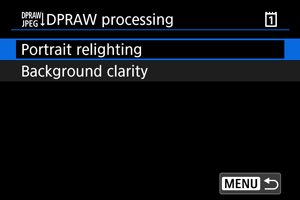
DPRAW Processing
When you use the camera in RAW image processing () for images captured with Dual Pixel RAW enabled (), dual pixel data and detailed face information can be used in image correction.
Portrait Relighting
Oblique or insufficient lighting on human subjects can be corrected by applying a virtual light source.
Unlike the Auto Lighting Optimizer feature that adjusts lighting in the face area automatically, portrait relighting is for manual adjustment of lighting. You can apply correction to the face as well as the body and other areas.
-
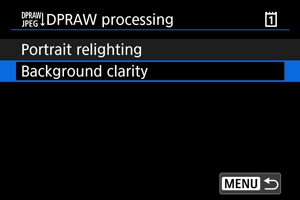
Select [
 : DPRAW processing].
-
Select [Portrait relighting].
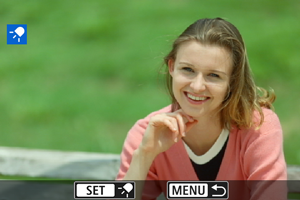
- Turn the
 dial to select an image to adjust, then press
  .
.
- Turn the
-
Adjust the image.
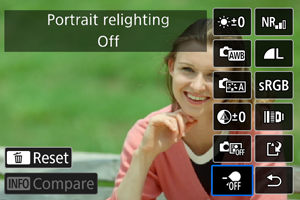
- Select [
 ], then press .
-
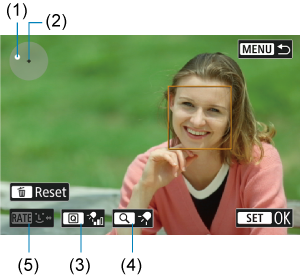
Adjust the image, then press
.(1) Use
 to position the light source.
(2) represents the position of the selected face. By adjusting (1) relative to (2), you can adjust the direction of lighting. Overlapping positions of (1) and (2) place the light source directly in front of the face.
You can also drag to adjust the direction of lighting.
(3) To set the light intensity (
 low /
low /  standard /
  high), press the
  button.
(4) To set the light coverage (
 spot /
  medium /
  wide), press the
  button.
(5) For images with multiple human subjects, you can press the
 button and turn the dial to select a face for adjustment before you specify processing conditions. You can also tap the screen to select a face.
Comparison screen
- You can switch between the [After change] and [Shot settings] screens by pressing the [
 ] button, then turning the dial.
 - Items in orange on the [After change] screen have been modified since the time of capture.
- You can switch between the [After change] and [Shot settings] screens by pressing the [
Caution
- Selection is possible from up to 10 people.
- Faces cannot be selected unless they are large enough and away from the edge of the screen, and the camera must be able to acquire detailed face information.
- Select [
-
Save.
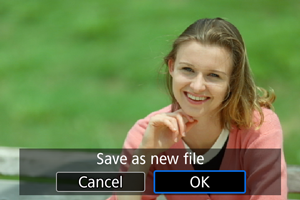
- Select [
 ] (Save), read the message, and select [OK].
- Select [
Background Clarity
To adjust hazy backgrounds in images of people and landscapes, you can set the level of clarity in a range of 0–4.
For clarity adjustment in RAW image processing, you can set the level of image edge contrast in a range of -4 to +4.
-
Select [
: DPRAW processing].
-
Select [Background clarity].
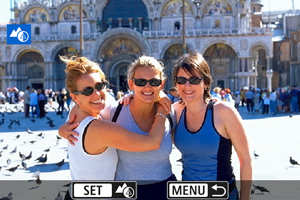
- Turn the
 dial to select an image to adjust, then press .
- Turn the
-
Adjust the image.
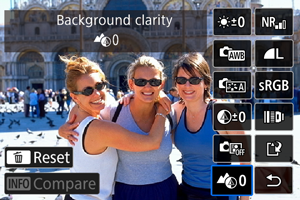
- Select
 , then press .
 - With selected, you can select the level by turning the or dial without pressing .
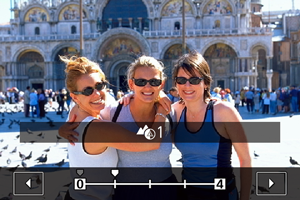
- Turn the or dial to select the level, then press .
Comparison screen
- You can switch between the [After change] and [Shot settings] screens by pressing the [] button, then turning the dial.
- Items in orange on the [After change] screen have been modified since the time of capture.
- Select
-
Save.
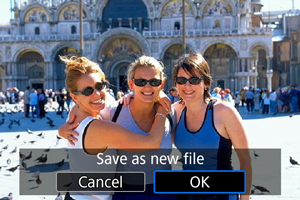
- Select [] (Save), read the message, and select [OK].
- Select [
Note
Caution
Portrait relighting and background clarity
- HEIF images cannot be processed this way.
- Magnified view is not available during adjustment.
- Images for which the camera could not acquire detailed face information cannot be selected. When shooting, try to ensure that faces are large enough and near the center of the screen.
- Portrait relighting and background clarity cannot be used together.
Portrait Relighting
- Images are displayed horizontally even if shot in vertical orientation.
- Results of processing may differ from the preview. Check images after processing.
- If areas other than the selected subject are adjusted, this can be reduced by narrowing the adjustment area.
- Adjustment may be applied to other subjects near the selected subject. This can be reduced by narrowing light source coverage.
Background Clarity
- Background clarity is less effective for images with significant background blurring. To control the amount of background blurring, see Av: Aperture-Priority AE.
- Fringing may appear on subjects that include adjacent bright and dark areas. This can be avoided by reducing the level of adjustment.
- Areas other than the background may also be adjusted.