Autoflash with Two Receiver Groups
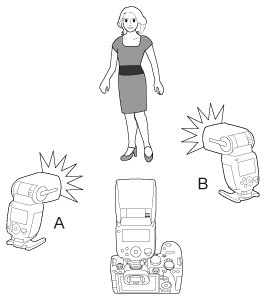
Receivers can be divided into firing groups A and B, and you can adjust the lighting balance (flash ratio) between them.
Exposure is automatically controlled, so that the groups' combined output provides standard exposure.
-
Press
 .
.
- Complete these settings on each receiver.
-
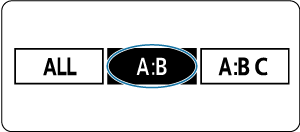
Set the receiver firing group in (1).
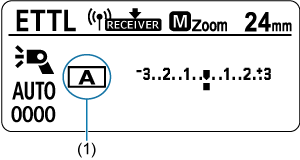
- Select either
 or
or  for the firing group.
 - Set one receiver to and another to .
- Select either
-
Set the sender firing group in (2).
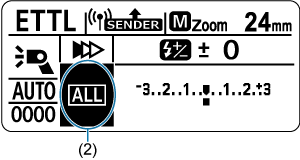
- Complete steps 3–5 on the sender.
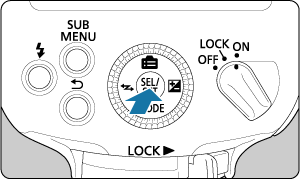
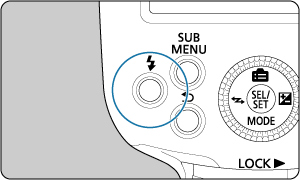
- Turn the
 dial to select an option, then press .
-
Set to
 .
.
- Turn the dial to select , then press .
- Turn the
-
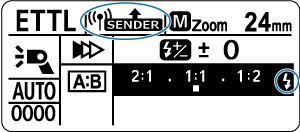
Set the A:B flash ratio.
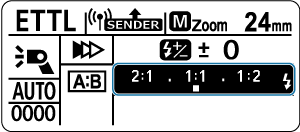
- Press to select the option shown in the figure.
- Turn the dial to select the A:B flash ratio, then press .
- Press
-
Check the connection and make sure the flash units are charged.
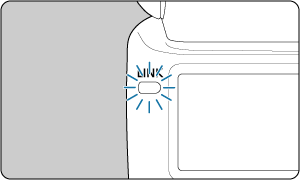
- Confirm that the
 lamp is lit in green.
- Confirm that the sender and receiver flash-ready lamps are lit.
- Make sure
 is not displayed on the sender LCD panel.
 - Confirm that the
 icon indicating completion of sender/receiver charging appears on the sender LCD panel (
 is not displayed).
 - For details on sender LCD panel illumination, see LCD Panel Illumination.
- Confirm that the
-
Take the picture.
- The receivers fire at the flash ratio you have set.