Connecting SELPHY to a Wireless Router
How to connect varies depending on whether the router is WPS-compatible.
WPS-Compatible Routers
-
Check the router.
- Confirm that the router is on and ready for communication.
-
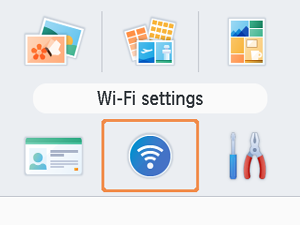
Choose [Wi-Fi settings] and press
 .
.
-
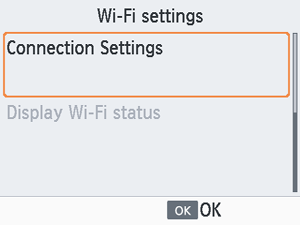
Choose [Connection Settings] and press
.
-
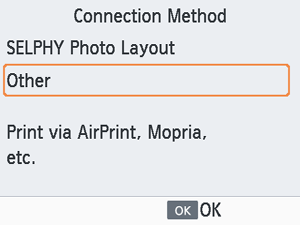
Choose [Other] and press
.
-
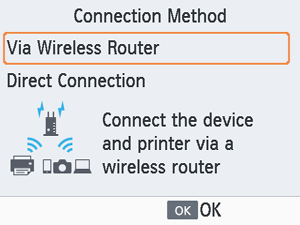
Choose [Via Wireless Router] and press
.
-
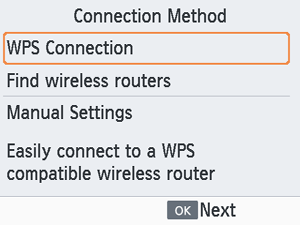
Choose [WPS Connection] and press
.
-
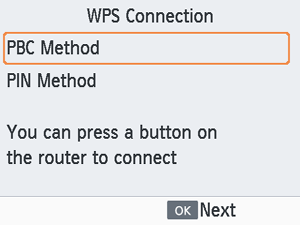
Choose [PBC Method] and press
.
-
On the router, hold down the WPS connection button for a few seconds.
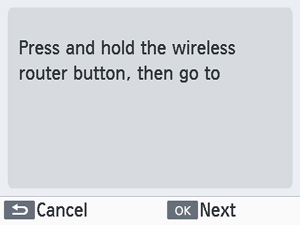
- For details on where the button is located and how long to press it, check the router user manual.
- On SELPHY, press .
-
Establish the connection.
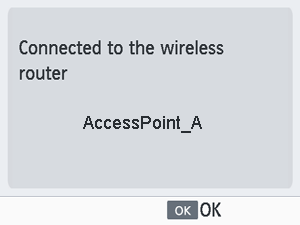
- Press when the screen above is displayed.
- Press
-
Check the router name.

Note
- If you selected [PIN Method] in step 7, enter the PIN code (shown on SELPHY) on the router, press on SELPHY, and go to step 9. For instructions on configuring PIN codes, refer to the router user manual.
Non-WPS Routers
-
Check the router.
- Confirm that the router is on and ready for communication.
-
Choose [Wi-Fi settings] and press
. -
Choose [Connection Settings] and press
. -
Choose [Other] and press
. -
Choose [Via Wireless Router] and press
. -
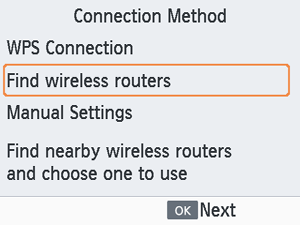
Choose [Find wireless routers] and press
.
-
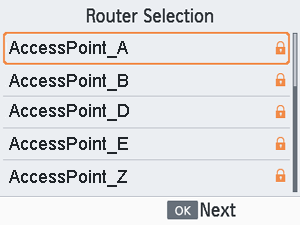
Choose a router, and then press
.
-
Enter the password and press
.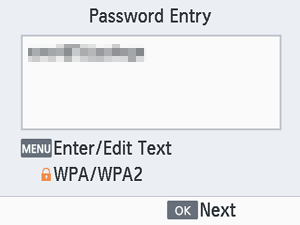
- Press
 to access the input screen, and then enter the password of the router selected in step 7.
- Press
-
Confirm that SELPHY is now connected, and then press
. -
Check the router name.