Basic Printing (Select & Print)
Select images on a memory card and print them as follows.
-
Insert the memory card into the memory card slot.
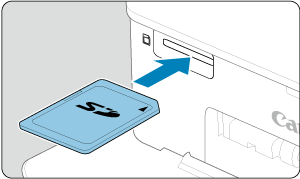
- Insert the memory card facing as shown until it clicks into place.
- To remove the card, push it in until it clicks, and then slowly release it.
- The [Select & Print] multi playback screen is displayed.
-
Choose an image.
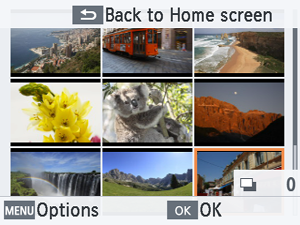
- Press


 to select an image to print.
 - To switch to the single playback screen and view the current image, press
 .
.
- Press
-
Choose the print quantity.
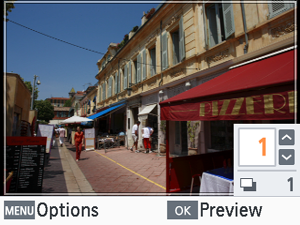
- Press or to choose the print quantity.
- To choose another image to print at the same time, press or , and then choose the print quantity.
- Press to access the [Preview] screen.
- Press
-
Print.
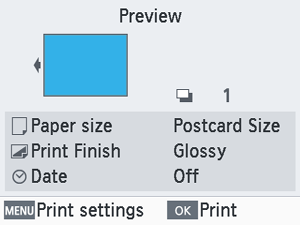
- Press to start printing.
- To adjust the settings displayed, press
 and change the settings on the [Print settings] screen ().
 - While printing, paper passes in and out of the back of SELPHY several times. Do not touch the paper until printing is finished and the print is ejected onto the paper cassette.
- Do not allow 19 or more prints to collect in the ejection area on the paper cassette.
- Press
Caution
- Never pull out the paper cassette, open the ink cassette compartment cover, or remove a memory card while printing or when you hear printer operation sounds immediately after it has been turned on. This may damage the printer.
- To cancel printing in progress, always press
 . Printing cannot be canceled by pressing
  , and unplugging the printer may damage it.
Options
On the image selection screen, you can view images by date and crop the selected image.
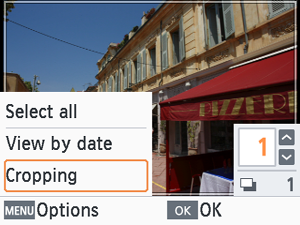
- Press on the image selection screen.
- Choose an option and press .
- All [Options] settings are reset when you turn off SELPHY or remove the memory card.
Select all
Selects all images on a memory card or USB flash drive at once (up to 5,000 images). The total print quantity is increased by one for each image (up to a total print quantity of 99).
View by date
To view photos taken on a certain date, choose the date on the screen for viewing by date. If you have many images, this can help you find ones you want to print.
Cropping
Displays a crop frame on the single playback screen. Only the area inside the crop frame is printed.
-
Adjust the image area to crop.
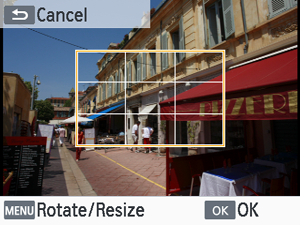
- Each press of switches between a mode for moving the crop frame and a mode for rotating or resizing it.
Crop frame movement mode
- To move the crop frame, press .
Crop frame rotation and resizing mode
- To enlarge the crop frame, press , and to reduce it, press .
- To switch the crop frame between portrait and landscape orientation, press .
- Each press of
-
Confirm the setting.
- Press to confirm the cropping area.
- Press
Note
- [Adjust Cropping] in [Options] enables you to adjust the cropping area, and [Reset Cropping] resets the cropping setting.