Automatic Flash Photography with Receivers divided into 3 Groups
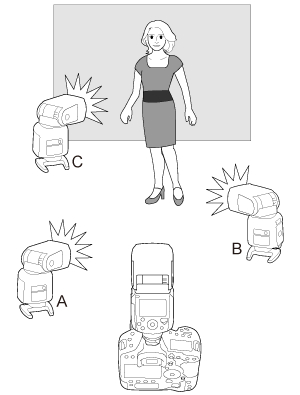
You can perform multiple flash shooting by adding firing group C to firing groups A and B. For an overview of flash control, see "Group Control".
C is useful when you want lighting that eliminates the subject's background shadow.
-
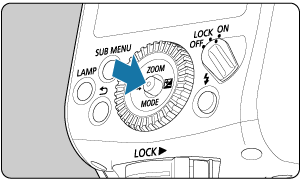
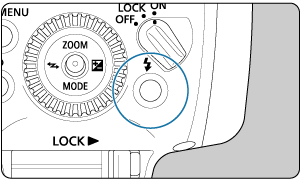
Push the joystick vertically.
-
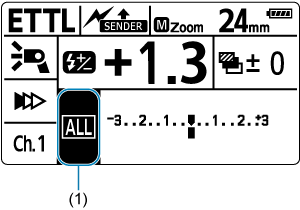
Select an item in (1).
- Push the joystick up / down / left / right or turn
 to select an item, and push the joystick vertically.
- Push the joystick up / down / left / right or turn
-
Set to
 .
.
- Press the joystick to the left or right, turn to select to select, then push the joystick vertically.
- Press the joystick to the left or right, turn
-
Configuring after setting the firing groups to A, B, and C.
- Check whether all the receiver units are set to the same transmission channel as the sender unit.
- Set the receiver unit to add as A, B, or C respectively and place them in position.
-
Check the transmission channel.
-
Set the A:B flash ratio.
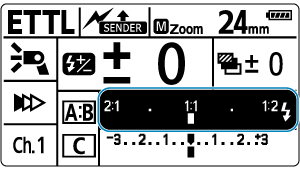
- Push the joystick vertically to select an item in the figure.
- Push the joystick to the left or right or turn to set the amount of compensation, and push the joystick vertically.
-
Setting the exposure compensation amount for firing group C.
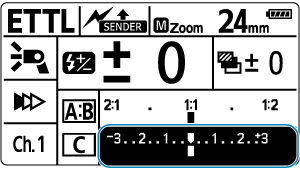
- Push the joystick vertically to select an item in the figure.
- Push the joystick to the left or right or turn to set the amount of compensation, and push the joystick vertically.
-
Check that the flash is ready.
- Check that the sender unit's flash-ready lamp is lit.
- Check that the receiver unit is fully charged.
-
Check the operation.
- Press the sender unit's test flash button.
- Firing groups A, B, and C will fire. If it does not fire, check that it is placed within the operation range.
-
Take the picture.
- Set the camera and take the picture in the same way as with normal flash shooting.
Caution
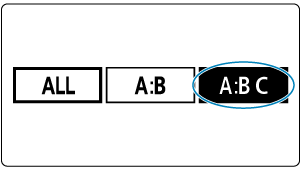
- To fire the 3 firing groups A, B and C together, select . With the
 setting, firing group C does not fire.
 - If you shoot with firing group C pointing directly toward the main subject, overexposure may result.
- With certain EOS film cameras that support E-TTL autoflash, you cannot perform wireless multiple flash shooting with a flash ratio setting.
- If there is a fluorescent light or computer monitor near a receiver unit, the presence of the light source may cause the receiver unit to malfunction and fire inadvertently.
Note
- You can press the depth-of-field preview button on the camera to fire the modeling flash ().
- If the receiver unit's auto power off takes effect, press the sender unit's test flash button to turn on the receiver unit.
- You cannot use the test flash when operating the flash timer, etc. on the camera end.