Attaching/Detaching Lenses
The camera can be used with all Canon EF and EF-S lenses. The camera cannot be used with RF or EF-M lenses.
Attaching a Lens
-
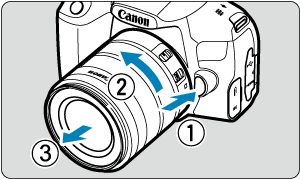
Remove the caps.
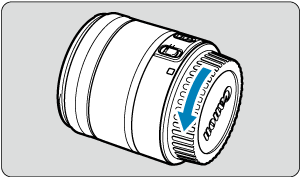
- Remove the rear lens cap and the body cap by turning them as shown by the arrows.
-
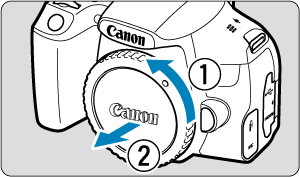
Attach the lens.
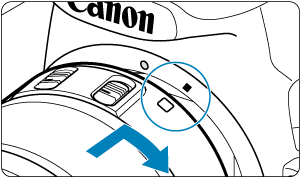
White index
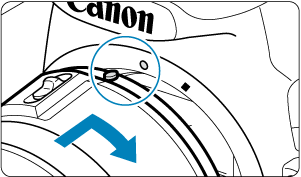
Red index
-
Align the white or red mount index on the lens with the corresponding mount index on the camera and turn the lens as shown by the arrow until it clicks into place.
-
-
Set the lens's focus mode switch to
 .
.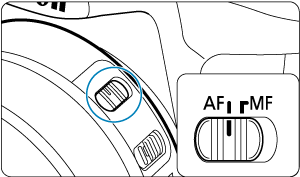
- stands for autofocus.
 stands for manual focus. Autofocus will not operate.
-
Remove the front lens cap.
Detaching a Lens
-
While pressing the lens release button, turn the lens as shown by the arrow.
- Turn the lens until it stops, then detach it.
- Attach the rear lens cap to the detached lens.
Caution
- Do not look at the sun directly through any lens. Doing so may cause loss of vision.
- When attaching or detaching a lens, set the camera's power switch to
 .
. - If the front part (focusing ring) of the lens rotates during autofocusing, do not touch the rotating part.
Note
- For instructions on how to use the lens, refer to the Lens Instruction Manual ().
-
Shooting angle of view
Because the image area is smaller than 35mm film format, the effective angle of view corresponds to approx. 1.6 times the lens's indicated focal length.
-
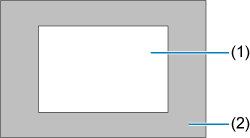
- (1) Image area (approx.) (22.3×14.8 mm/0.88×0.59 in.)
- (2) 35mm film format (36×24 mm/1.42×0.94 in.)
Tips for avoiding smudges and dust
- When changing lenses, do it quickly in a place with minimal dust.
- When storing the camera without a lens attached, be sure to attach the body cap to the camera.
- Remove dust on the body cap before attaching it.