Menu Operations and Settings
Menu Screen
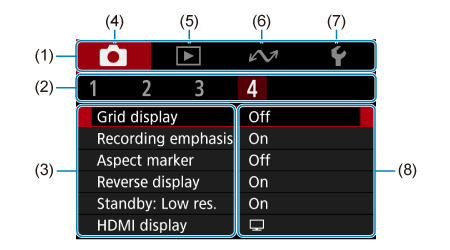
- (1) Main tabs
- (2) Secondary tabs
- (3) Menu items
- (4)
 : Shooting
- (5)
 : Playback
 - (6)
 : Wireless communication
 - (7)
 : Set-up
 - (8) Menu settings
Some tabs, menu items, and setting options may not be displayed, depending on the recording mode.
Menu Setting Procedure
-
Display the menu screen.
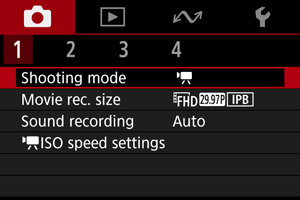
- Press the
 button to display the menu screen.
- Press the
-
Select an item.
- Press
 to select an item, then press the
  button.
- Press
-
Select an option.
- Press to select an option.
- The current setting is indicated in blue.
- For some setting items, a standby screen is displayed. Select an option to configure the setting.
- Press
-
Set the option.
- Press the button to set it.
- Press the
-
Exit the setting.
- Press the button.
- Press the
Note
- The description of menu functions hereafter assumes that you have pressed the button to display the menu screen.
- To cancel the operation, press the button.
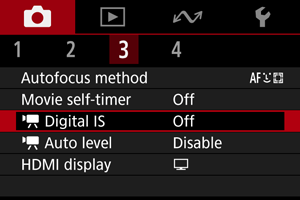
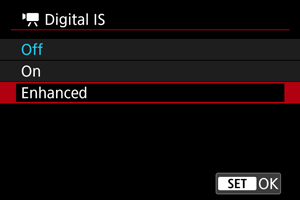
Dimmed Menu Items
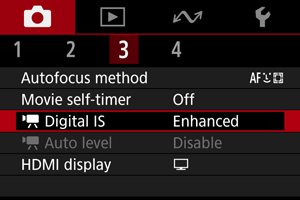
Example: With the Digital IS setting set to [Enhanced]
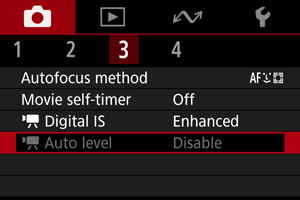
Dimmed menu items cannot be set. The menu item is dimmed if another function setting is overriding it.

You can see the overriding function by selecting the dimmed menu item and pressing the ![]() button.
button.
If you cancel the overriding function's setting, the dimmed menu item will become settable.
Caution
- You may not be able to see the overriding function for certain dimmed menu items.