
Connecting the Remote Control and Camera
Connect the remote control and camera using the Bluetooth function.
-
Set the camera to the pairing standby mode.
- Select [Connect to Wireless Remote] on the camera's menu screen. For more details, refer to the camera instruction manual.
-
Set the remote control.
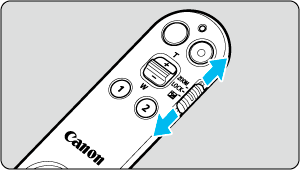
- Set the zoom/lock/exposure compensation switch to a position other than
 .
.
- Set the zoom/lock/exposure compensation switch to a position other than
-
Connect the remote control to the camera.
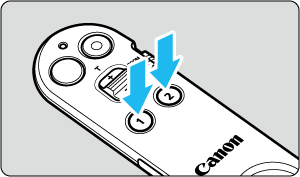
- Press and hold button 1 and button 2 simultaneously for at least 3 seconds. Pairing will begin.
- When pairing is completed, the indicator lights up once. The remote control is registered in the camera and a message is displayed on the LCD monitor.
- If pairing fails, the indicator blinks rapidly. In that case, press buttons 1 and 2 again.
Caution
- Pairing information can be registered for up to five camera models. If five camera models have already been paired and another unregistered camera model is paired, the pairing information for the new model will overwrite the pairing information for the first model that was registered.
- The remote control can only connect to one camera at a time. When changing the connected camera, first terminate the connection by setting [Bluetooth] to [Disable] on the connected camera.
Note
- Pairing is not removed even when the camera is turned off. Remote operations can be performed again when the camera is turned on.
Checking Connection Information
Paired remote control connection information can be checked from the camera's menu screen.
Connection information is displayed as the Bluetooth address (12-digit alphanumeric code) on the back of the remote control. For further details, refer to the Advanced User Guide for your camera.
Deleting Connection Information
When changing the remote control to be paired, or when pairing again, delete the connection information in the camera's menu screen. For further details, refer to the Advanced User Guide for your camera.