Shooting Remotely
You can use Browser Remote to shoot remotely.
Shooting Still Photos
-
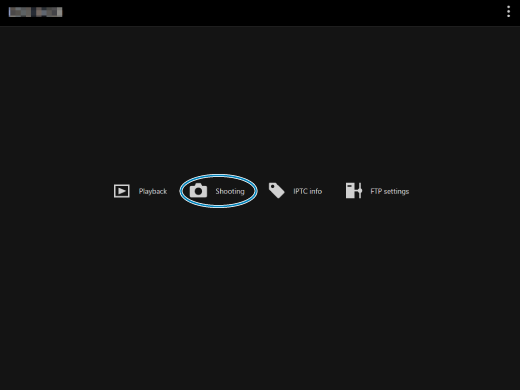
Select [Shooting].

-
The remote shooting screen is displayed.
-
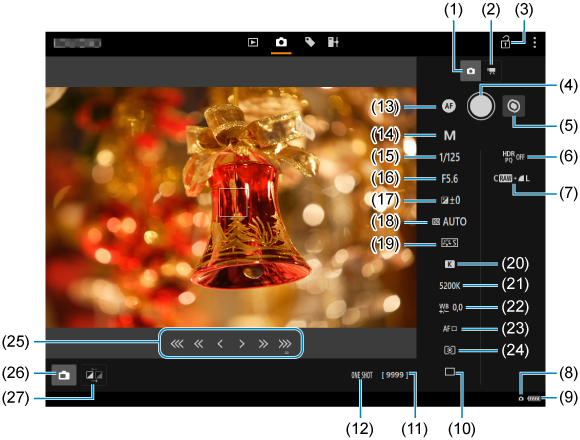
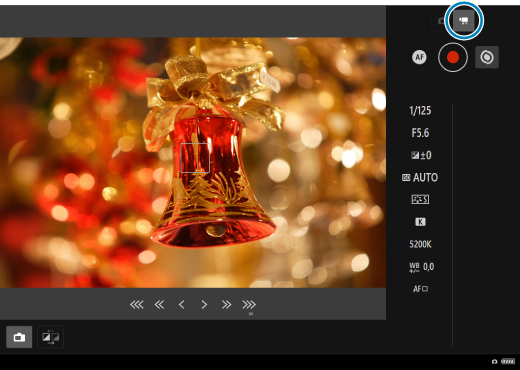
- (1)Still photo shooting button
- (2)Movie shooting button
- (3)Multi function lock icon
- (4)Shutter button
- (5)MF switching button
- (6)HDR shooting
- (7)Image-recording quality
- (8)Browser Remote connection
- (9)Battery
- (10)Drive mode
- (11)Possible shots
- (12)AF operation
- (13)AF button
- (14)Shooting mode
- (15)Shutter speed
- (16)Aperture
- (17)Exposure compensation
- (18)ISO speed
- (19)Picture style
- (20)White balance
- (21)Color temperature
- (22)White balance compensation
- (23)AF method
- (24)Metering mode
- (25)MF button
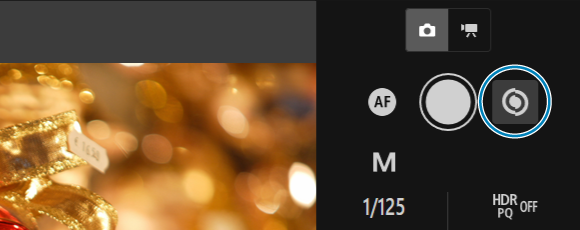
- (26)Live View shooting button
- (27)Live View image quality switching button
-
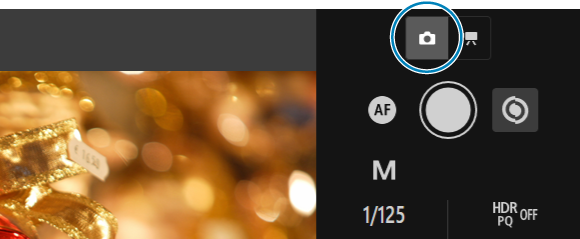
Select the Still photo shooting button (1).
-
Set the lens's focus mode switch to AF.
-
Display Live View image.
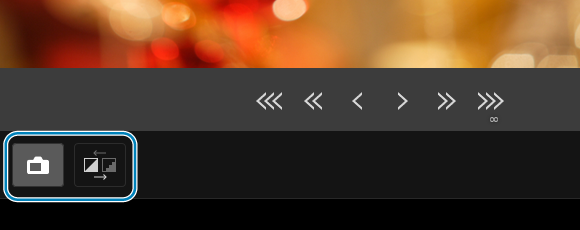
- You can toggle between showing and hiding Live View by selecting the Live View shooting button (26).
- To make Live View image display more responsive, select the Live View image quality switching button (27) and lower the Live View image quality. To restore the original quality, select the button again.
-
Configure the shooting function settings.
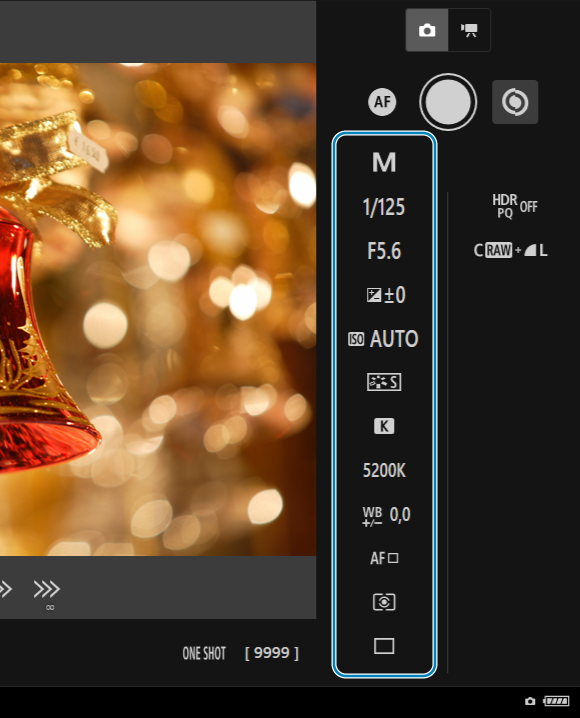
- Select setting items (such as image-recording quality) to view the setting details, which you can configure.
- Configure the settings as needed.
-
Adjust the focus.
Using Autofocus
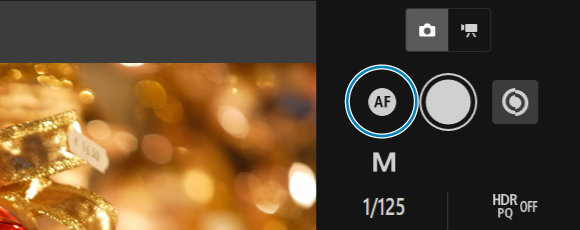
- If you selected [AF button] on the [AF for still photo shooting] menu, AF is performed when the AF button (13) is selected.
- If you selected [Shutter button for AF/shooting] on the [AF for still photo shooting] menu, when you select the Shutter button (4) AF is performed and a picture is taken.
Focusing Manually
- You can toggle between showing and hiding the MF button (25) by selecting the MF switching button (5).
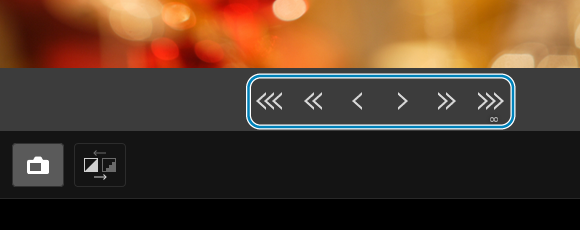
- Select the MF button (25) to adjust the focus. To focus more closely, press [


 ]. To focus farther away, press [

 ].
]. -
Three levels of focus adjustment are available.
[
] []: Largest increment[
] []: Intermediate increment[
] []: Smallest increment
-
Take the picture.
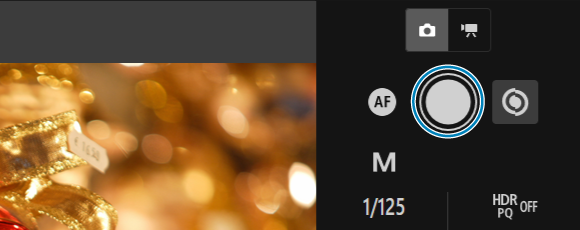
- Select the Shutter button (4) to take a picture.
- Captured images are stored on the camera's card.
- To view or download images, see Viewing Images.
Caution
- Depending on the connection status, image display or shutter release may be delayed.
- When the Camera's Live View shooting/Movie shooting switch is set to
 , still photo shooting is not possible.
Shooting Movies
-
Select [Shooting].
-
The remote shooting screen is displayed.
-
-
Select the Movie shooting button (2).
-
Configure the settings as needed.
-
Perform the actions in steps 3 to 6 under Shooting Still Photos.
-
-
Take the picture.
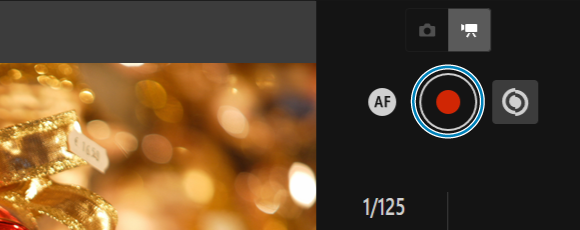
During Movie Shooting Standby
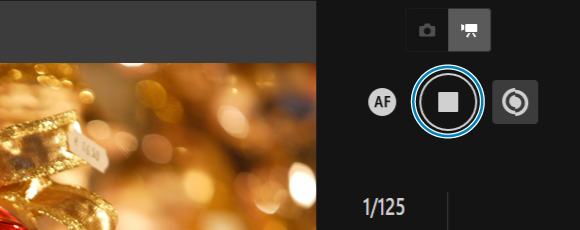
During Movie Shooting
- Select the Shutter button (4). When you let go of the button, movie shooting will start.
- During movie shooting, the red [○] on the Shutter button (4) changes to a white [□].
- Press the Shutter button (4) again. When you let go of the button, movie shooting will stop.
![]() WARNING
WARNING
Do not hold the camera in the same position for long periods of time.
Even if the camera does not feel too hot, prolonged contact with the same body part may cause skin redness or blistering due to low-temperature contact burns. The use of a tripod or similar equipment is recommended when using the product in hot places and for people with circulation problems or less sensitive skin.