
A+: Fully Automatic Shooting (Scene Intelligent Auto)
 is a fully automatic mode. The camera analyzes the scene and sets the optimum settings automatically. It can also adjust focus automatically on either the still or moving subject by detecting the motion of the subject.
-
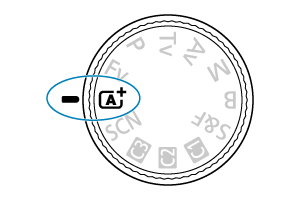
Set the Mode dial to
.
-
Select [
Assist].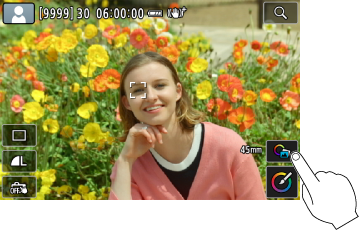
-
Aim the camera at what you will shoot (the subject).
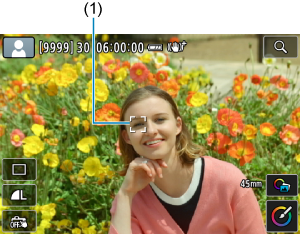
-
A tracking frame (1) may be displayed on the subject, under some shooting conditions.
-
-
Focus on the subject.
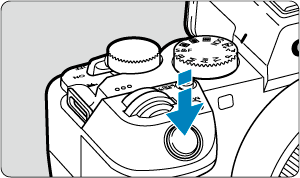
- Press the shutter button halfway to focus.
- You can also focus by tapping a person's face or other subject on the screen (Touch AF).
- Under low light, the AF-assist beam () is automatically activated if needed.
- Once the subject is in focus, that AF point turns green and the camera beeps (One-Shot AF).
- An AF point in focus on a moving subject turns blue and tracks subject movement (Servo AF).
-
Take the picture.
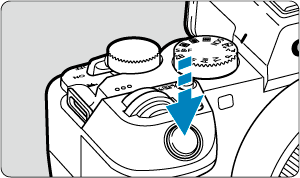
- Press the shutter button completely to take the picture.
- The image just captured will be displayed for approx. 2 sec. on the screen.
Caution
- Subject movement (whether subjects are still or moving) may not be detected correctly for some subject or shooting conditions.
Note
- AF operation (One-Shot AF or Servo AF) is set automatically when you press the shutter button halfway. Even when automatically set to One-Shot AF, the camera will switch to Servo AF if subject motion is detected while you are pressing the shutter button halfway or shooting continuously.
- mode makes colors look more impressive in nature, outdoor, and sunset scenes. If you prefer other colors, turn the Mode dial to Fv, P, Tv, Av, or M, select a Picture Style other than [
 ], then shoot again ().
 Minimizing blurred photos
- Be careful about camera shake in handheld shots. To avoid camera shake, consider using a tripod. Use a sturdy tripod that can bear the weight of the shooting equipment. Attach the camera securely to the tripod.
- Consider using a remote switch (sold separately, ) or wireless remote control (sold separately, ).
 FAQ
FAQ
-
Focusing is not possible (indicated by an orange AF point).
Aim the AF point over an area with good contrast, then press the shutter button halfway (). If you are too close to the subject, move away and shoot again.
-
After focusing, multiple AF points are displayed simultaneously.
Focus has been achieved at all those points.
-
The shutter speed display is blinking.
Since it is too dark, taking the picture may result in a blurred subject due to camera shake. Using a tripod or a Canon EL/EX series Speedlite (sold separately, ) is recommended.
-
The bottom of pictures taken with flash is unnaturally dark.
If a hood is attached to the lens, it may obstruct light from the flash. If the subject is close, detach the hood before taking the picture with flash.
Note
-
Note the following if you are not using flash.
- Under low light, when camera shake tends to occur, hold the camera steady or use a tripod. When using a zoom lens, you can reduce the blur caused by camera shake by setting the lens to the wide-angle end.
- When shooting portraits under low light, tell subjects to stay still until you have finished shooting. Any movement as you shoot will make the person look blurry in the picture.
Shooting Moving Subjects
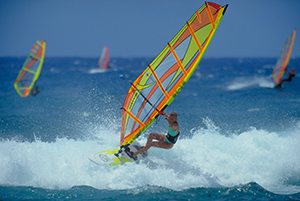
Pressing the shutter button halfway tracks moving subjects to keep them in focus.
Keep the subject on the screen as you hold down the shutter button halfway, and at the decisive moment, press the shutter button completely.
Scene Icons
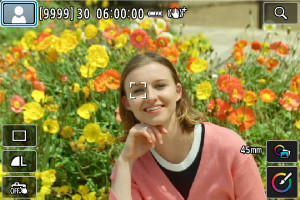
The camera detects the scene type and sets everything automatically to suit the scene. The detected scene type is indicated in the upper left of the screen. For icon details, see Scene Icons.
Adjusting Settings
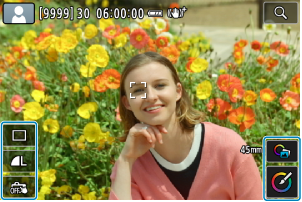
By tapping icons on the screen, you can adjust settings for drive mode, image quality, Touch Shutter, Assist, and Creative Assist.
Assist Features
Selecting [ Assist]
-
Select [
 : Assist].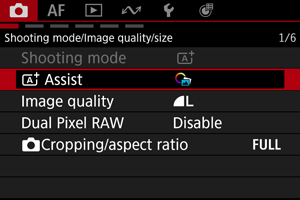
-
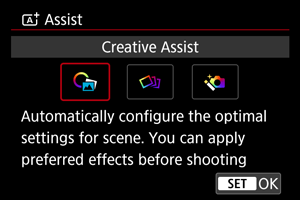
Select an option.
Note
-
From the shooting screen, you can access the selection screen by tapping [
 ].
].
Creative Assist
You can shoot with your preferred effects applied.
-
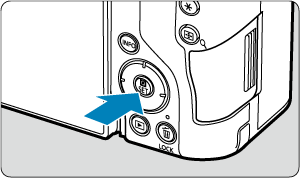
Press
 .
.
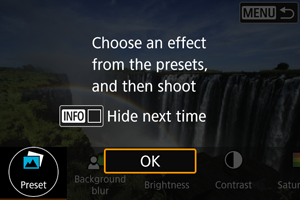
- Read the message and select [OK].
-
Select an effect.
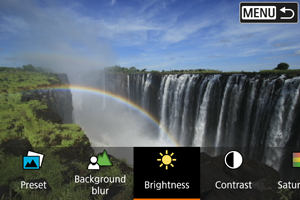
- Select an effect with the
 dial and press .
- Select an effect with the
-
Select the effect level and other details.
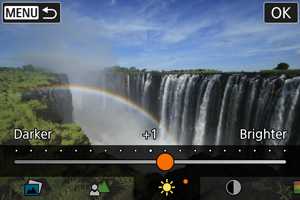
- Set with the dial and press .
- To reset the setting, press the
 button, then select [OK].
- Set with the
Creative Assist effects
-
[
 ] Preset
Select one of the preset effects.
Note that [Saturation], [Color tone 1], and [Color tone 2] are not available with [B&W].
-
[
 ] Background blur
Adjust background blur. Choose higher values to make backgrounds sharper. To blur the background, choose lower values. [Auto] adjusts background blurring to match the brightness. Depending on lens brightness (f/number), some positions may not be available.
-
[
 ] Brightness
Adjust image brightness.
-
[
 ] Contrast
Adjust contrast.
-
[
 ] Saturation
Adjust the vividness of colors.
-
[
 ] Color tone 1
Adjust amber/blue color tone.
-
[
] Color tone 2
Adjust green/magenta color tone.
-
[
 ] Monochrome
Set the toning effect for monochrome shooting.
Note
- [Background blur] is not available in flash photography.
- These settings are reset when you switch shooting modes or set the power switch to
 . To save the settings, set [: Retain Creative Assist data] to [Enable].
Saving effects
To save the current setting to the camera, tap [ Register] on the [Creative Assist] setting screen, then select [OK]. Up to three presets can be saved as [USER*]. After three have been saved, an existing [USER*] preset must be overwritten to save a new one.
Creative bracketing
Multiple images are captured per shot besides the normal image, each with characteristics such as brightness and color tone automatically changed.
-
Select [
: Assist].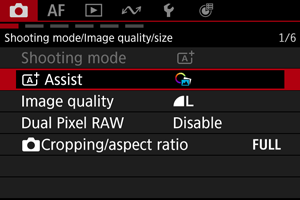
-
Select [Creative bracketing].
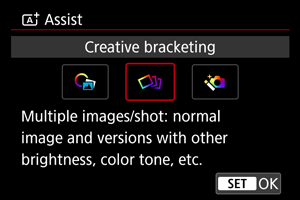
Caution
- Continuous shooting is not available.
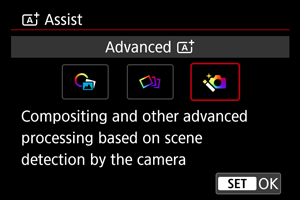
Advanced
Compositing and other advanced processing is applied to your shots based on scene detection by the camera.
-
Select [
: Assist].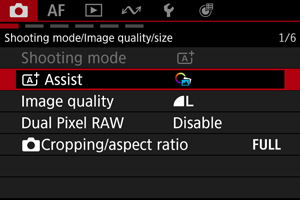
-
Select [Advanced
].
-
Check the icon.
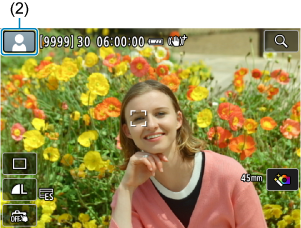
- Scene icon (2) outline blinking in yellow: Captured images will be merged. After you shoot, a single image is saved after compositing.
- Non-blinking scene icon: Single-image shooting in mode.
Caution
- Continuous shooting is not available.
- The camera shoots in [Electronic] shutter mode.
- The image area is smaller than in other shooting modes.
- RAW image quality cannot be set.
- Flash photography is not available.
- Images that are greatly out of alignment due to camera shake or other issues may not be aligned correctly.
- To prevent camera shake, a high ISO speed may be set.
- Note that the image may not be rendered with a smooth gradation and may look irregular or have significant noise.
- The image processing may not be sufficient in scenes with strong backlighting or high contrast.
- Shooting moving subjects may result in afterimages from the movement, or darkness around the subject.
- Images may not be aligned correctly if they are patterned (with a lattice or stripes, for example), are generally flat and uniform, or are greatly out of alignment due to camera shake or other issues.
- Be careful about camera shake in handheld shots.
- Shooting under fluorescent or LED lighting may cause issues such as irregular exposure or colors in the resulting images, due to the flickering light source.
- [BUSY] appears on the screen as images are processed, and shooting is not possible until processing is finished.
- Shots will look slightly different from the preview image shown on the screen.
- AF point display information is not added to images in some scenes ().