Zebra Settings
To help you adjust exposure before or during movie recording, you can display a striped pattern over or around image areas of a specified brightness.
-
Select [
 : Zebra settings].
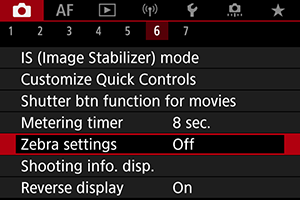
-
Select [Zebra].
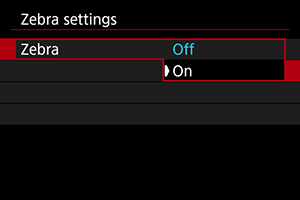
- Select [On].
-
Select [Zebra pattern].
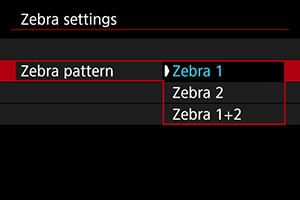
- [Zebra 1]: Displays left-slanting stripes around areas of the specified brightness.
- [Zebra 2]: Displays right-slanting stripes over areas that exceed the specified brightness.
-
[Zebra 1+2]: Displays both [Zebra 1] and [Zebra 2].
[Zebra 1] display takes precedence where [Zebra 1] and [Zebra 2] display areas overlap.
-
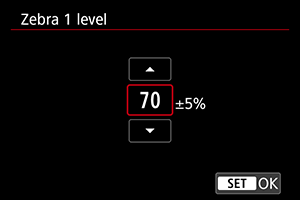
Set the level.
Zebra 1 level
Zebra 2 level
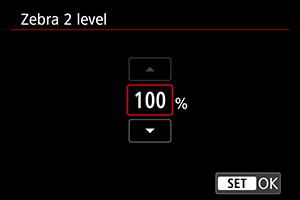
- Set by turning the
 dial or pressing
  up or down.
- Set by turning the
Note
- The maximum brightness value does not reach 100% when HDR-PQ is set. Note that the maximum brightness value varies depending on [: Highlight tone priority] and [: Picture Style] settings.
- Checking the zebra display level in advance is recommended when you will set [Zebra pattern].