Sending Images to a Web Service
This section describes how to send images to image.canon.
Connecting to image.canon
Link the camera to image.canon to send images directly from the camera.
- A smartphone with a browser and internet connection is required.
- For instructions on how to use image.canon services and details on countries and regions where it is available, visit the image.canon site (https://image.canon/).
- Separate ISP connection and access point fees may apply.
Steps on the camera (1)
-
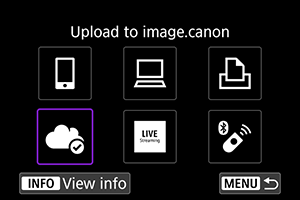
Select [
 : Wi-Fi/Bluetooth connection].
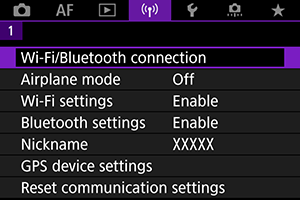
-
Select [
 Upload to image.canon].
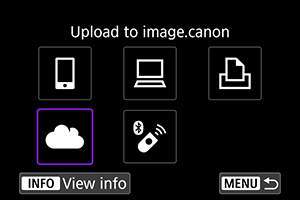
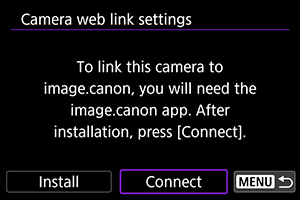
-
Select [Connect].
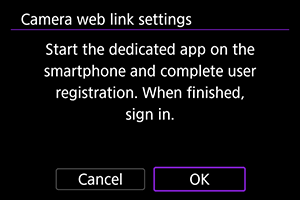
-
Select [OK].
-
Scan the QR code with the dedicated app.
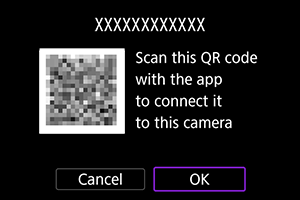
- Select [OK].
-
Establish a Wi-Fi connection.
- Connect to an access point via Wi-Fi. Go to step 6 in Wi-Fi Connection via Access Points.
-
Confirm that the number is displayed in the dedicated app.

- Select [OK].
-
Select [OK].

- The [] icon changes to [
 ].
].
- The [
Steps on the computer or smartphone
-
Set up camera web link.
- Follow the instructions to complete the settings on the camera web link settings page.
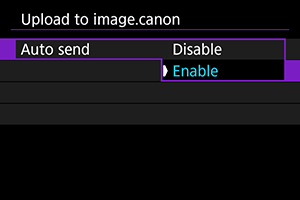
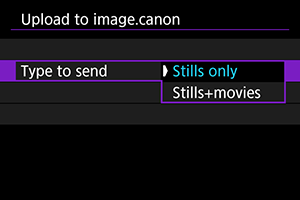
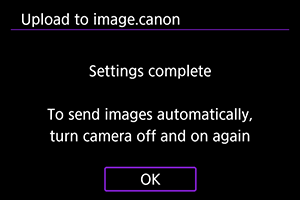
Automatic Image Transfer
Images are automatically uploaded to image.canon after the camera starts up (or recovers from auto power off). Original files of images sent to image.canon are retained for 30 days, without storage limitations, and can be downloaded to computers or transferred to other Web services.
- Uploading is not possible during interval timer shooting.