Print Settings
- Print Finish
- Borders
- Page Layout
- Background
- Image Optimize
- Brightness
- Color Adjustment
- Filter
- Smooth Skin
- Correct Red-Eye
- Date
- File Number
- Print Dots to Prevent Re-use
Several print settings for printing from memory cards or USB flash drives can be changed. Settings apply to all relevant printing, so there is no need to complete the settings for each image. Note that default settings are restored after you turn off SELPHY. Depending on the type of image or the application used, it may not be possible to configure some features.
-
Choose [Setup] and press
 .
.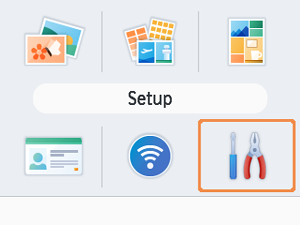
-
Choose [Print settings] and press
.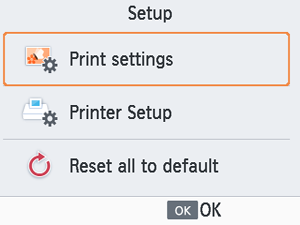
-
Choose an item to change and press
.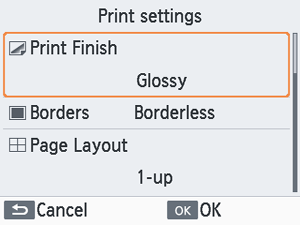
- Print settings can also be shown on the [Preview] screen. (Settings unavailable for the current printing feature are grayed-out and cannot be adjusted.)
Print Finish
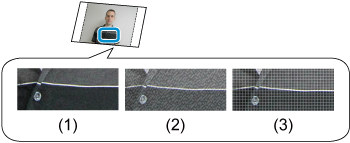
- By adding a subtle texture to the surface of prints, you can create a less glossy finish.
| (1) | Glossy (default) | Prints with a glossy surface finish. |
| (2) | Semi-gloss | Applies a fine surface pattern, for a less glossy finish. |
| (3) | Satin | Applies a fine grid-like surface pattern, for a less glossy finish. |
Borders
- Print images with or without a border.
- Choosing [Bordered] enables you to print the entire image.
- Borderless (default) / Bordered
Page Layout
- Choose the number of images per sheet.
- For Color Ink/Label Set KC-18IL (8 Labels per Page, ), choose [8-up].
| 1-up (default) | Prints one image per sheet. |
| 2-up | Prints two images per sheet. |
| 4-up | Prints four images per sheet. |
| 8-up | Prints eight images per sheet. |
Background
- Specify the color around images.
- The effect of this setting is shown on the [Preview] screen, in the layout illustration in the upper left.
- White (default) / Black
Image Optimize
- Automatically corrects brightness and contrast to suit each image.
- On (default) / Off
Brightness
- Adjust image brightness in a range of –3 to +3.
- Choose larger positive values to make images brighter, or larger negative values to make them darker.
Color Adjustment
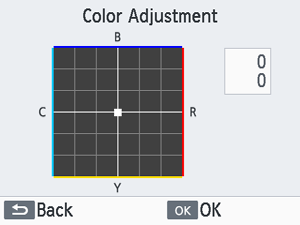
- Adjust the level of red, blue, cyan, and yellow (R/B/C/Y) in a range of 0–3. Increasing the level of R, for example, decreases the level of C (the complementary color).
- Press


 to select a value, and then press to confirm your choice.
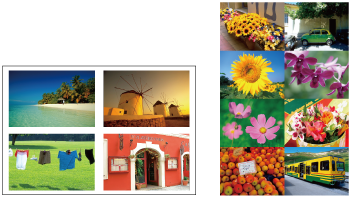
Filter
- Choose special color tones to make prints look distinctive, or choose sepia or black-and-white prints.
| Off (default) | - |
| Vivid | Images are vivid, with greater contrast and color saturation. |
| Neutral | Images are subdued, with less contrast and color saturation. |
| PositiveFilm | Images have a vibrant, natural appearance, as produced with positive film. |
| Sepia | Produces sepia-tone prints. |
| B/W | Produces black-and-white prints. |
Smooth Skin
- Make skin appear smooth and beautiful.
- Off (default) / On
Correct Red-Eye
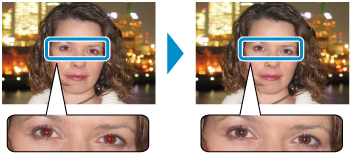
- Correct images affected by red-eye.
- Off (default) / On
Date
- Add camera shooting dates when you print.
- [Subtle] makes the lettering imperceptible when viewed directly but visible at an angle.
- Off (default) / Prominent / Subtle
Caution
- To avoid having two instances of the date for images already labeled by the camera, select [Off].
File Number
- Images can be printed with their file number.
- [Subtle] makes the lettering imperceptible when viewed directly but visible at an angle.
- Off (default) / Prominent / Subtle
Print Dots to Prevent Re-use
- Prints dots in the margin to prevent accidental reuse of paper.
- On (default) / Off
Caution
- Never reuse paper for printing, even if most of the sheet is blank. This may damage the printer or cause malfunction.