Focus Bracketing
Focus bracketing enables continuous shooting with the focal distance changed automatically after each shot. These images enable you to create a single image in focus over a deep depth of field. Compositing is also possible using an application that supports depth compositing, such as Digital Photo Professional (EOS software).
-
Select [
 : Focus bracketing].
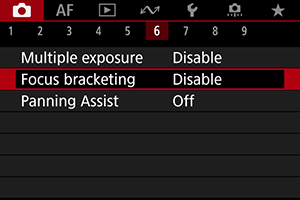
-
Set [Focus bracketing].
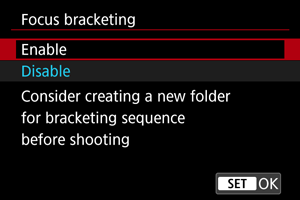
- Select [Enable].
-
Set [Number of shots].
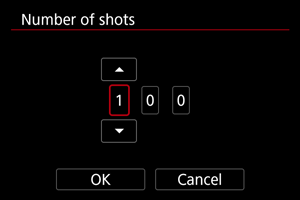
- Specify the number of images captured per shot.
- Can be set in a range of [2]–[999].
-
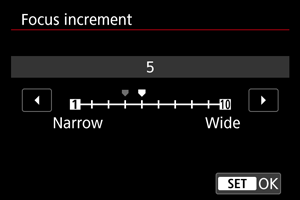
Set [Focus increment].
-
Specify how much to shift the focus. This amount is automatically adjusted to suit the aperture value at the time of shooting.
Larger aperture values increase the focus shift and make focus bracketing cover a wider range under the same focus increment and number of shots.
- After completing the settings, press
 .
.
-
-
Set [Exposure smoothing].
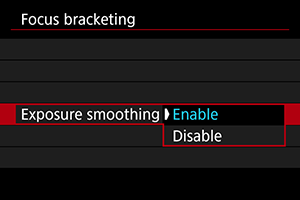
- You can compensate for changes in image brightness during focus bracketing by selecting [Enable], so that the camera makes adjustments based on differences between the displayed and actual aperture value (effective f/number), which varies by focal position.
- Select [Disable] if you prefer not to compensate for changes in image brightness during focus bracketing. Use this option for purposes other than depth compositing of the captured images in applications such as DPP.
-
Set [Depth composite].
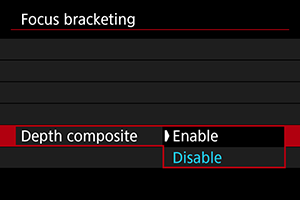
- Select [Enable] for in-camera depth compositing. Both the depth-composited image and the source images are saved.
- Select [Disable] if you prefer not to perform in-camera depth compositing. Only captured images are saved.
-
Set [Crop depth comp.].

- Select [Enable] for cropping before compositing, to prepare any images without a sufficient angle of view for compositing alignment by cropping them to correct the angle of view.
- Select [Disable] if you prefer not to crop these images. In this case, areas without a sufficient angle of view are covered by a black border in the saved images. You can crop the images manually or edit them as needed.
-
Set [Flash interval].
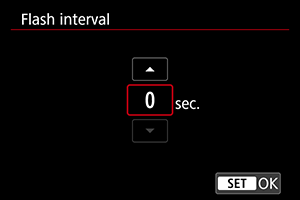
- Focus bracketing is available with compatible Speedlites, and with non-Canon flash units fired via the PC terminal.
- When set to [0], compatible Speedlites fire and the camera shoots as soon as the Speedlites are fully charged. Refer to the instruction manual of compatible Speedlites for precautions on continuous firing. Consider setting a longer interval when using multiple compatible Speedlites in wireless flash photography.
- With non-Canon flash units, set a suitable interval time for the flash recharging time and durability. Also refer to Non-Canon Flash Units.
-
Take the picture.
- To save your shots in a new folder, tap [
 ] and select [OK].
 - Focus at the nearer end of your preferred focal range, then press the shutter button completely.
- Once shooting begins, release the shutter button.
- The camera shoots continuously, shifting the focal position toward infinity.
- Shooting ends after your specified number of images, or at the far end of the focal range.
- To cancel shooting, press the shutter button completely again.
- To save your shots in a new folder, tap [
Caution
- Focus bracketing is intended for still photo shooting on a tripod.
- Shooting with a wider angle of view is recommended. After depth compositing, you can crop the image if necessary.
- For details on lenses and flash units compatible with this feature, visit the Canon website ().
- Suitable [Focus increment] settings vary by subject. An unsuitable [Focus increment] setting may cause unevenness in composite images, or shooting may take more time because more shots are taken. Take some test shots to decide a suitable [Focus increment] setting.
- Shooting under flickering light may cause uneven images. In this case, lowering the shutter speed may give better results.
- Focus bracketing is not available when the camera is set to manual focus ().
- Canceling shooting in progress may cause exposure problems in the last image. Avoid using the last image when combining the images in Digital Photo Professional.
- Maximum shutter speed with focus bracketing is 1/8000 sec.
- Depth compositing is canceled if you open the battery compartment or card slot cover, or if the remaining battery capacity becomes too low. After cancellation, composited images are not saved.
- Depth compositing may fail for patterned images (with a lattice or stripes, for example) or images that are generally flat and uniform.
- When taking several shots, start by focusing closer, then gradually focus farther away.
- Too great a distance when moving the focal position between multiple shots may cause unevenness in depth-composited images, or it may cause compositing to fail.
- Depth compositing is intended for subjects that are not moving. For this reason, shooting subjects in motion may prevent effective compositing.
- Depth compositing of images with multiple subjects may fail if your shots are composed with the subjects far apart from each other, for example.
- To cancel depth compositing in progress, press the
 button. Cancellation discards the composited image but keeps all source images.
 - In depth compositing, optimal images from the shots are selected and combined by the camera. Not all of the shots are combined to create the composite image.
Note
- Using a tripod, remote switch (sold separately, ), or wireless remote control (sold separately, ) is recommended.
- For best results, set the aperture value in a range of f/5.6–11 before shooting.
- Details such as shutter speed, aperture value, and ISO speed are determined by conditions for the first shot.
- [: Focus bracketing] reverts to [Disable] when the power switch is set to
 .
.
Depth compositing image quality setting and images saved
-
With [
 Rec options] in [
 : Record func+card/folder sel.] set to an option other than [Rec. separately]
Source Images*1 Composited Image Image Quality Only  (
( )
)RAW JPEG/HEIF*2 Only JPEG/HEIF*3 JPEG/HEIF JPEG/HEIF () + JPEG/HEIF*3 () + JPEG/HEIFJPEG/HEIF -
With [
Rec options] in [: Record func+card/folder sel.] set to [Rec. separately]Image Quality Slot 1 Slot 2 Source Images*1 Composited Image Slot 1 Slot 2 Slot 1 Slot 2 () ()JPEG/HEIF*2
()Only JPEG/HEIF*3
()JPEG/HEIF JPEG/HEIF*2 JPEG/HEIF Only JPEG/HEIF*3
()JPEG/HEIF
()JPEG/HEIF JPEG/HEIF*2 Only JPEG/HEIF*3 JPEG/HEIF JPEG/HEIF
1 Multiple captured images
2 Image quality of composited images is ![]()
![]() when set to
when set to ![]() (
(![]() ).
).
Note
- Composited images are saved as JPEG or HEIF images. RAW composited images are not produced.